How to Screen Record on Windows (with Audio) Effortlessly
98% accurate, real-time transcription in just a few clicks. 58 languages and multiple platforms supported.
Tell me if this sounds familiar: you need to record the full screen of Windows (or, at least, some part of it), so you decide to look for third-party tools, but they're complex. So how to screen record on Windows and then even edit it — with minimal effort? Well, you could use Windows built-in screen recording tools.
Windows — for decades — has included two popular screen recording options called the Snipping tool and Xbox Game Bar. Most Windows make it too easy to capture screen videos with the built-in screen recorders, but it's a real mystery where the screen recording tools are hidden — maybe under some keyboard shortcuts.
If you're a Windows user and want to record the screen and share it with your team in a snap, I've listed the three best ways in this ultimate guide.
How to screen record on Windows using Snipping Tool
Windows comes with a built-in screenshot or screen recording tool — Snipping Tool — which lets you capture a full-screen, rectangle, window, or free-form screenshot. It's a way to record screens on Windows without having to install any third-party application.
Here's how to screen record on Windows 11 with the help of Snipping Tool.
Step 1: Head to the 'Search' box on your Windows and type 'Snipping Tool.' Launch the application on Windows 11, and a small pop-up will appear.
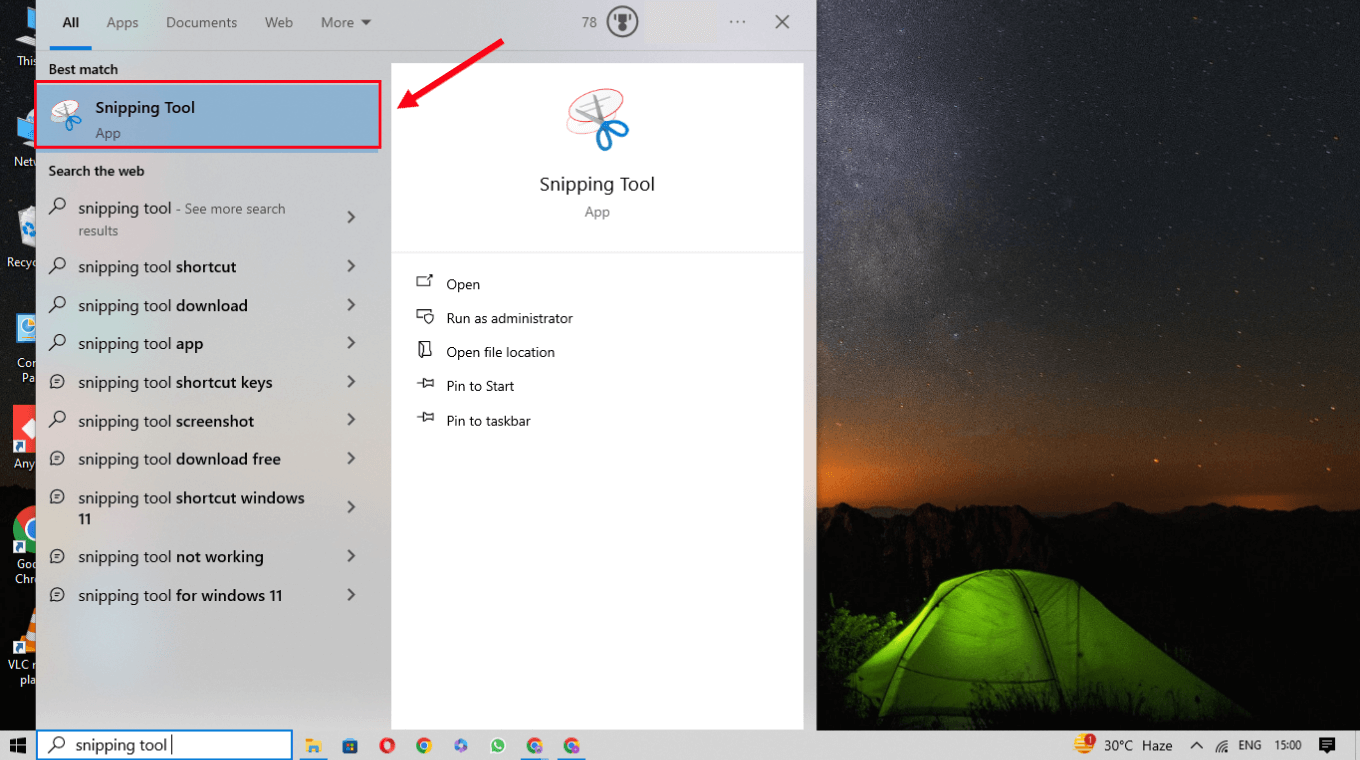
Step 2: Open the window or tab you want to record. In the top menu toolbar, select the 'Record' option (or video camera icon) followed by the 'New' button.
Step 3: The Snipping Tool will start recording the entire Windows screen or a specific portion of the screen — followed by the 'Start' button. Once done, you can select the red 'Stop' button to finish the recording.
With the 'Save' icon, the screen recording can be automatically saved to your device in the MP4 format.
But this isn't perfect — there are certain hardware requirements, so it's possible your computer cannot use this feature if you use a Windows 11 build number lower than 22621.1344.
How to screen record on Windows using Xbox Game Bar
Another way to capture a video of your screen in Windows 10 or even Windows 11 is by using the Xbox Game Bar. While the Xbox Game Bar is designed to record games, you can also record a screen in Windows. It also includes options to tweak the video length, audio capture, video quality, and much more.
Here is the tutorial on how to screen record on Windows 10 with the built-in Xbox Game Bar.
Step 1: Press Windows Key + G on your keyboard to open the Xbox Game Bar — and if asked, check the 'Yes.' That opens a small recorder application where you can select the 'Start Recording' button or press Windows Key + Alt + R to start or stop recording.
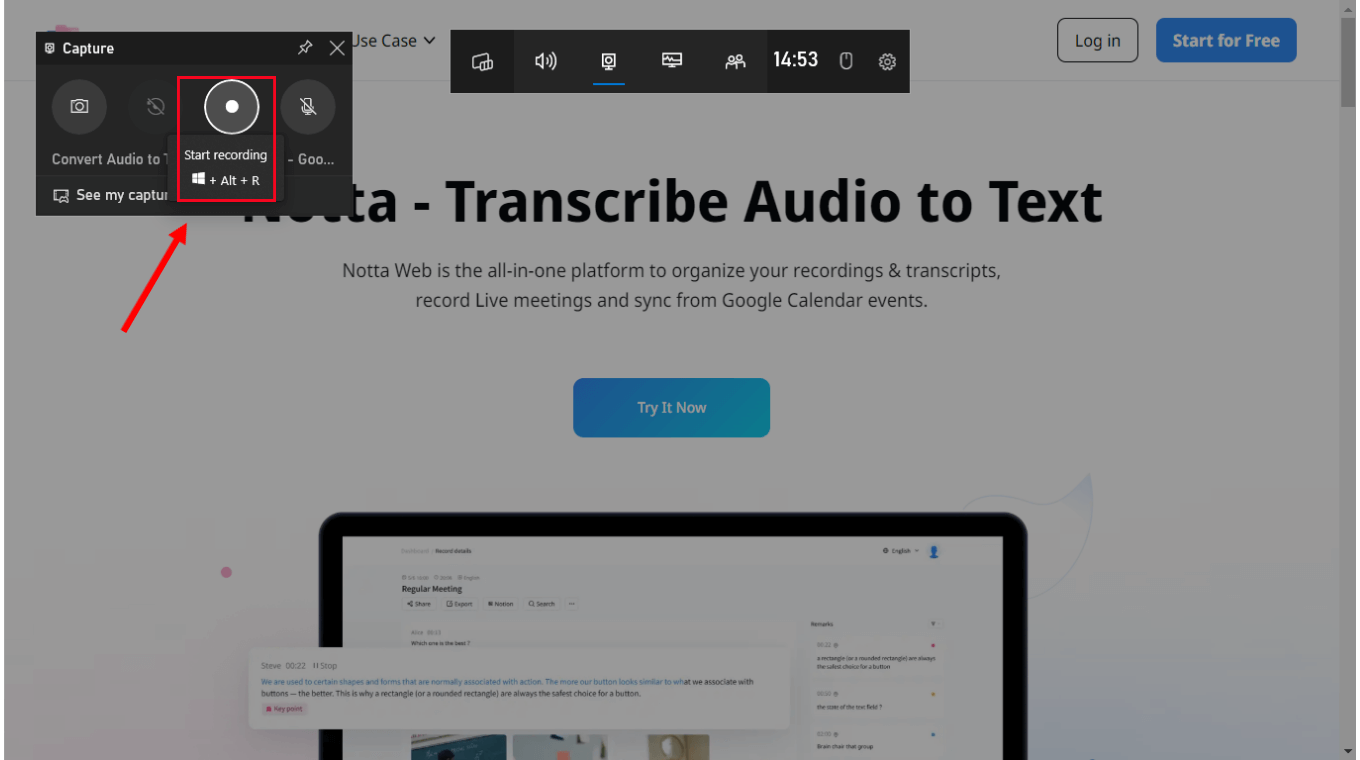
Step 2: If you want to turn on the microphone, select the 'Microphone' icon located next to the recording button. Click the blue 'Stop' button to finish the recording.
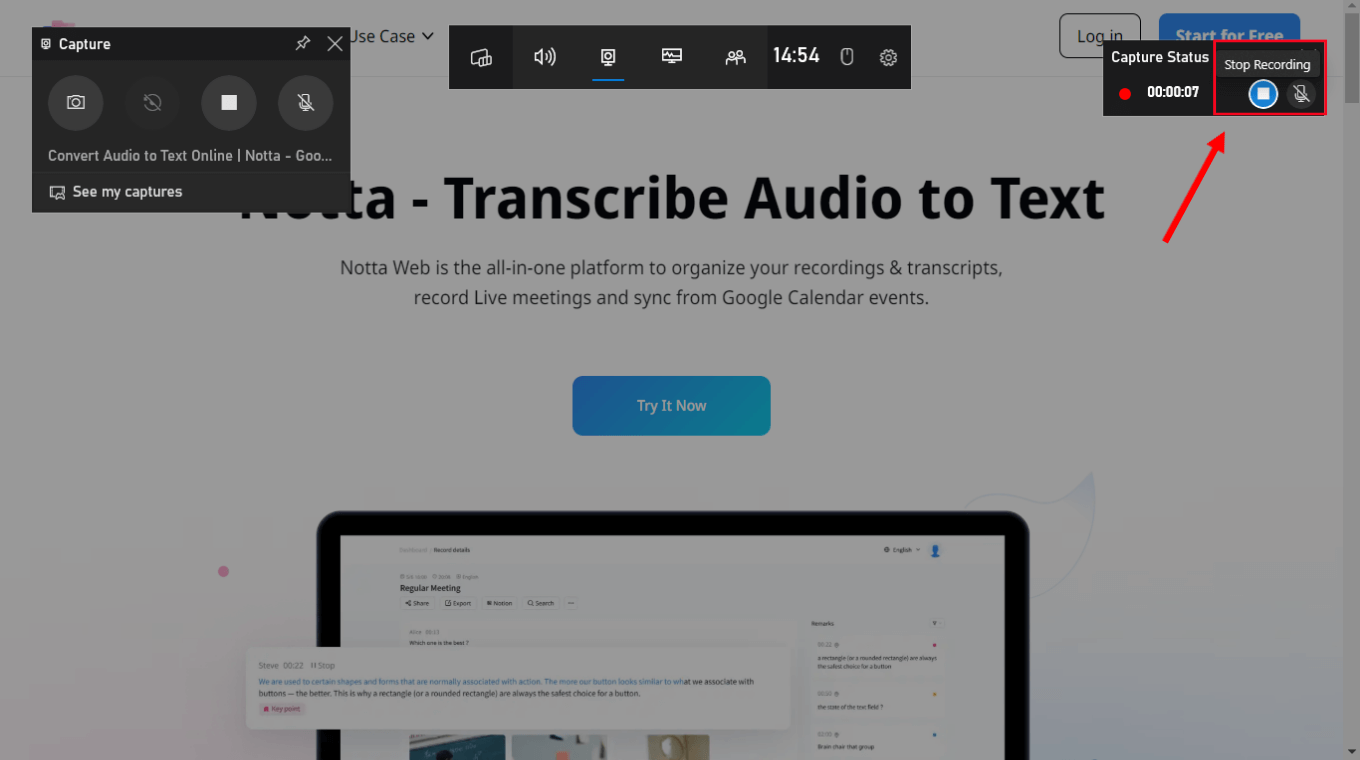
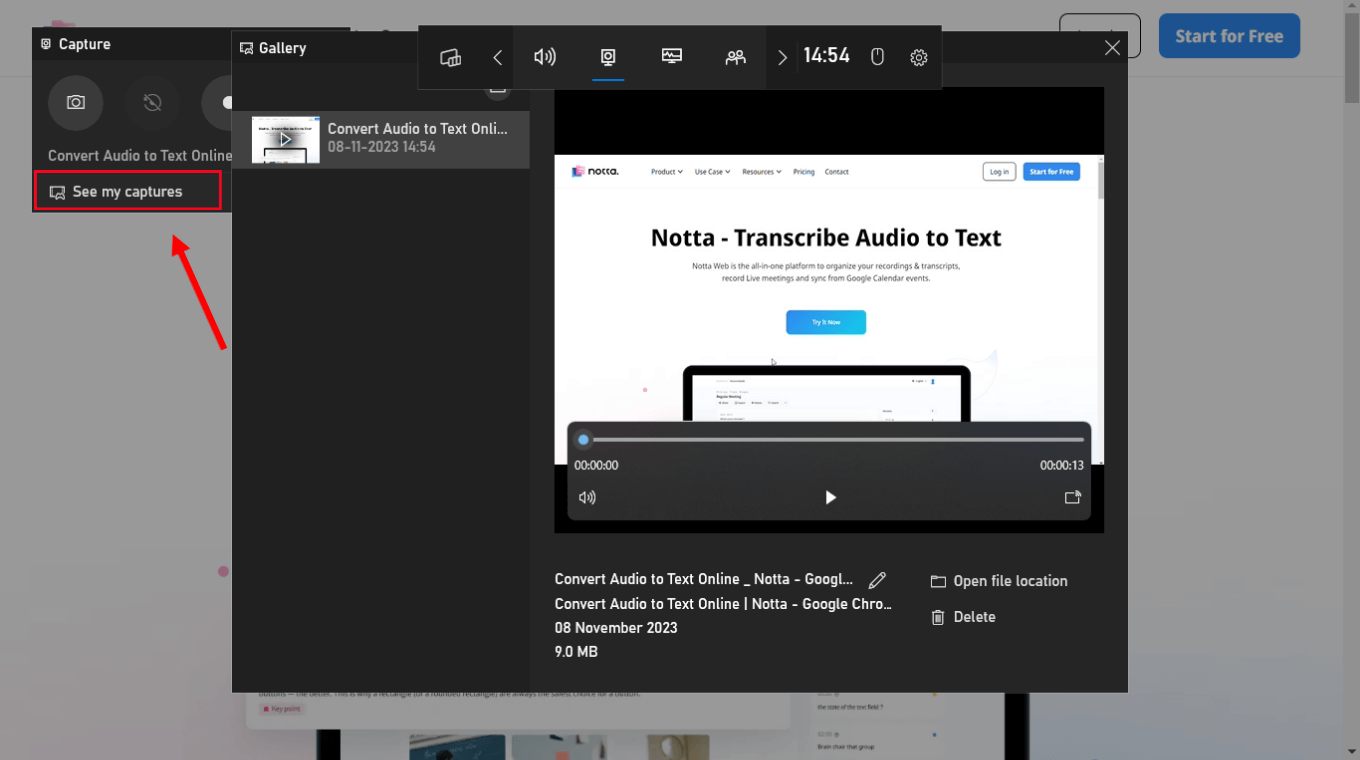
Step 3: The screen recording will be automatically saved to 'See my captures.' Open the 'See my captures' icon to view the recently recorded screens or video files and even save them locally to your PC.
Note: Xbox Game Bar cannot record the Windows desktop or File Explorer — and is primarily designed for game recording.
How to screen record on Windows using Notta
Notta is a great screen recorder and transcriber designed to help you record screens on Windows (or even Mac). It's a nice alternative to Windows’ built-in screen recorder — and comes with additional editing features. There's a feature it does exceptionally well: transcribing the spoken words into text.
Here's how to screen record on Windows with audio using the Notta Web App.
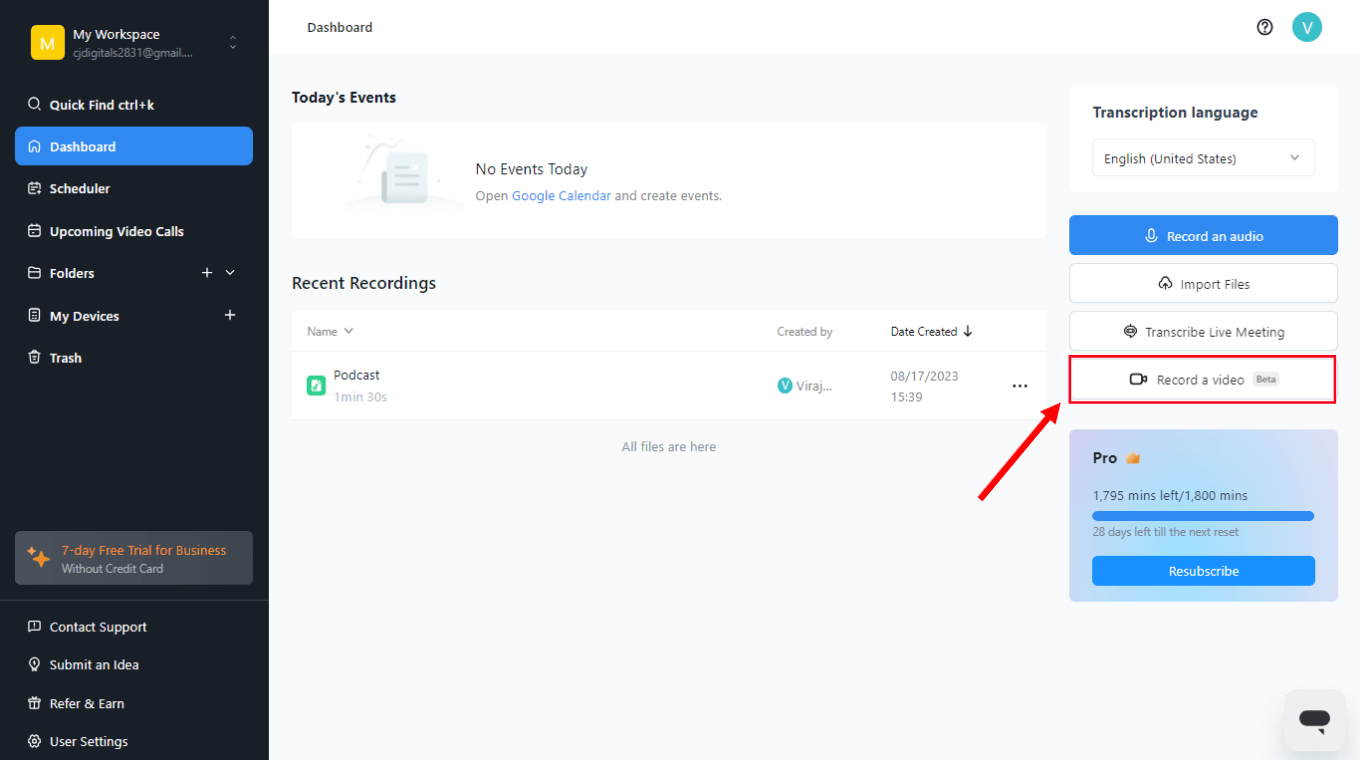
Step 1: Open the Notta official website on Windows and sign up for a free account. Go to the dashboard and select the 'Record a Video' icon located in the navigation panel.
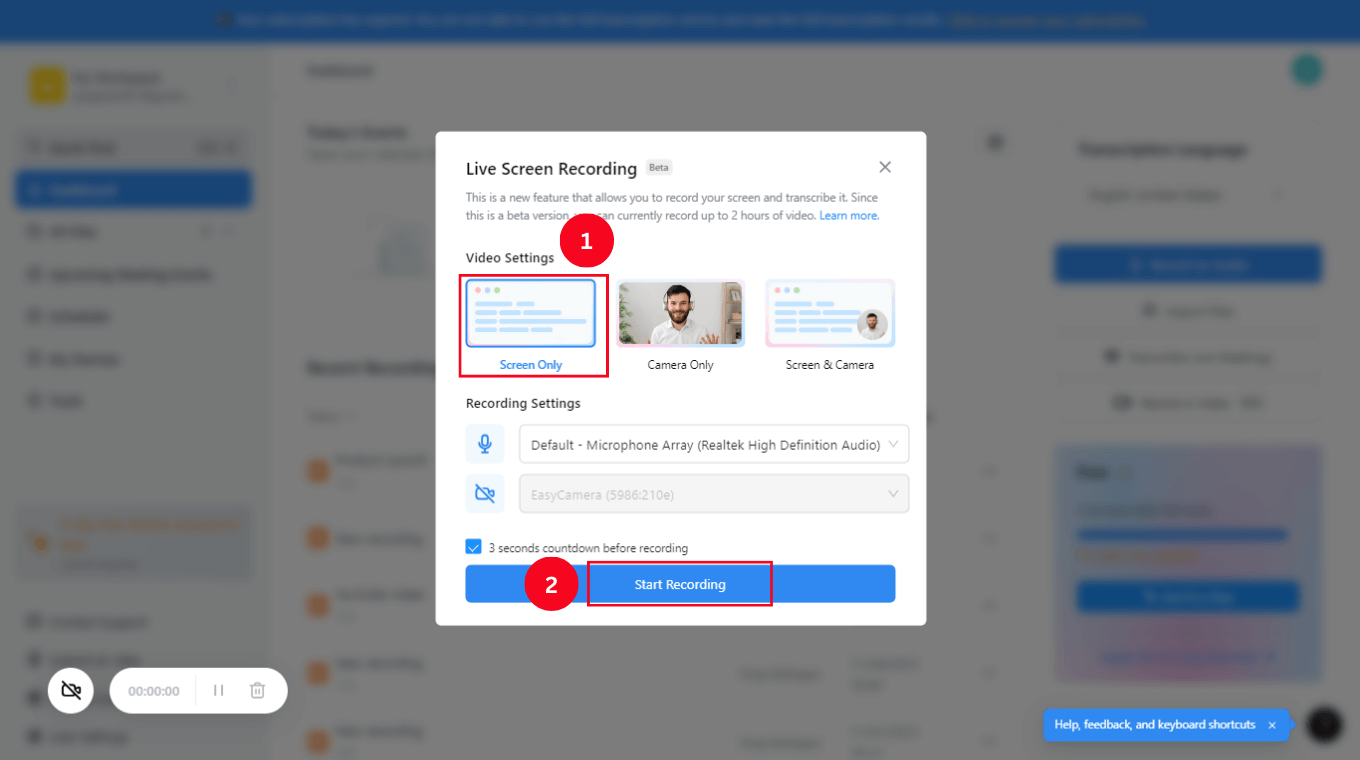
Step 2: You'll see several icons: Screen Only, Camera Only, and Screen & Camera. Click the 'Screen Only' option and then select the blue 'Start Recording' button.
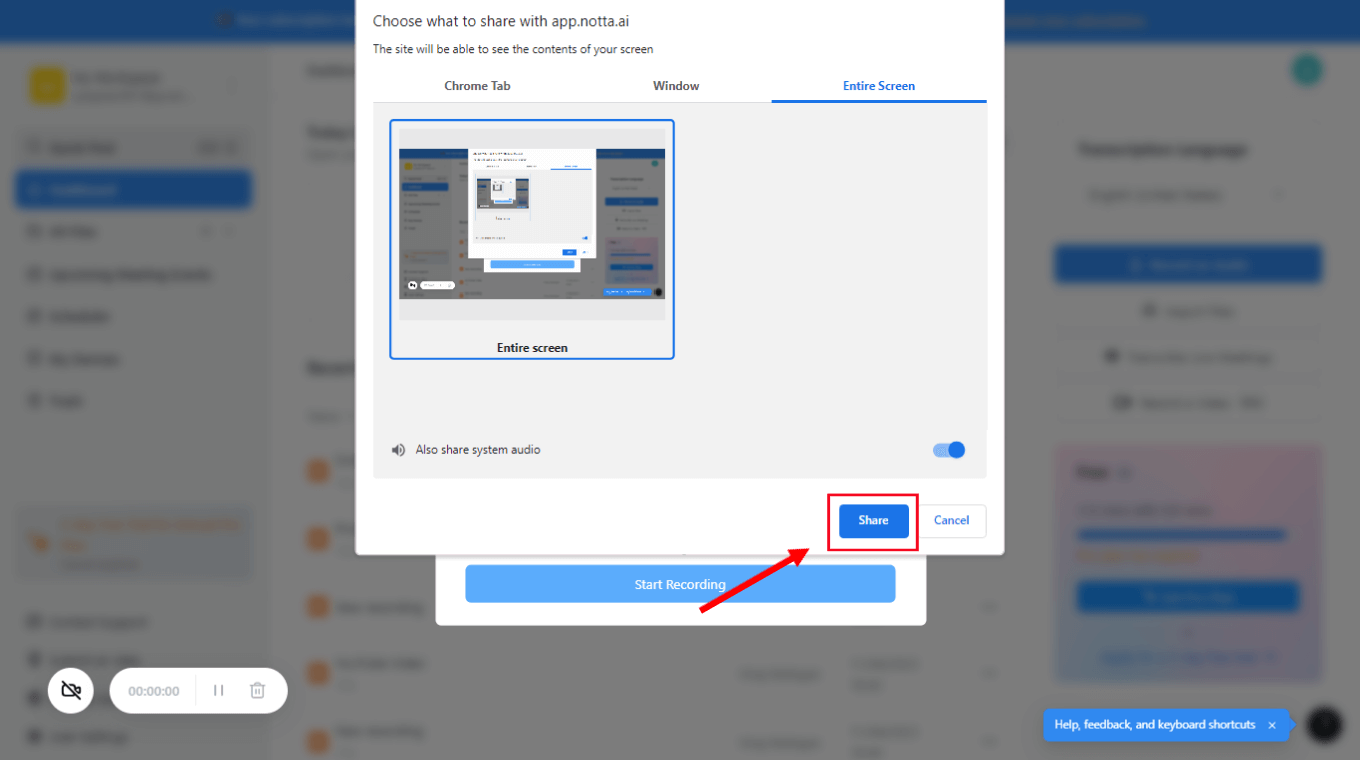
Step 3: Next, choose from the three available options: Chrome Tab, Windows, or Entire Screen. Select one of them and choose the blue 'Share' button.
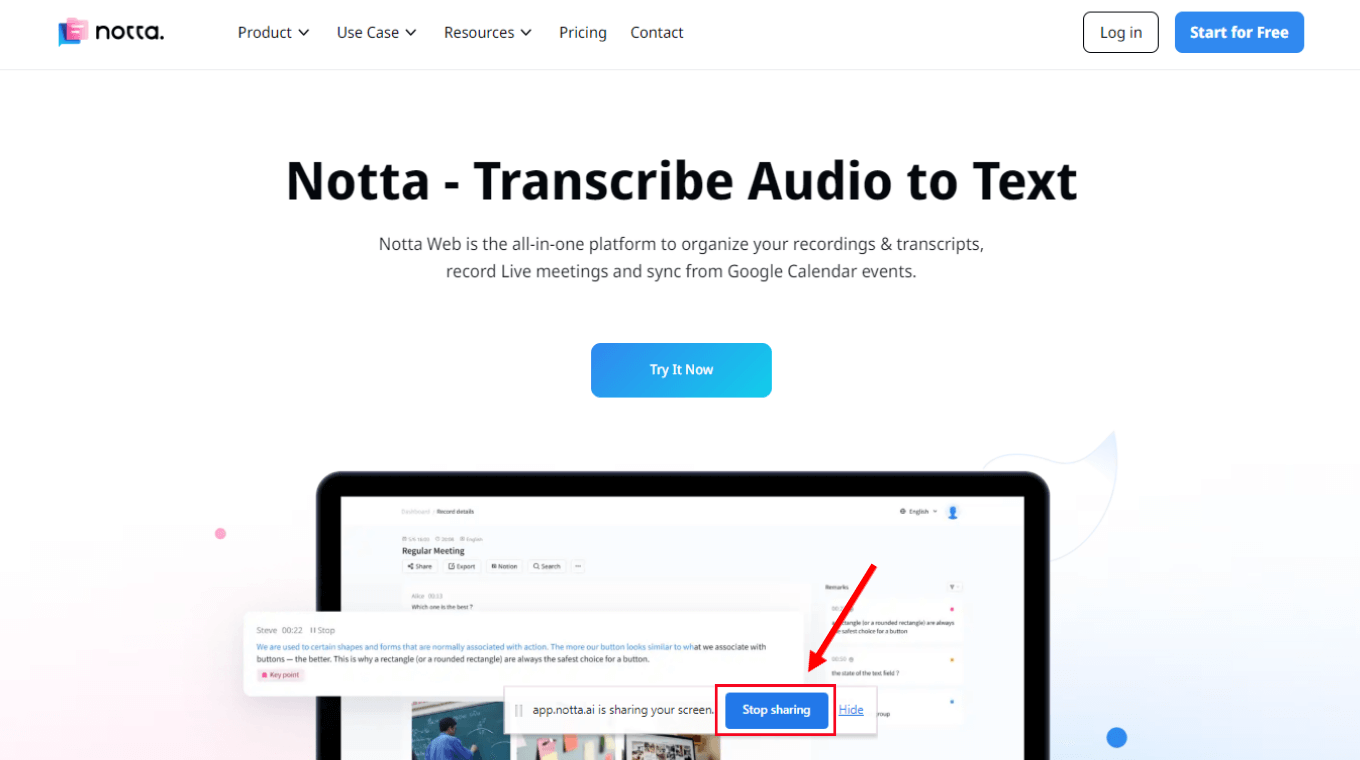
Step 4: You'll now see how Notta starts recording the Windows screen. Once done, select the 'Stop Sharing' button available at the bottom of the page.
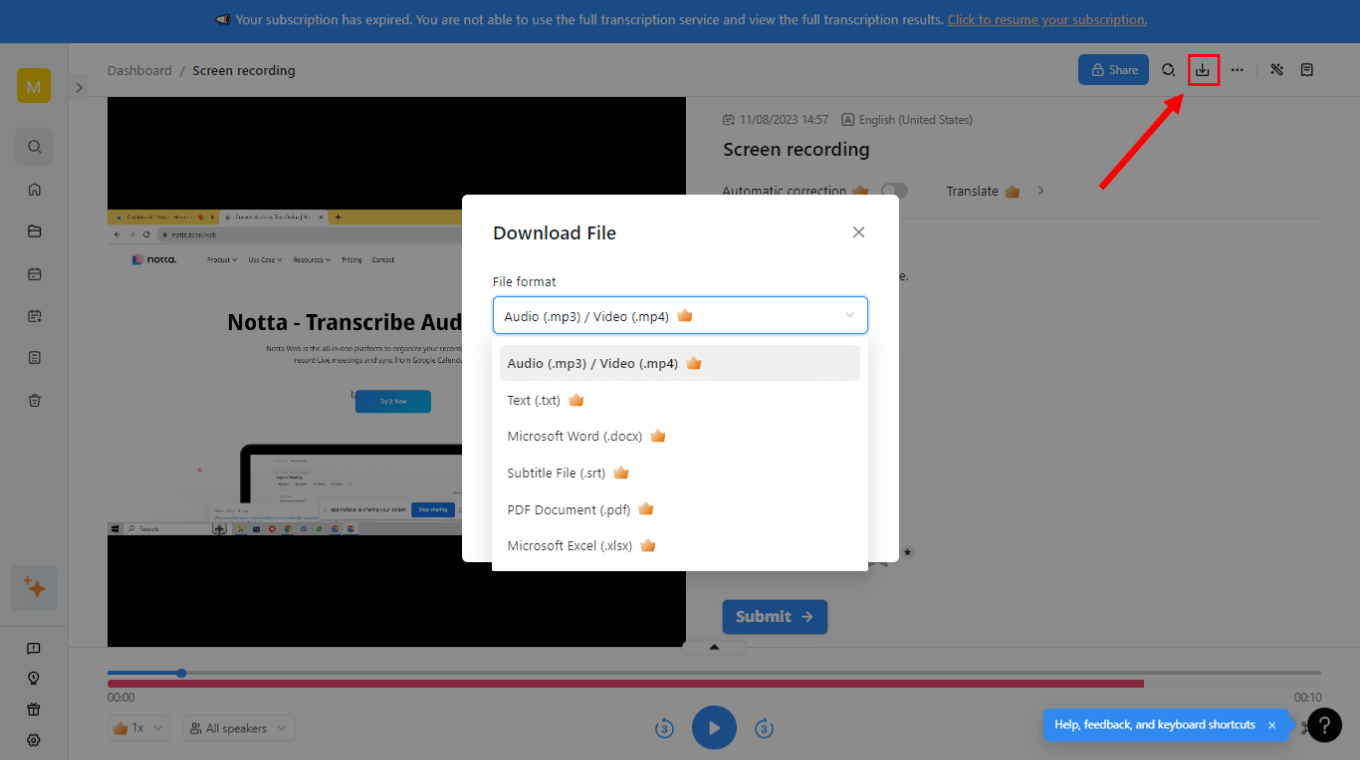
Step 5: If you want to download the recording and transcription, click the 'Download' icon and choose the file format — MP3 (audio), MP4 (video), XLSX, PDF, DOCX, SRT, and TXT.
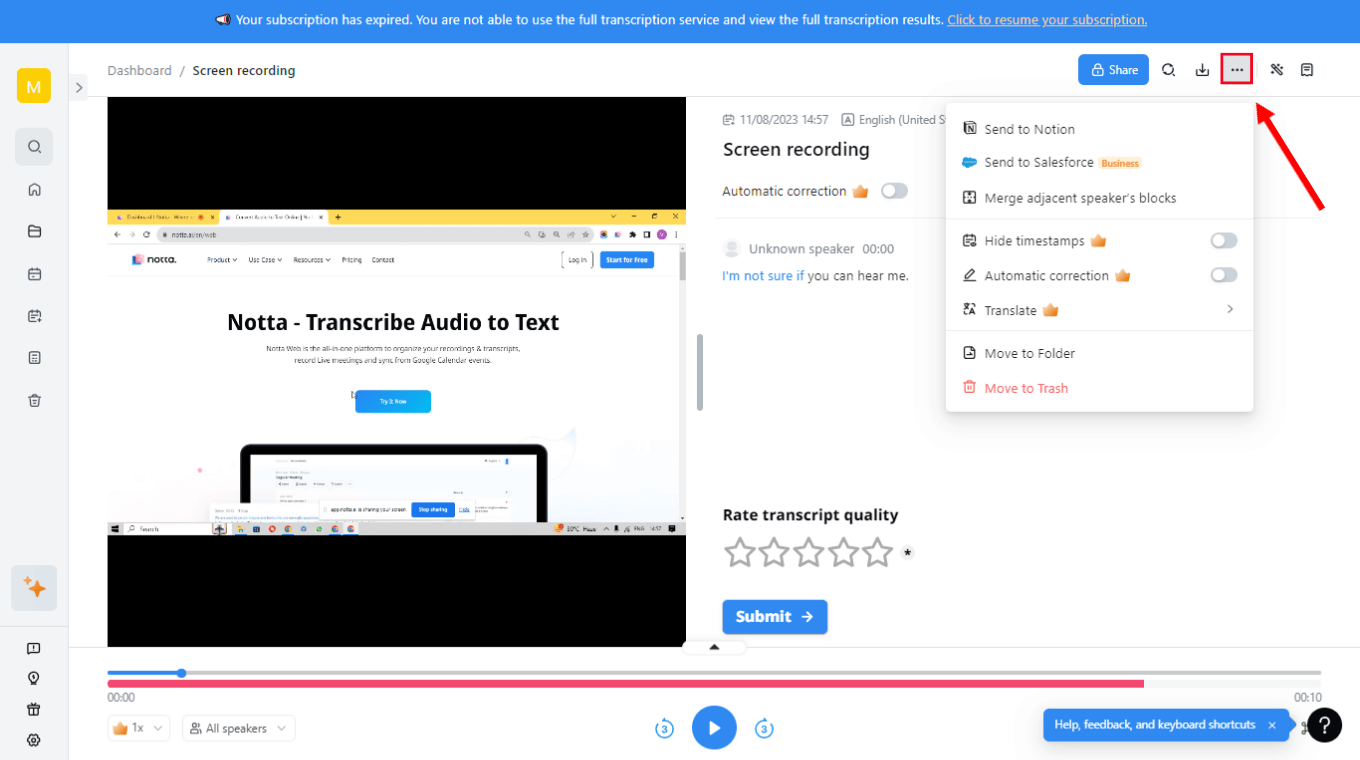
If you want more from your screen recorder — perhaps a quick way to share recordings instantly with team members, Notta can help you do that as well. The 'three dots' at the top of the transcript lets you share the recording directly on Notion or Salesforce.
Use our cutting-edge AI solution to take control of your recording tasks and optimize your time and focus.
FAQs
Can I screen record with sound?
Yes, you can record screen and audio on both Windows 10 and Windows 11. Take the Xbox Game Bar, for example. With this built-in screen recording tool, you can modify the settings before recording to capture the screen and audio on Windows.
If this doesn't solve your problem, you can choose another way to screen record Windows with audio — and that is Notta Web App. For this, start recording the screen using Notta and tap 'Share Audio' to record the screen and audio together.
Does Windows have a screen recorder?
Yes, there are two popular built-in screen recording tools in Windows — Xbox Game Bar and Snipping Tool. While both these screen recorders get the job done, they might fall short for someone looking for additional features like transcription.
In this case, the Notta recording and transcribing tool makes more sense. That's the easiest way to record screen and transcribe the audio on Windows (and even Mac) — which can then be successfully saved on the device.
Why my Windows Alt R is not working?
Windows + Alt + R is one of the easiest ways — or keyboard shortcuts — to start recording on Windows. Pressing these three keys on the keyboard will automatically open the Xbox Game Bar — however, you won't be able to find the recorded files afterward. If the Xbox Game Bar is disabled, the Windows + Alt + R might not work.
Key takeaways
Most of the time, when you need to record screen on Windows, you'll only have to look down at the keyboard and remember the shortcut: Windows + Alt + R. But the screen recording needs vary so much based on the use case — and that's what makes it hard to choose the best screen recording app.
So, what's the best answer to how to screen record on Windows? It's Notta! This is an audio or video recorder, transcriber, and summarizer app designed for both Windows and Mac. After you record a video, you can download and send the media file directly to third-party platforms like Notion or Salesforce.