
Where Are Teams Recordings Stored? [Fully Explained]
Unlock the power of AI — Notta's meeting assistant records, transcribes and summarizes meeting minutes with one click.
We recently had a meeting on Teams, and our boss initiated the meeting recording. However, we are unable to locate the recording. Where and how can we find the Teams recordings?
If you are having difficulties locating your Teams meeting recordings just like this Microsoft Teams Meetings user, you are not alone because Microsoft changed the Teams recording location in 2021 and thus the questions.
This article will show you how to find your Teams recordings in detailed steps, so you can view, share, and download them. Let’s dive in.
Where do Microsoft Teams store recordings?
Initially, all Teams recordings were automatically saved to Microsoft Stream.
But since early 2021, Microsoft implemented a change, and all Teams recordings have been stored either in OneDrive or SharePoint, depending on the type of meeting.
For channel Teams meetings
The recordings are saved to the team’s Sharepoint in a Recordings folder in the channel's File tab and are available to everyone who is part of the channel.
In Microsoft Teams, you have different channels for company departments, topics, projects, and more. The moment you create a new channel in Microsoft Teams, a SharePoint folder will be created to store all your team files.
For non-channel Teams meetings
The recordings are stored in the OneDrive Recordings folder of the person who initiated the recording. While everyone invited to the meeting can view the recording, only the organizer or the person who started it can edit it.
*Need real-time notes instead? Enable transcription in teams to skip recording storage hassles
Non-channel meetings can be hosted for reasons like:
Being on a call with a team member from a different department
Doing a group video meeting
Calling a person who isn't in your company
How to find the Teams meeting recordings?
Now that we've covered the basics of the Teams recording location let's take a closer look at how to find them.
1. Teams recording location for Channel meetings
These are open-door meetings that occur within a Teams channel and are therefore accessible to anyone in the channel, even if not invited.
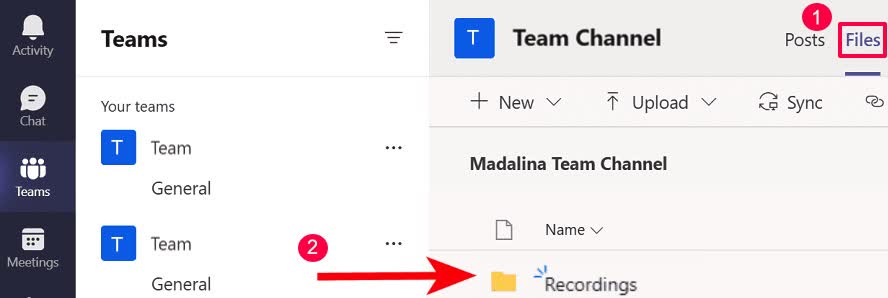
As earlier indicated, Teams recordings for channel meetings are stored in Sharepoint. To locate the recording, follow the following steps:
Go to Microsoft Teams and search for your specific team and channel.
In the channel, on the ‘Files’ tab from the top navigation bar.
Then, select the ‘Recordings’ folder.
2. Teams recording location for all other meetings
Non-channel meetings, also called standard, personal, or private meetings, keep meetings private to the meeting attendees.
The recording will be in the meeting recorder’s OneDrive folder, and they’ll be notified when the recording is available.
Open the OneDrive directory on your computer.
Next, click on the ‘Recordings’ folder. Here all of your meeting recordings will be listed.

Important notes about Teams recording:
Teams will keep recording even after the user who started the recording has left the meeting.
A recording will expire and be automatically deleted after a predetermined period. The admin sets the duration of time that the Record will be accessible.
The recording feature does not capture whiteboards and shared notes.
Teams automatically stop recording after everyone leaves the meeting.
Teams won’t commence recording until you’ve obtained everyone’s permission to record the meeting in some organizations.
Notta offers the most integrated AI meeting notes, summaries, and action items so nothing gets missed.
Play, download, share, and delete a Teams recording
Once you have located a Microsoft Teams recording, there are several actions you can take with it, such as playing, downloading, sharing, and deleting it. Here are the steps to perform each action.
Play a Teams recording
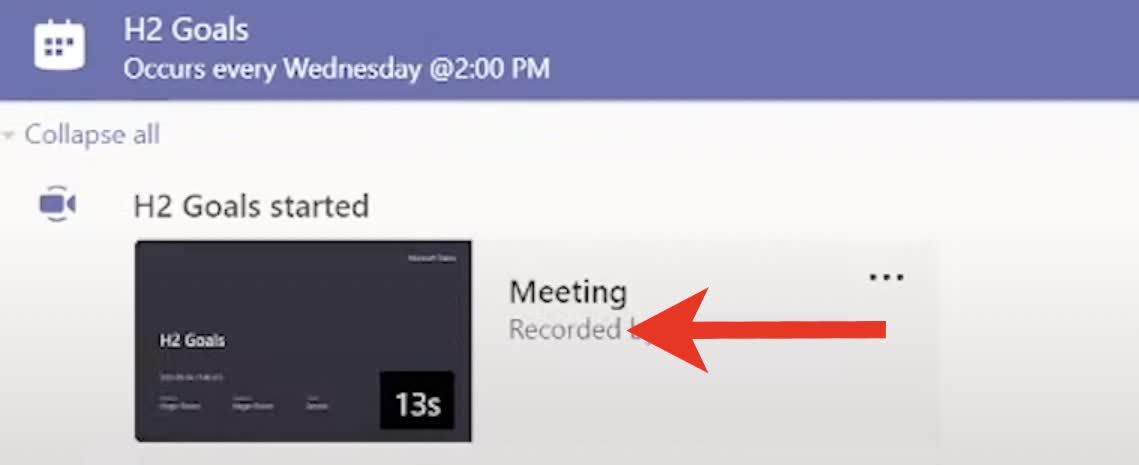
If the meeting is scheduled, you can find it in the Teams calendar, click the Details tab to access the recording and play it.
If it was a channel meeting, head to the channel conversation and click on the recording to play it.
Share a meeting recording
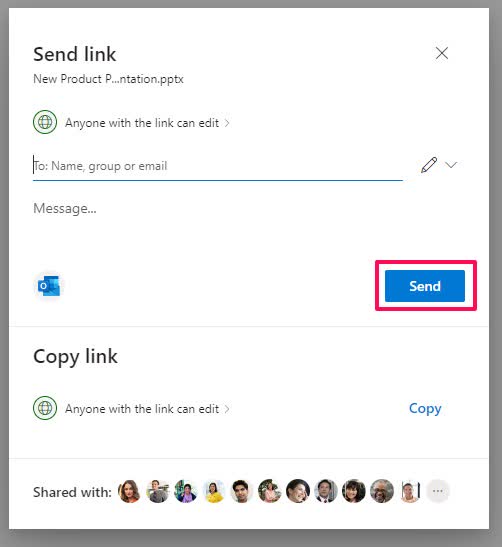
With Teams, you can share a meeting recording even with people who weren’t part of the meeting.
Go to OneDrive or SharePoint and find the recording.
Select it and click ‘Share’ at the top of the page.
You can 1) copy the link 2) enter the email addresses of the people you want to share with and click ‘Send’.
Download a meeting recording
Only the meeting organizer or the person who started the recording can download a meeting recording.
To download a recording on OneDrive or SharePoint:
Select one or more recording files you want to download.
Click the ‘Download’ button in the top navigation bar.
Select Save or Save As when prompted by your browser and choose the location where you want to save the recordings.

Tired of downloading recordings? Transcribe Microsoft teams recordings to create searchable notes.
Most computers will start downloading right away. However, there might also be a popup where you need to choose where the file is saved.
Delete a meeting recording
To delete a recording in OneDrive:
Go to the OneDrive website.
Click on the circle box that appears to select the File you want to delete.
Select ‘Delete’ on the bar at the top of the page.
To delete a recording in SharePoint:
Go to SharePoint, open the document library, and select the Teams recording you want to delete.
Right-click on the File and select ‘Delete’.
Click ‘OK’ on the delete confirmation dialog that appears.
Best alternative to recording Teams meetings
While you can use Teams to record your meeting, it has some limitations. For instance, the recording feature is limited to paid account users and only the meeting organizer can start a Teams recording.
So if you are looking for a better alternative to record a Teams meeting, I recommend using Notta and this is for good reasons.
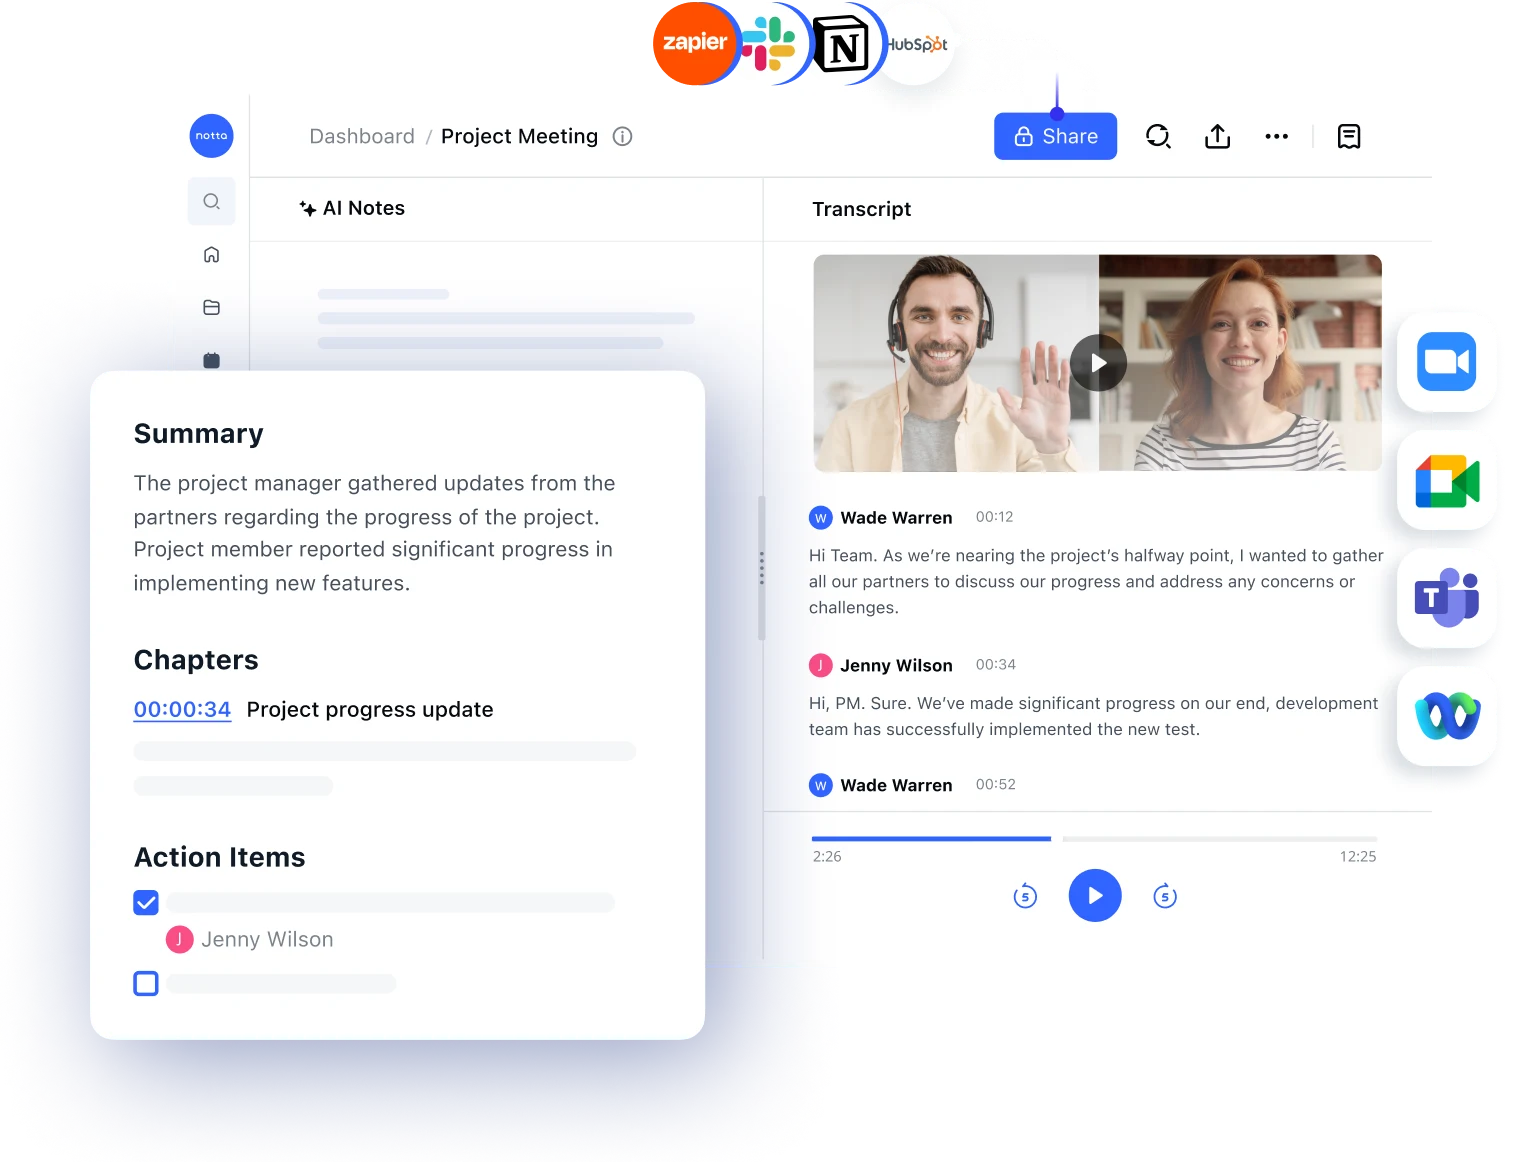
With Notta, you can record the meeting as a participant, unlike Teams, which requires the approval of the meeting administrator. Besides, it generates a live transcript of all conversations, allowing you to fully engage with other participants without worrying about forgetting important details.
*Learn how to transcribe teams meetings live without recording at all
Below are the easy steps to record a Teams meeting with the Notta Web app:
Step 1: Launch Notta and click ‘Transcribe Live Meeting’ on the right sidebar.
Step 2: The following pop-up window will appear. Select a transcription language and enter your meeting link, then click 'Transcribe Now'.
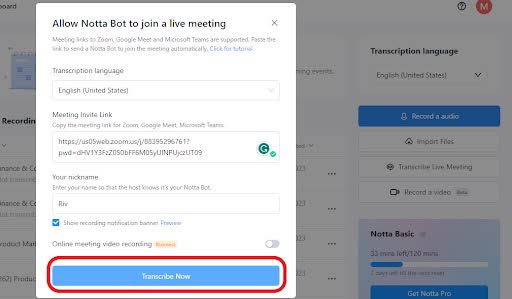
Step 3: The Notta bot will join your meeting and start recording the conversations (you can also record meeting video with the paid version).
Notta AI meeting assistant records, transcribes, and summarizes meetings so everyone can stay engaged without missing important details.
Conclusion
We hope this guide helped you learn where Microsoft Teams recordings are stored, and how to share, download, and play these recordings.
If you’re looking for an easy way to record audio for your meetings and transcribe this audio instantly we recommend using Notta. Not only does it have high-quality transcription, but you can translate it into other languages, edit your transcript, and quickly share it with team members.