How to Add Translated Subtitles to YouTube Videos
98% accurate, real-time transcription in just a few clicks. 58 languages and multiple platforms supported.
Are you looking for a fast and easy way to translate YouTube subtitles? This can seem like a complex process, but it doesn’t have to be.
If you’re a YouTube content creator, podcaster, or journalist, it’s important to have translations for your videos. This allows a larger audience to be able to consume your content.
We’ve developed methods to translate thousands of videos without even knowing how to speak the languages. And we’re going to reveal these methods in the article below.
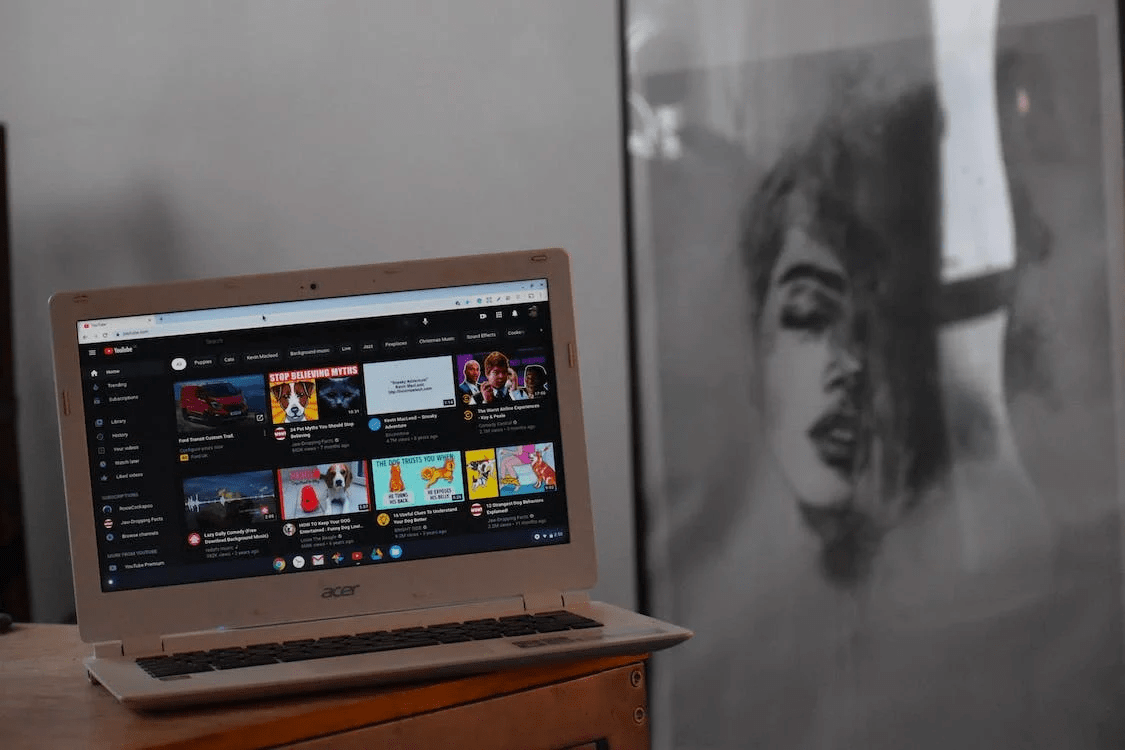
Method 1: Directly upload a subtitle
This first method is to upload a subtitle to YouTube directly. We’ll upload the subtitle to YouTube then let YouTube translate the video for you.
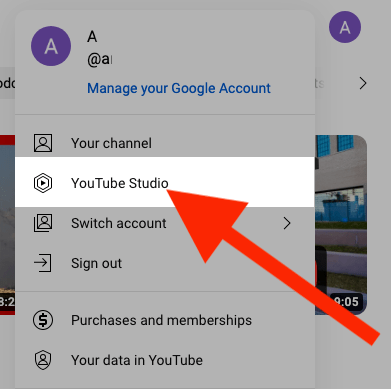
Step 1: Click on your account icon in the top right corner of the YouTube screen. Then click on ‘YouTube Studio.’
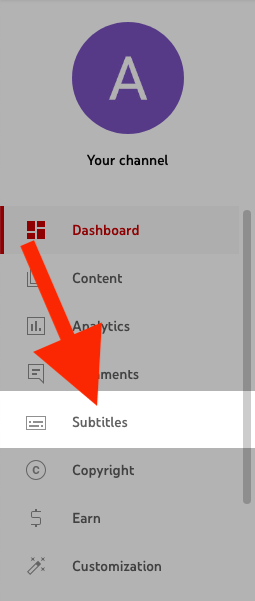
Step 2: Click on ‘Subtitles.’
Step 3: Click on the video you want to translate. Then click ‘Add Language’ and select your language.
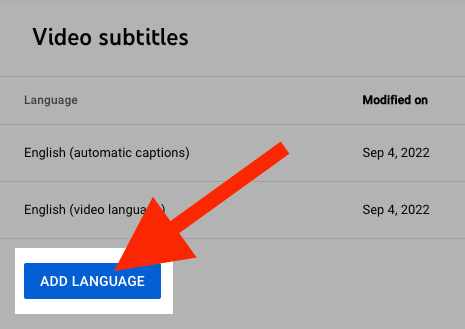
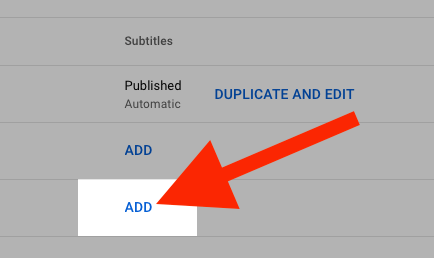
Step 4: Click ‘ADD’ on the far right under subtitles.
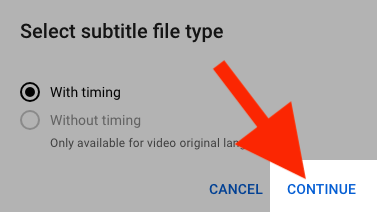
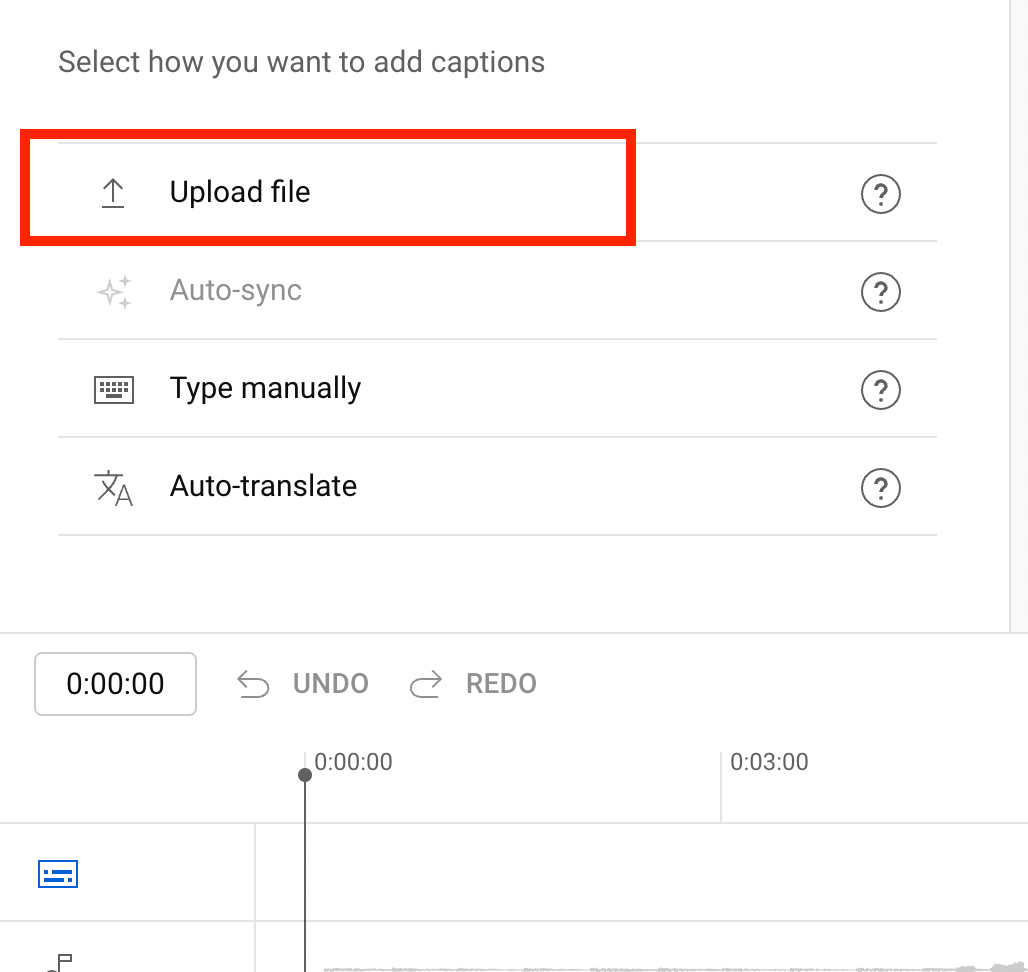
Step 5: Click ‘Upload file’ then click ‘Continue.’ YouTube requires you to select “With timing” with an additional language. This is why it’s important to use an app such as Notta that will create your subtitle with timestamps.
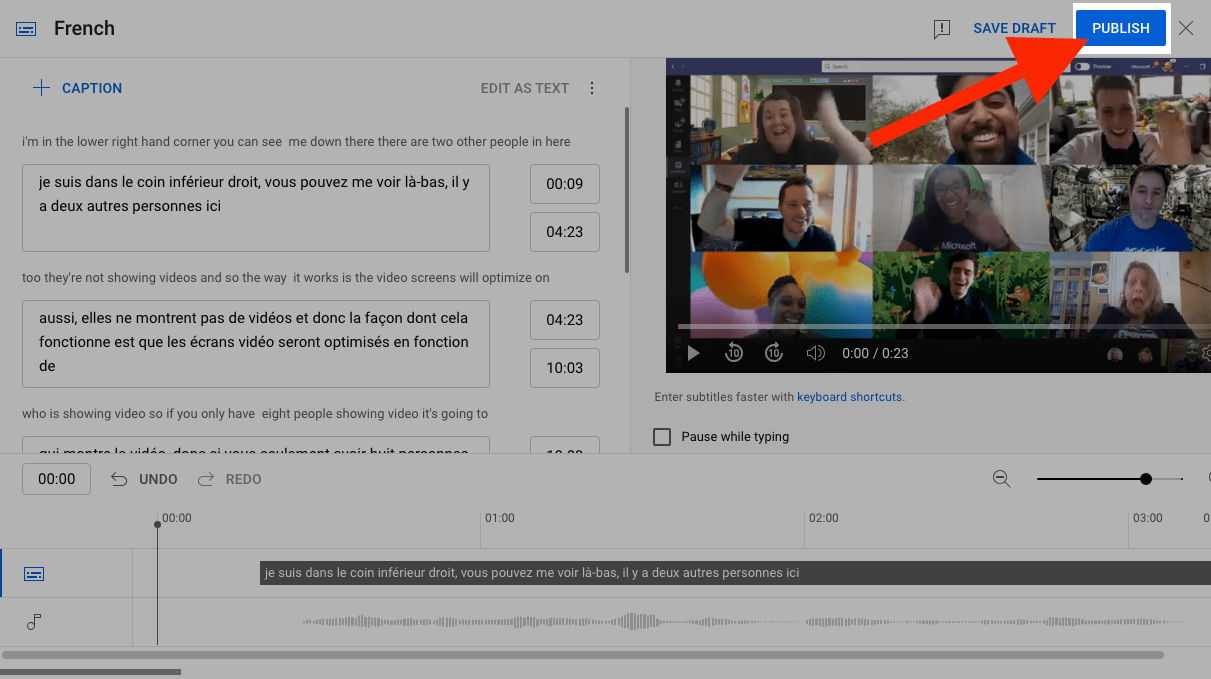
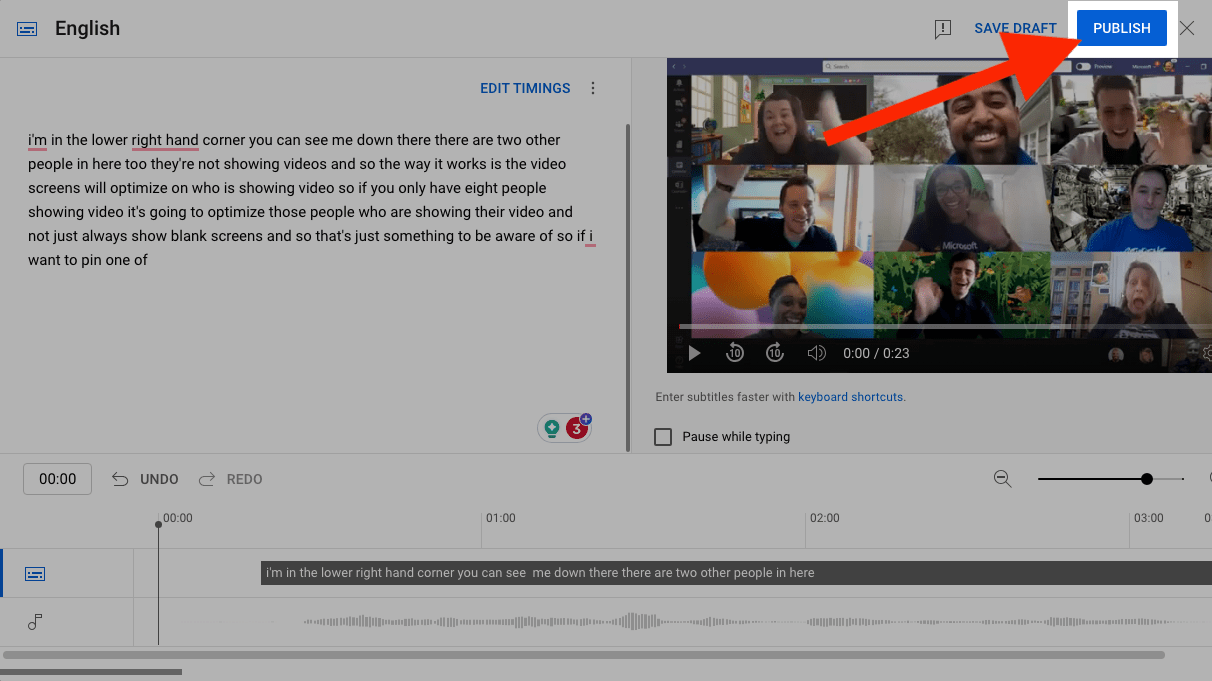
Step 6: Make sure all of the subtitles line up and click ‘Publish.’
Step 7: Click on the video you want to translate. Click ‘Add Language’ and select your language.

Step 8: Click ‘ADD’ on the far right under subtitles.

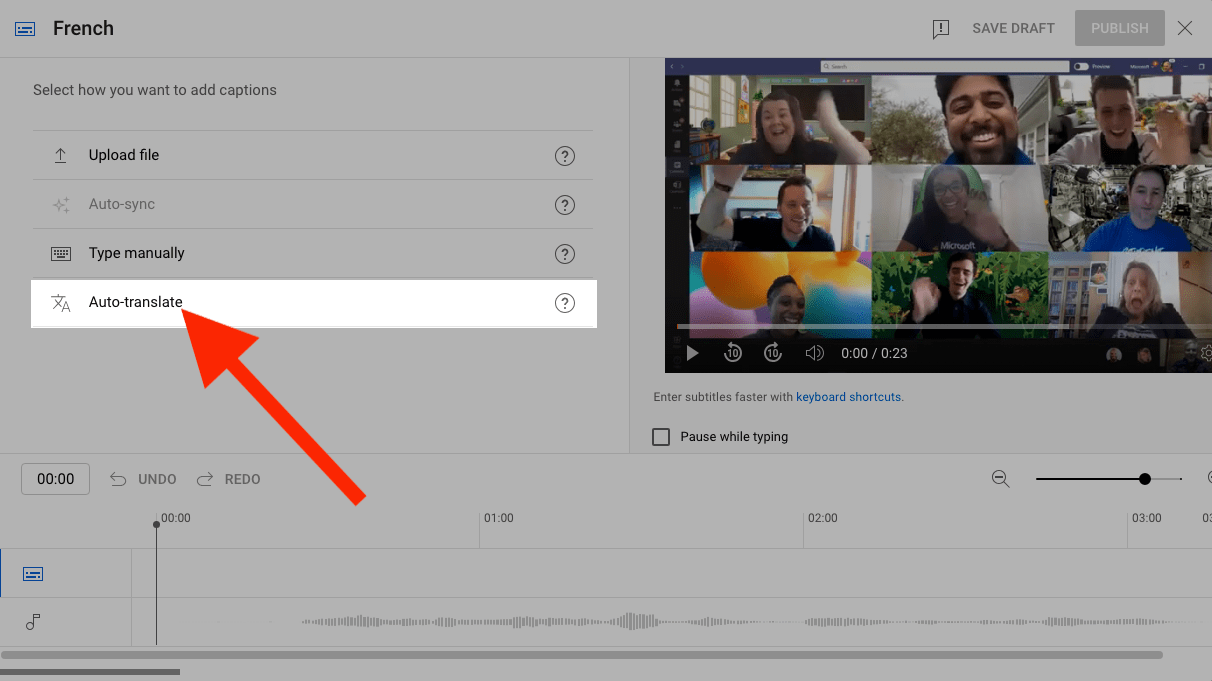
Step 9: Click ‘Auto-translate.’ Then click ‘Publish.’
Method 2: Auto-translate with built-in tool
This process will be much easier if YouTube creates automatic captions for your video. If not, you will have to enter subtitles in the native language of the video manually. In that case, skip to Method 3.
Step 1: Click on your account icon in the top right corner of the YouTube screen. Then click on ‘YouTube Studio.’

Step 2: Click on ‘Subtitles.’

Step 3: Click on the video you want to translate. Then click ‘DUPLICATE AND EDIT’ under subtitles in the same column of the language that says “(automatic captions).”

Step 4: Copy the text in the box you see here. Close this window, then click ‘EDIT’ under Subtitles in the (video language) column. Paste the text you copied from the automatic captions. Then click ‘Publish.’
Step 5: Click on the video you want to translate. Then click ‘Add Language’ and select your language.

Step 6: Click ‘ADD’ on the far right under subtitles.

Step 7: Click ‘Auto-translate.’ Then click ‘Publish.’
Notta can convert your spoken interviews and videos into text with 98.86% accuracy in minutes. Focus on conversations, not manual note-taking.
Method 3: Manually write the transcript yourself
If you know how to speak the language you want to translate, you can also type it yourself. This will be much more time-consuming, but luckily, YouTube may display the original language timestamps for you. This may save you from starting and stopping the video over and over.
Step 1: Click on your account icon in the top right corner of the YouTube screen. Then click on ‘YouTube Studio.’

Step 2: Click on ‘Subtitles.’

Step 3: Click on the video you want to translate. Then click ‘Add Language’ and select your language.

Step 4: Click ‘ADD’ on the far right under subtitles.

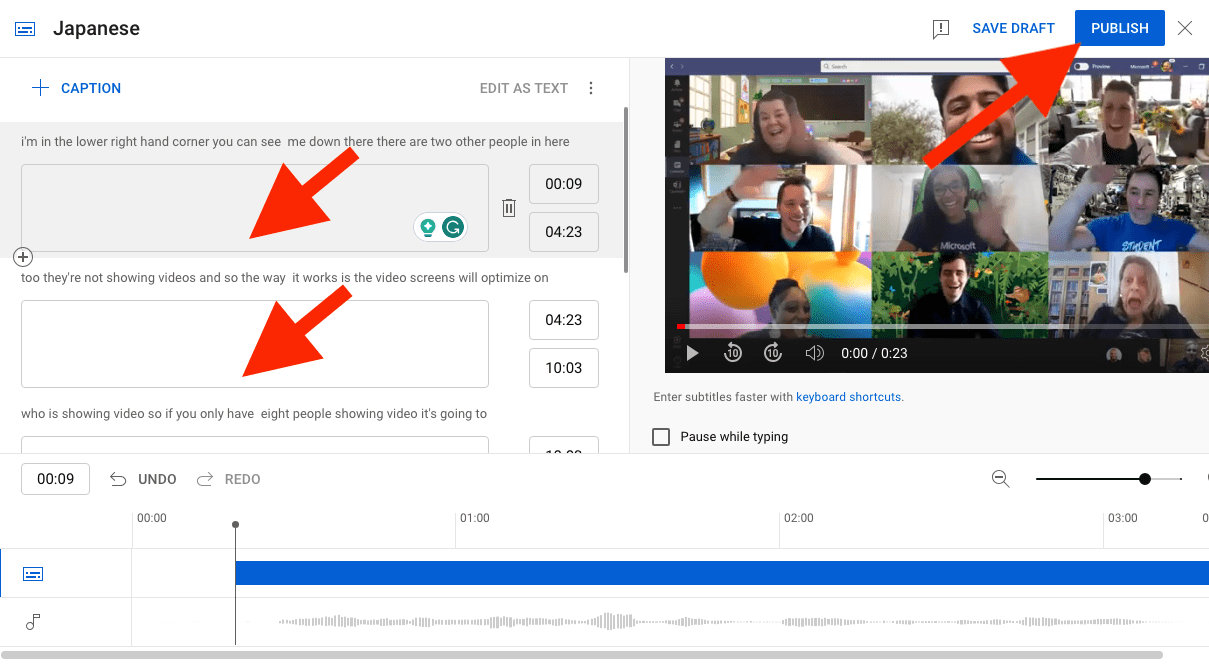
Step 5: Click ‘Type manually.’ If subtitles are autogenerated from the original language, they’ll display above the typing field. Simply type the translation in the field below the subtitles. Then click ‘Publish.’
Benefits of translating YouTube videos
Translating YouTube videos comes with many benefits. Some are obvious, and some are not so obvious. Here are some great benefits of YouTube translation:
Global audience
You’ve just expanded your audience to a ton of new people by translating your video. Many people may find your video interesting, and they may be compelled to watch it. But if it’s not in their native language, they will move on to the billions of other YouTube videos. If you at least have subtitles in place, you will be able to keep viewers on your video to get more of that precious watch time.
SEO purposes
Not only does it help a global audience’s ability to watch your video it also helps with SEO. Every language you translate your video into goes into Google’s search algorithm. When people search for keywords in the translated language, your video may pop up. As you add more languages, the amount of reach your video can have goes up.
Accessibility
Translating your videos also helps people consume your content who may not be able to listen at the time. Many people watch videos with no sound and only subtitles. You’d be surprised at the amount of people that watch YouTube videos with captions on. It’s important to translate your video for these viewers who simply enjoy videos with subtitles.
Automated YouTube video translation tool
The YouTube subtitle editor allows you to add subtitles with or without timestamps. Uploading subtitles without timestamps can be a pain. You will have to line each sentence up correctly with the video for it to make sense.
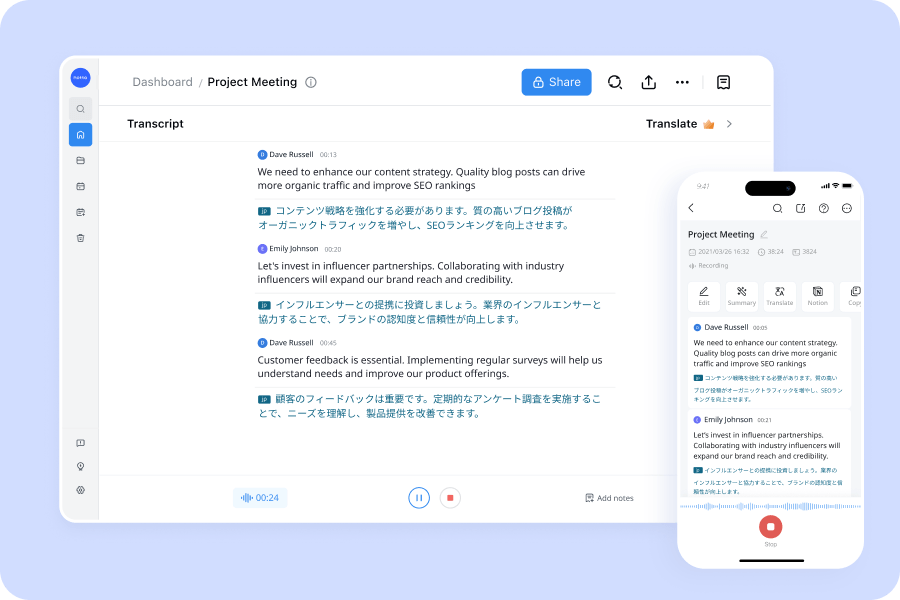
Notta is a YouTube subtitle translator that will automatically create subtitles and captions for you. It has 98.86% accuracy. You can export your subtitles in multiple formats with time stamps.
Step 1: Copy and paste your YouTube link to the Import Files feature in Notta.
Step 2: In a couple minutes you can review your transcript.
Step 3: Export your subtitles in SRT, PDF, DOCX, XLSX, or TXT.
Pros:
Exceptionally high accuracy
Export in multiple formats
Translate subtitles within Notta
Exports subtitle in YouTube-friendly format for SEO
Cons:
Not able to customize fonts and colors
Notta offers multi-language, accurate transcriptions to boost your video engagement.
FAQs
How to translate your playlists
Whether you want to translate a YouTube playlist or any type of audio playlist, it’s more simple than you might think. You just need to use an audio-to-text converter to transcribe it to text and then translate it. Here’s how:
Step 1: Upload the audio or video to an audio-to-text converter such as Notta. It will generate a transcript in the language the audio is in.
Step 2: Open the transcript and use the converter to translate it into your desired language.
Step 3: Export the translation in your desired format.
How to change the default language of your YouTube video
If you have subtitles for your video in multiple languages, you can choose the default language it shows up in. This will be the first language that shows up when a viewer turns subtitles on. Here’s how to set the default language:
Step 1: Click on your account icon on your YouTube page, then click ‘YouTube Studio.’
Step 2: Click ‘Content’ then click on the video you want to set the default language for.
Step 3: Click ‘Edit.’ Then scroll down, select the ‘Video Language.’ and choose the language you want to change. Click ‘Update Videos.’
How to change YouTube subtitles to English
Most English YouTube videos have English subtitles. However, if your profile is set to a different language, subtitles will show in your default language. Here’s how to change it:
Step 1: On the video you’re watching, click the ‘gear icon’ on the toolbar at the bottom of the video.
Step 2: Click ‘Subtitles/CC’ and select ‘English.’
Why is YouTube Translate not working?
YouTube’s auto translator only works if the default language has timestamped subtitles. If there are automatic captions generated, you can copy and paste them into the main video language subtitles. If there are not automatic captions, you’ll have to upload or manually type them before YouTube Translate will work on new languages.
How to change subtitles language on YouTube
Changing the language of subtitles on a YouTube video is very simple:
Step 1: On the video you’re watching, click the ‘gear icon’ on the toolbar at the bottom of the video.
Step 2: Click ‘Subtitles/CC’ and select the language you want to see.
Final thoughts
Translating YouTube captions doesn’t have to be rocket science. With the methods we outline here, you can translate your video into dozens of languages and skyrocket your video’s reach.
It’s important to use a YouTube subtitle translator such as Notta to generate your translations. This will speed up your process significantly. Sign up for a free Notta account today.