How to Get Transcripts for Webex Meetings and Recording?
Unlock the power of AI — Notta's meeting assistant records, transcribes and summarizes meeting minutes with one click.
With over 39 million cloud-calling users and 650 million active monthly meeting participants, Cisco Webex is a leading player in the video conferencing industry. The Webex transcription feature makes it even more effective, yet many people don’t know how to use it.
In this guide, we’ll cover what Webex meeting has in stock for users seeking to transcribe their meetings and how to surmount the transcription limitations that Webex doesn’t cater to.
Can Webex transcribe meetings?
Yes, Webex provides transcription capabilities, but it has several limitations. It is only available for meetings in English using the desktop versions of Webex Meetings, Webex Webinars, and Webex Events (classic).
If you are the host, you can get a Webex transcript post-meeting from the audio of recorded meetings or events.
The meeting transcripts appear during recording playback, and the production takes approximately twice the duration of the meeting. Sometimes, it may take up to 24 hours, depending on the length of the meeting or due to the temporary load on the transcription engine.
While Webex transcription is generally accurate, it may not always provide 100% precision. Factors such as background noise, multiple speakers, or strong accents can affect transcription quality.
If you don't meet the prerequisites for Webex transcription, or you're not satisfied with its limited features, you can skip the Webex guide below and use Notta to transcribe your meeting instead.
Notta AI meeting assistant records, transcribes, and summarizes meetings so everyone can stay engaged without missing important details.
How to turn on recording transcripts for Webex?
Before you can get the transcripts of a meeting on Webex, you need to turn on the recording transcript feature.
Site administrators can enable this feature for all hosts or specific users, or even allow individual users to activate it for themselves. Let's delve into the steps for each scenario.
Enable Webex transcription for everyone
Step 1: As the site administrator, sign in to your Webex admin account dashboard and go to Common Site Settings.
Step 2: Click on Options and scroll down to Site Options from the resulting menu.
Step 3: Next, toggle on the Create recording transcripts for all hosts’ MP4 recordings option.
Voila, the automated transcription is now turned on for all users. However, you can also toggle on the radio button next to 'Allow hosts to turn off Recording transcripts in My Webex Preferences,' so each meeting host can decide whether to create a transcript for their meeting or not.
Once the admin grants the permission, individual hosts can activate transcription for their meetings by simply navigating to Preferences > Recording > Create recording transcripts for all my MP4 recordings.
If you can’t see this option, your site administrator has chosen to create transcripts automatically for all recordings or prevent you from creating them.
Enable transcription for specific users
If you're a site administrator, you can enable transcription for specific users by following similar steps but selecting the desired users instead of the entire user base.
Step 1: Log in to Webex Site Administration and go to User Management on the left panel.
Step 2: Select Edit User, then search and click on the name of the user (or users) for whom you want to turn on transcripts.

Step 3: Scroll to the Privileges > General section and tick the checkbox next to Create Recording Transcripts for All of This User's MP4 Recordings.
You can also turn on transcription for new users when creating their accounts by following the same steps. The only difference is you need to select Add User instead of Edit User.

How to get transcripts from a Webex recording?
Now, you should have your Webex meeting recorded following the steps above.
The transcripts will appear at the side of the recording when you replay it, and you can search for text in the transcript to locate the exact information you need.
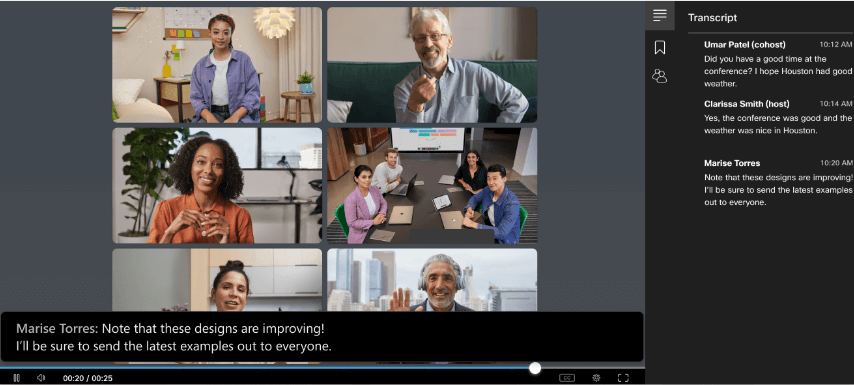
If you're the meeting host or the host gave you edit privileges for the content, you can download the transcript by following these steps:
Step 1: Sign in to User Hub and select Recordings from the navigation panel.
Step 2: Choose the recording you want, then click Download.
Step 3: Under the Transcript tab, select the file format you want. You can download the transcript in WebVTT (.vtt) or text (.txt) format.
How to transcribe a Webex meeting with Notta
Webex does not offer real-time transcription; instead, transcripts are generated a while after the meeting has ended. Also, the transcripts are available only in one language, which is English.
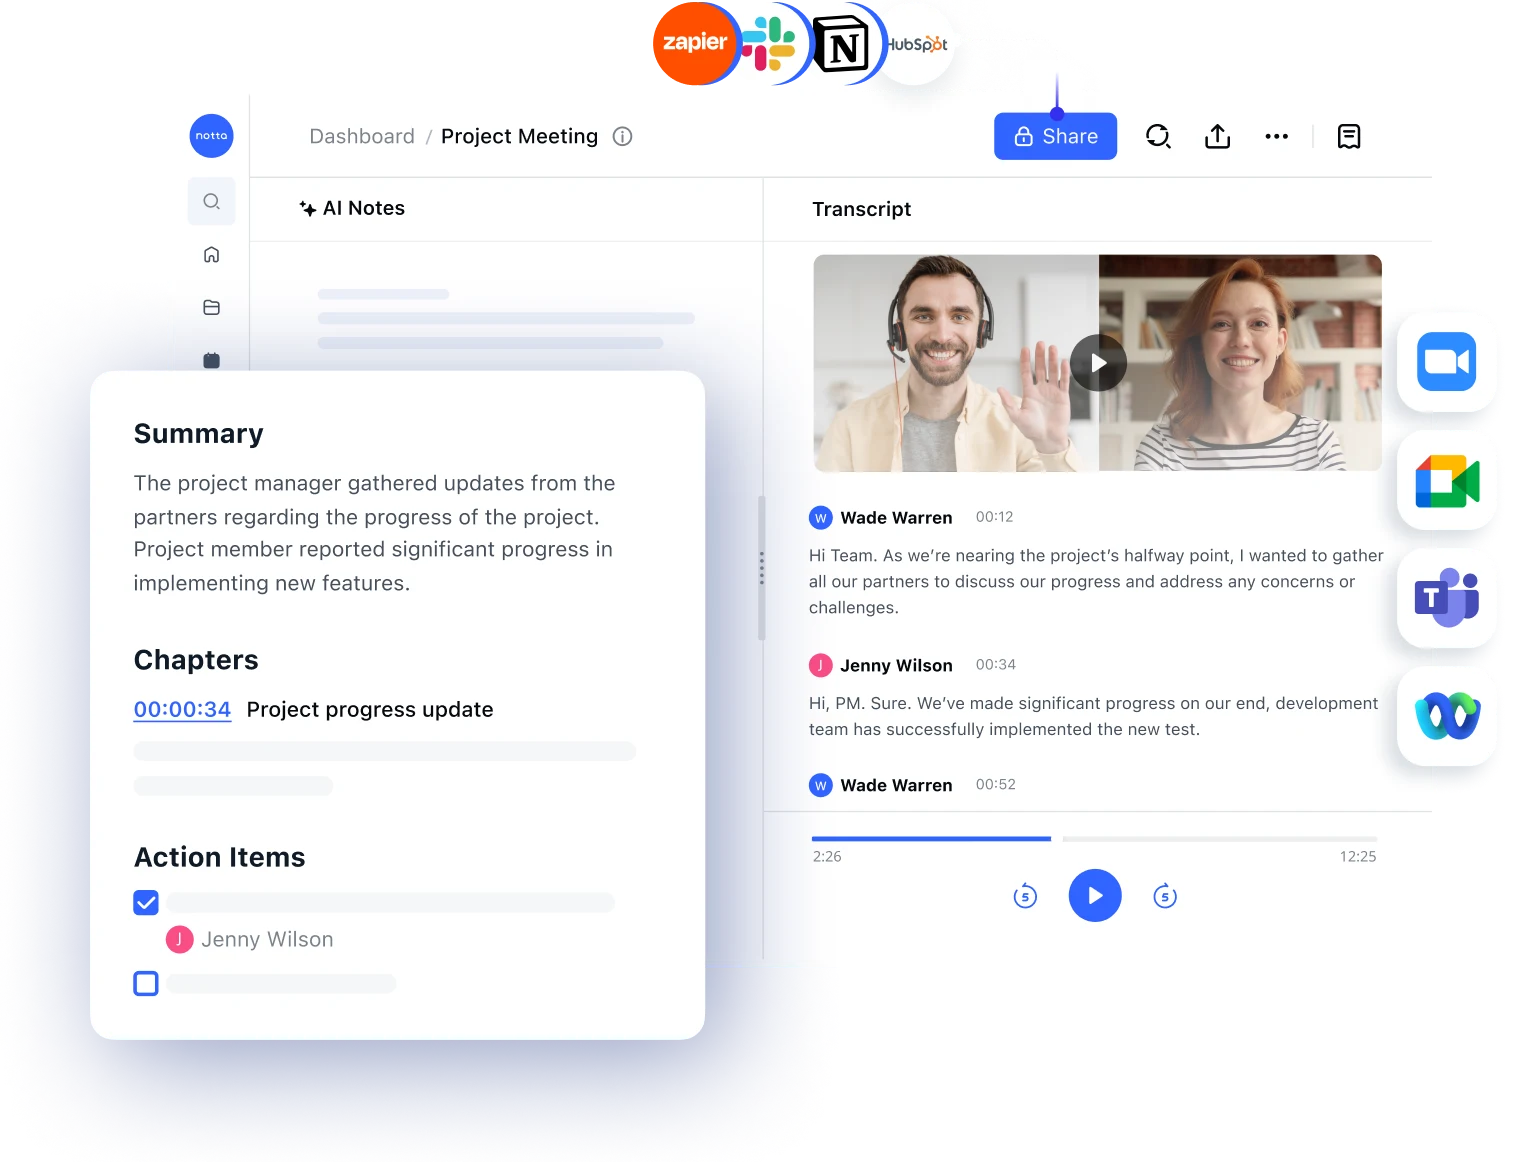
However, with a meeting transcription tool like Notta, Webex transcription is far more seamless and can be done in real time. Notta makes it much simpler to create a transcript. You receive a higher-quality transcript with fewer steps, and you can edit and share the results as soon as your meeting ends.
More so, Notta transcription comes with speaker identification and timestamps, so you’ll always know who says what and when in your meetings. Let’s see how to transcribe a Webex meeting live step by step using Notta (available on both Web and mobile).
Transcribe a Webex meeting in real time
Step 1: Sign up and launch the Notta app.
Step 2: On the dashboard, click ‘Record online meeting.’
Step 3: Select the transcript language and paste the Webex meeting link, then click 'Transcribe now.'
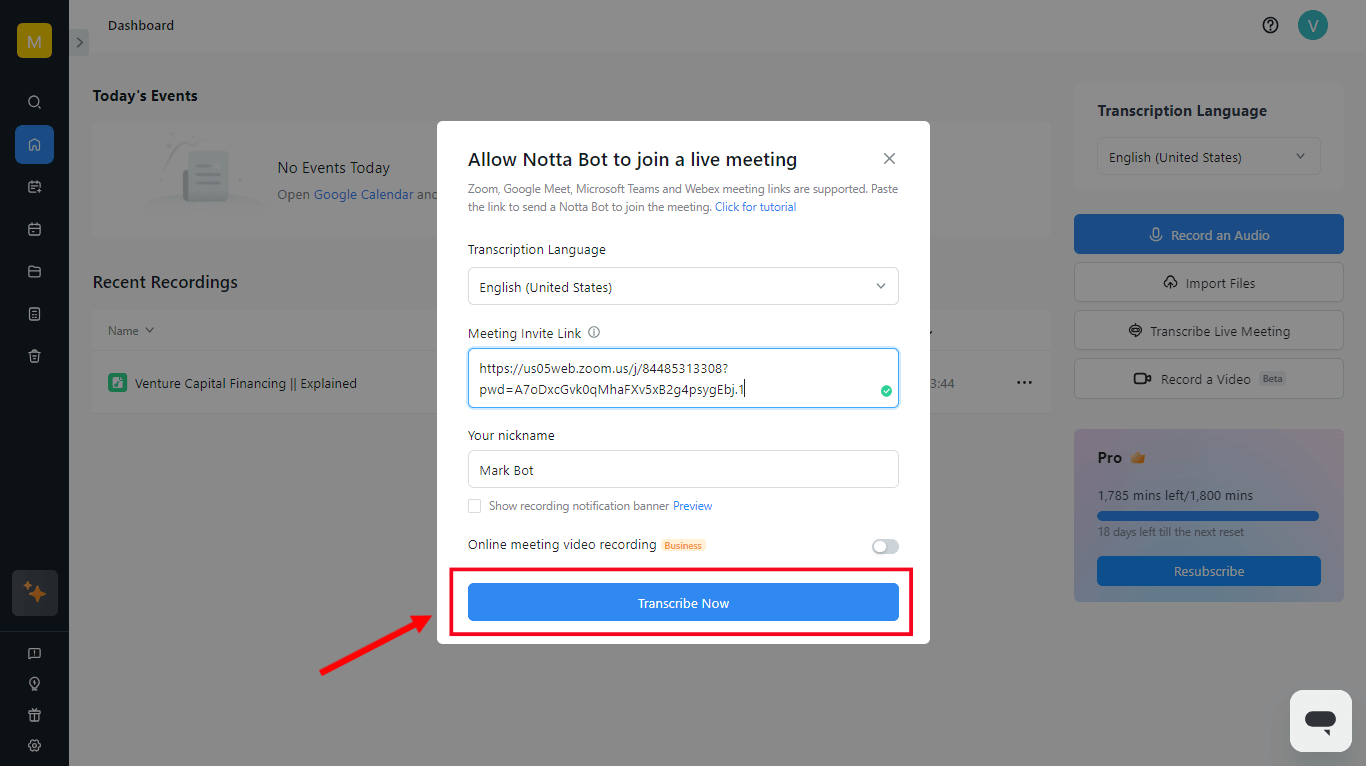
The Notta bot will join in and start recording and transcribing in real-time.
On top of real-time transcription, Notta can make your Webex meeting more engaging and productive using these features:
AI meeting summary: Notta uses advanced AI algorithms to extract key insights from meeting transcripts and provide a meeting summary in seconds.
Export: Export your meeting notes and transcript to various formats, including DOCX, PDF, and TXT.
Meeting transcript on autopilot: Can't make it to a scheduled meeting? Let Notta's AI assistant stand in for you and generate a complete transcript so you can catch up on the meeting's content.
Notta offers the most integrated AI meeting notes, summaries, and action items so nothing gets missed.
Transcribe a Webex meeting recording
Transcribing a recorded Webex meeting is just as easy as transcribing a meeting in real time. Here's how it works:
Step 1: Download your Webex meeting recording from the 'Recordings' section in the Webex user hub.
Step 2: Log in to Notta and click the 'Upload & transcribe file' button.
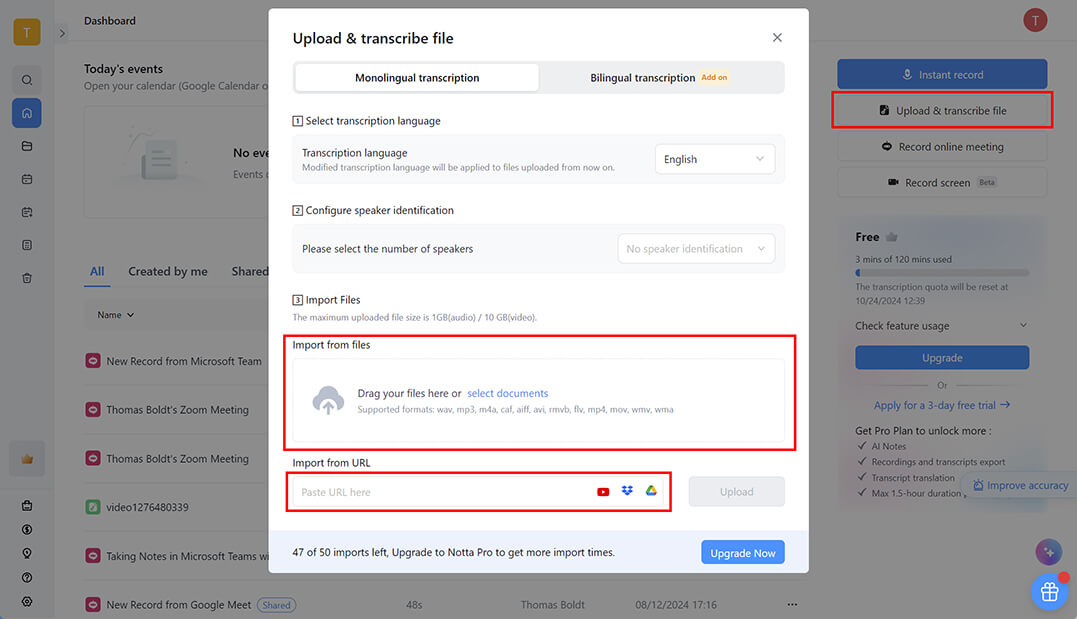
Step 3: Click the 'Import File' section and browse to select your Webex recording file. Notta will immediately begin processing and transcribing your recording.
That's all there is to it!
Comparing Notta and Cisco Webex transcription services
| Feature | Webex Transcription | Notta |
|---|---|---|
| Accuracy | Unpublished | Up to 98% |
| Processing time | Up to 24 hours | 5 minutes for transcribing 1-hour audio file |
| Pricing | Starting at $12 USD per user per month | Free plan available; paid plans start at $8.17 USD per user per month. |
| Language supported | English only | 58 |
| Timestamps | Yes | Yes |
| Speaker identification | Yes | Yes |
| Meeting summary | No | Yes |
| Export options | TXT | DOCX, PDF, TXT, SRT, XLSX, MP3 |
| Collaboration | No | Yes |
| App integrations | No | Yes |
The table above makes it clear that Notta has far more impressive capabilities than Webex's built-in transcription tool. The built-in tool is useful for transcribing simple meetings in English, but you're quite limited in terms of what you can actually do with your transcript.
Notta provides better accuracy, more comprehensive language support, and AI-powered summaries, which make it the best choice for serious meetings where transcription accuracy and productivity are essential.
Sum up
Notta's automatic real-time meeting transcription is a transformative tool for your Webex meeting workflow. It frees you from the tedious task of taking notes by hand and gives you a huge productivity boost with its online collaborative editing and AI meeting summaries. Best of all, you can review and edit your transcript as soon as your meeting ends without waiting for processing time!
FAQs
Is Webex transcription free?
No, Webex transcription is only available for users with a paid account. Paid accounts start at $12 USD per user per month.
Why can’t I view the transcripts of my Webex meeting recording?
This may be happening for many reasons.
First, your account may not be turned on for transcripts. If the transcript option does not appear when you play your recordings, then you do not have the transcript service turned on.
It may also be due to poor audio quality during the meeting caused by noisy backgrounds, accents, poor acoustics, etc.
Does Webex do live captioning?
Yes, Webex offers live captioning, but the feature is only available for users with a paid plan. If you have a compatible plan, you can enable the feature during your Webex meetings using the 'Show closed captions' button in the bottom left of the meeting window.
Can I save the Webex transcript without recording the meeting?
Yes, you can save a Webex transcript without recording the meeting, but only if your meeting uses the Webex Suite meeting platform (formerly known as the 'Video Mesh-ready meeting platform'). Click 'Show closed captions,' and a transcript will be created, which you can download from the 'Captions & highlights' panel.