
How to Dictate in Excel [2 Easy Ways]
98% accurate, real-time transcription in just a few clicks. 58 languages and multiple platforms supported.
Remember when typing speed was essential to qualify for data entry posts? Today, that's a thing of the past. Speech recognition in Excel has been around since 2003. But not many people knew about it or even bothered to use it.
In this new AI and machine learning era, everyone is talking about speech-to-text and revisiting how these tools work.
But what does speech-to-text dictation in Excel mean?
Hands-free speech-to-text dictation involves dictating text and numbers to your chosen Excel cells.
There are specific requirements you need to meet for speech-to-text Excel dictation to work on your device:
The device should run on a minimum RAM of 128 MB and a Pentium processor with a speed of 300 MHz.
Have Windows 10 or 11
Install Microsoft 365 or any Office version
Get a top-quality microphone
Here is a step-by-step guide on how to dictate in Excel.
How to dictate text in Excel with Windows Speech Recognition
There are several steps to dictating text and numerals in Excel. These include:
Step 1: Install and configure your microphone. Every microphone has a different installation process. Follow its instruction manual to connect it to your device.
Step 2: Click on the ‘Windows’ Icon at the bottom left corner of your screen and search for ‘Online speech recognition.’
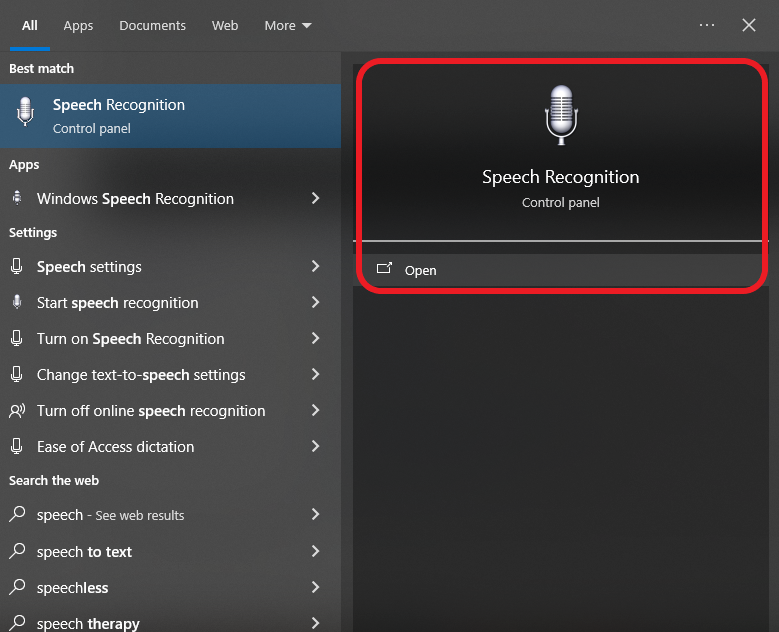
You can also access the feature by navigating to Control Panel>Ease of Access>Speech Recognition.
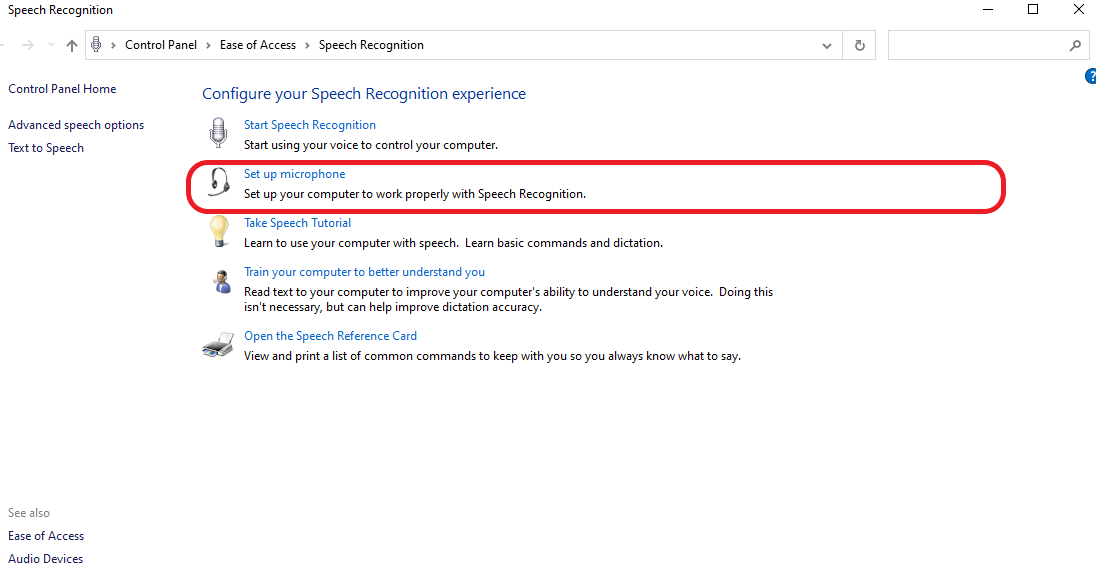
Step 3: Select setup microphone, choose the type of microphone you are using, and test the connection.
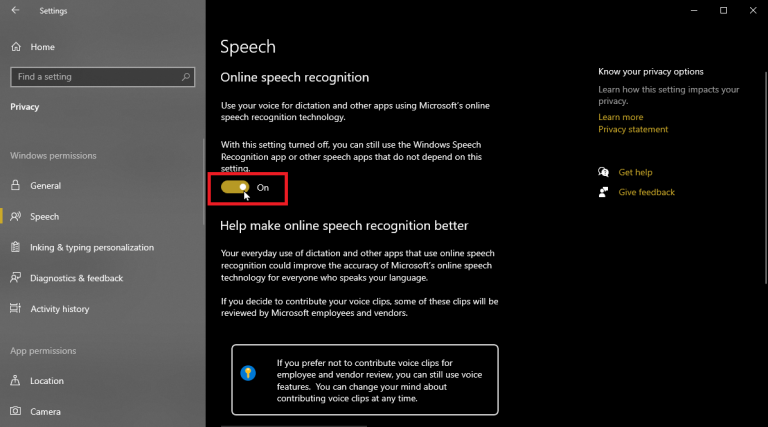
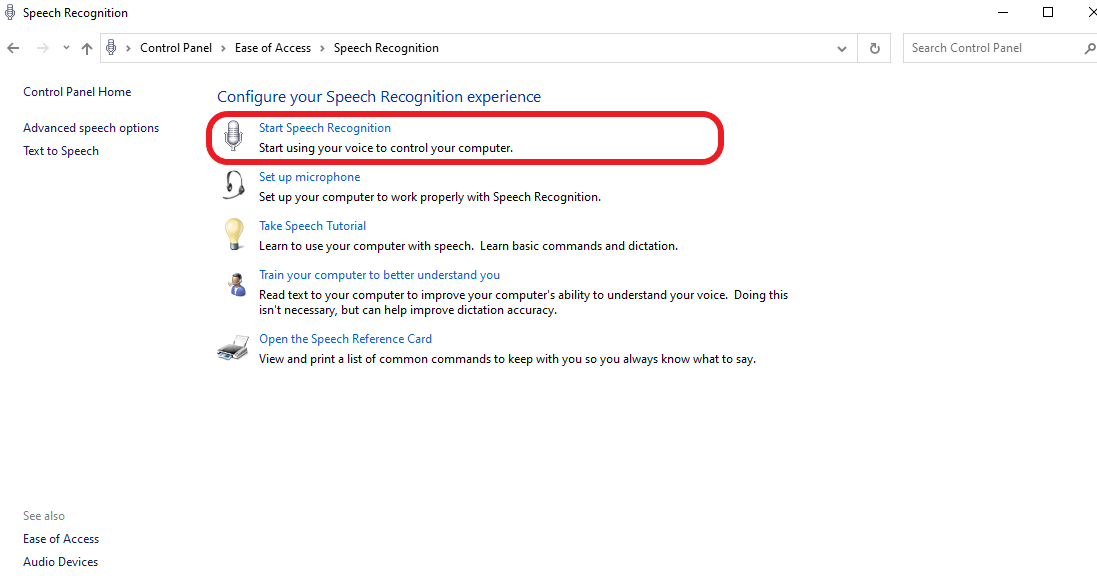
Step 4: Navigate to the speech recognition settings and click "Start Speech Recognition” to train your computer to understand your speech patterns for better dictation accuracy.
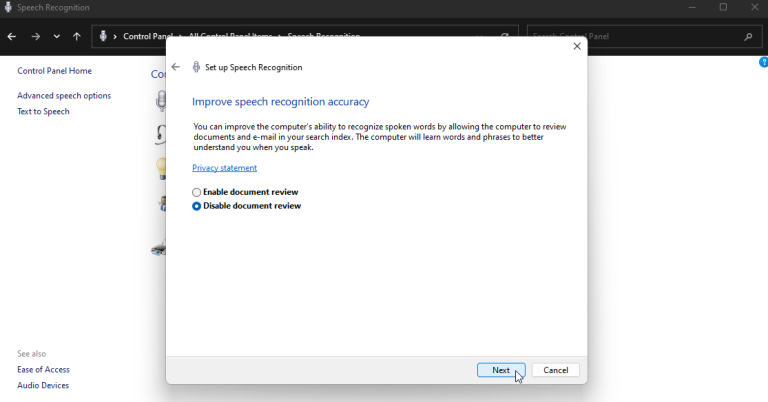
Step 5: In the pop-up window, choose whether to give the computer access to your emails and documents. The computer uses these to understand your speech patterns and how you use your words. If privacy is a concern, you can turn off this option and choose to train your computer through dictating when you navigate back to the control panel.
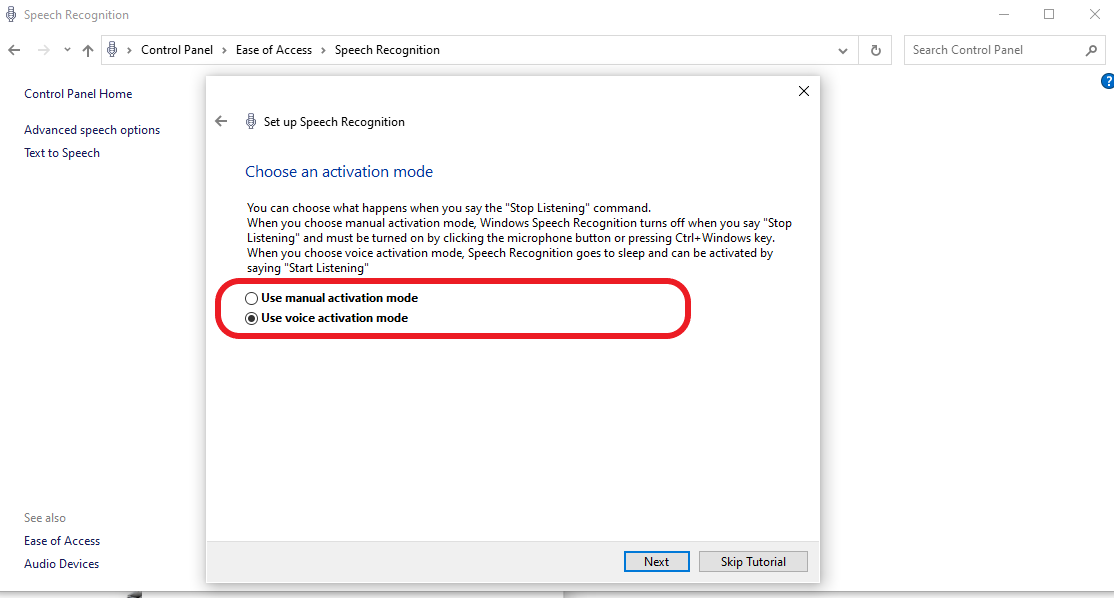
Step 6: Next, choose between manual or voice activation mode. Voice activation allows you to initiate the dictation tool by saying, ‘Start Listening,’ and stop it by saying, ‘Stop Listening.’ Manual activation requires you to click on the microphone or use the shortcut keys ‘CTRL+Windows key.’
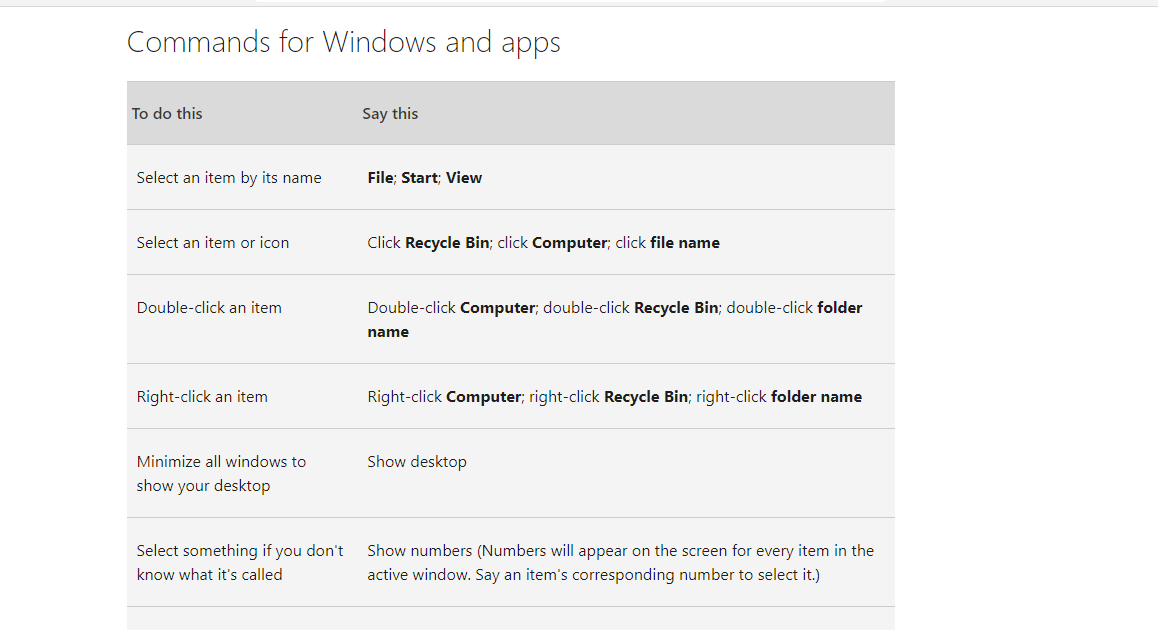
Step 7: The next screen provides the ‘View Reference Sheet’ button to access all the possible voice activation commands. Click on it to access and read the webpage.
Step 8: Click ‘Next,’ and choose whether to run speech recognition on startup.
Step 9: Complete the configuration process by watching a tutorial on using the feature. You can, however, opt to skip this step.
Step 10: Open a new Excel page and press ‘Windows+H’ to open the dictation function.
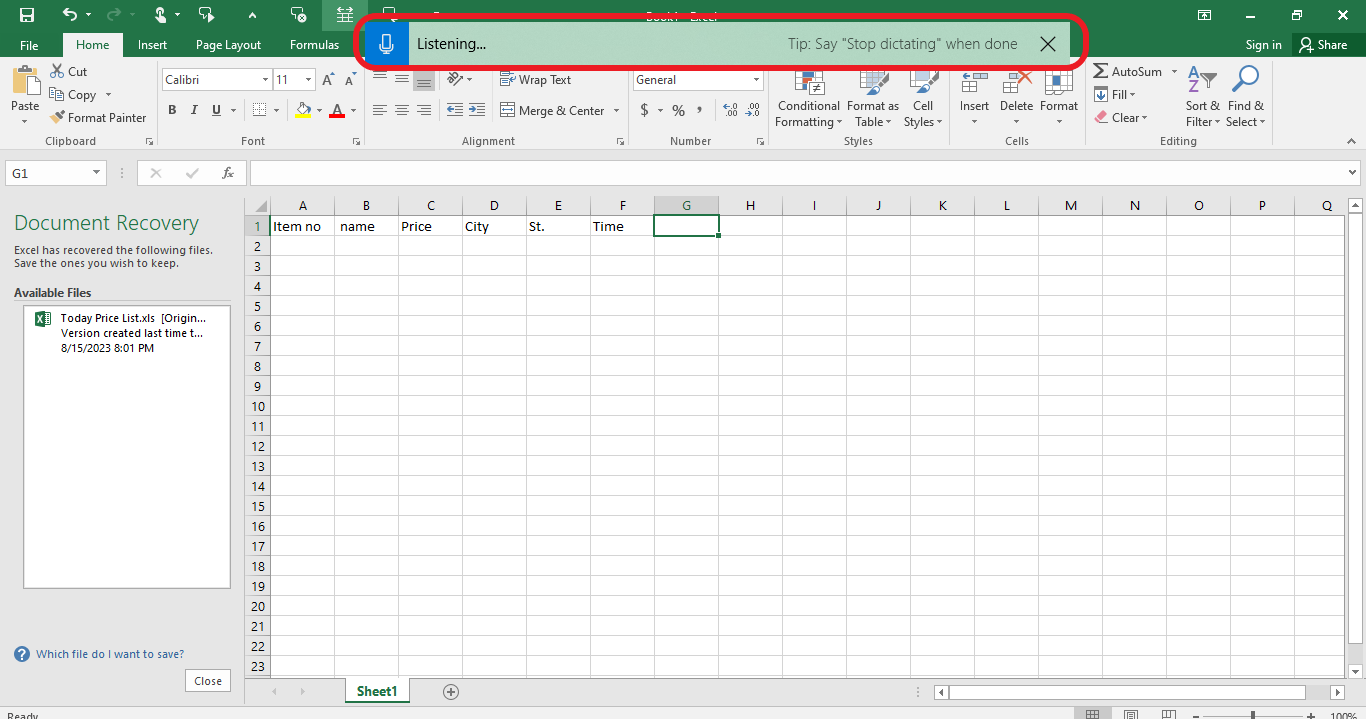
Step 11: Go to the cursor box where you intend to add content.
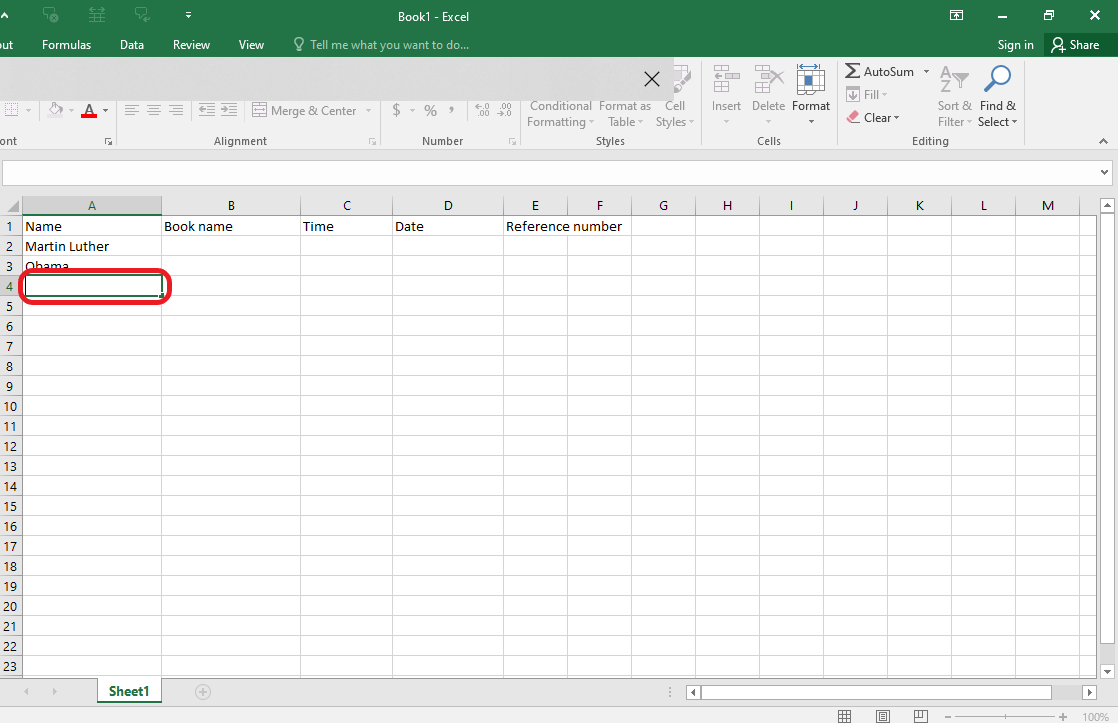
Step 12: Click on the Microphone to dictate your content.
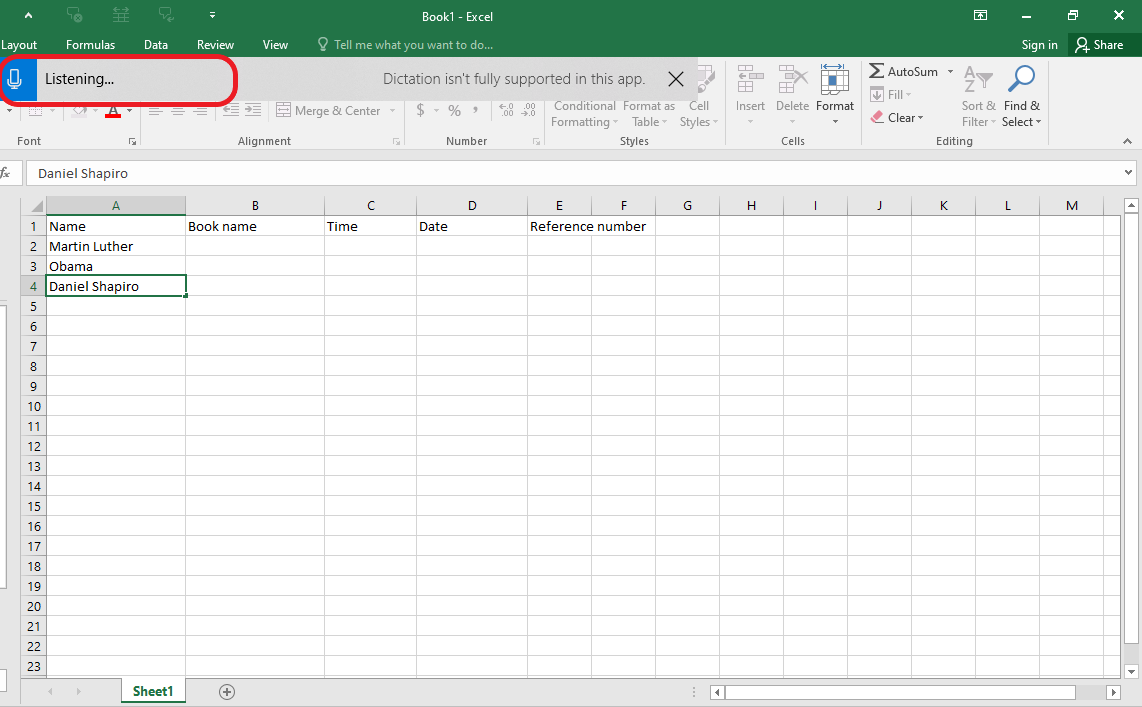
Step 13: Press ‘Enter’ to move to the next cell and repeat the process till you input all your content. (The microphone automatically goes to sleep once you press the Enter button. Click on it to awaken it and speak your content.)
Important notes:
You need to adhere to specific rules to ensure the accuracy of your dictation results:
Dictate in a silent room where there is no noise distraction.
The microphone should be close to the mouth to pick up only your sound and ensure clarity.
Remember to train the speech recognition feature to master your pronunciations and intonations.
Use a monotone, low voice for the best results.
Use a computer with good processing power for a rich audio result.
When dictating, only pause when you have completed a section.
Tired of tedious data entry? Notta brings voice dictation directly to Excel. Simply speak to fill cells, formulas, headers and more. Focus on analysis instead of clicking and typing. Boost efficiency beyond your dreams.
How to dictate text in Excel with Notta
Notta can help you dictate your speech to text and expert it using Excel. Here is how:
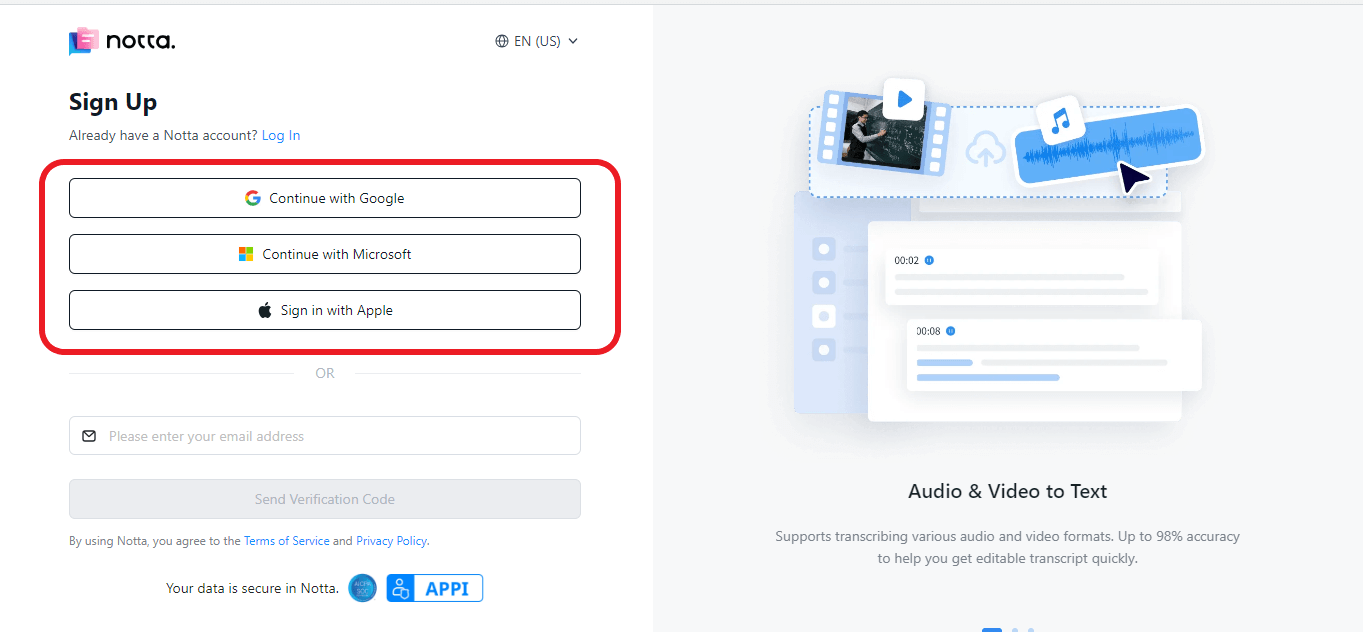
Step 1: Create an account or log in to your Notta account.
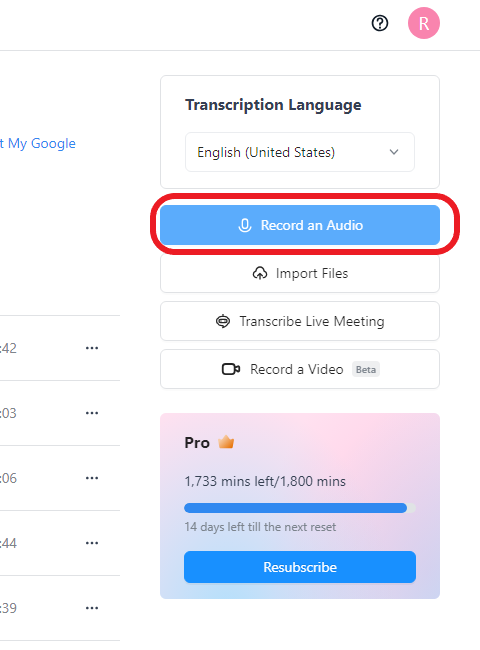
Step 2: Select ‘Record an Audio’ on the right side of the dashboard after signing in and start dictating your text.
Step 3: The transcription will happen in real-time. Once you finish, end the recording by pressing the red ‘Stop’ button. Make any edits to the transcript using the inbuilt editor.
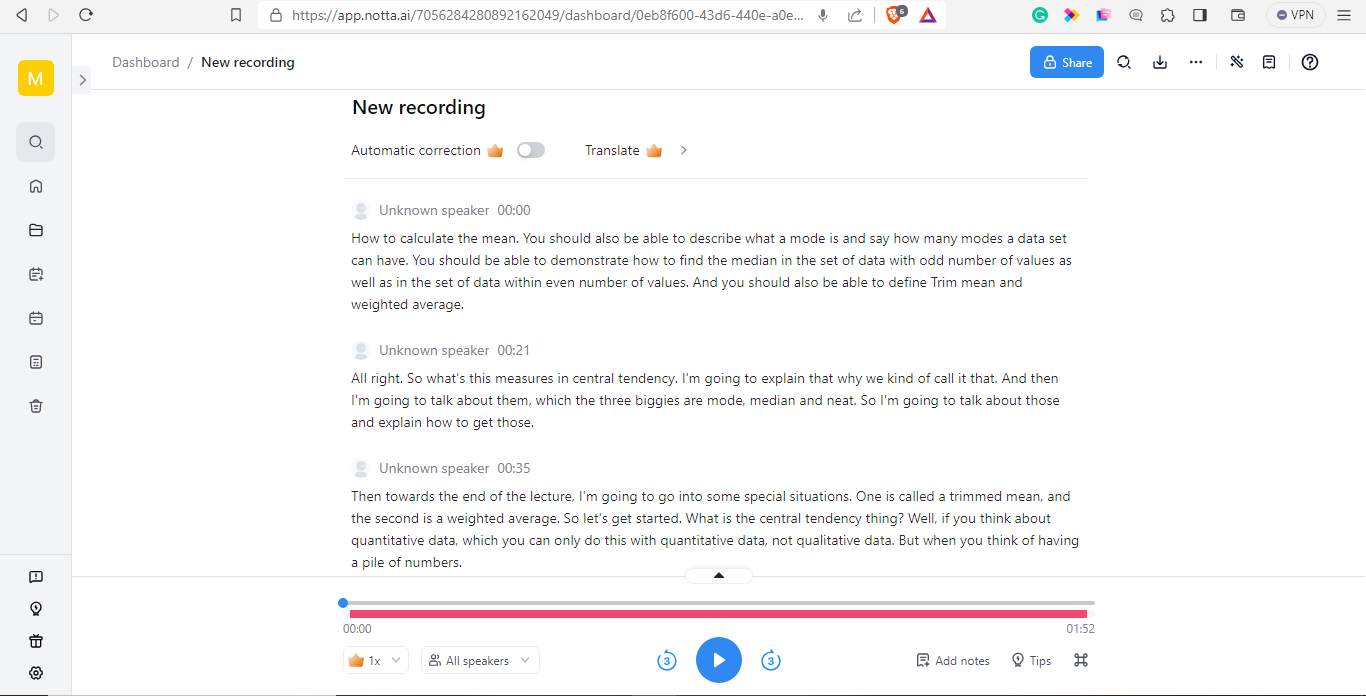
Step 4: Click the ‘Download’ icon on the top right corner to export the transcript.
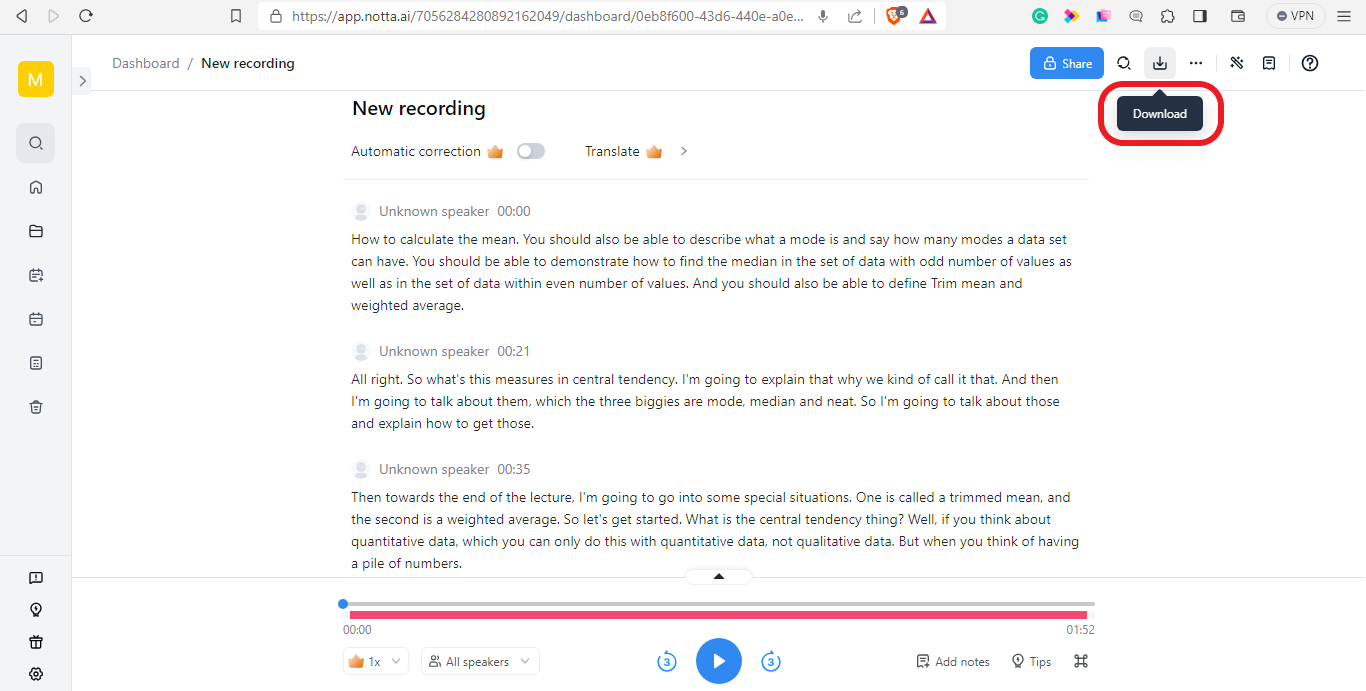
Step 5: Choose the export format in the pop-up box that appears. Select ‘Microsoft Excel XLSX’ format, choose what you want to appear, then click ‘Export.’
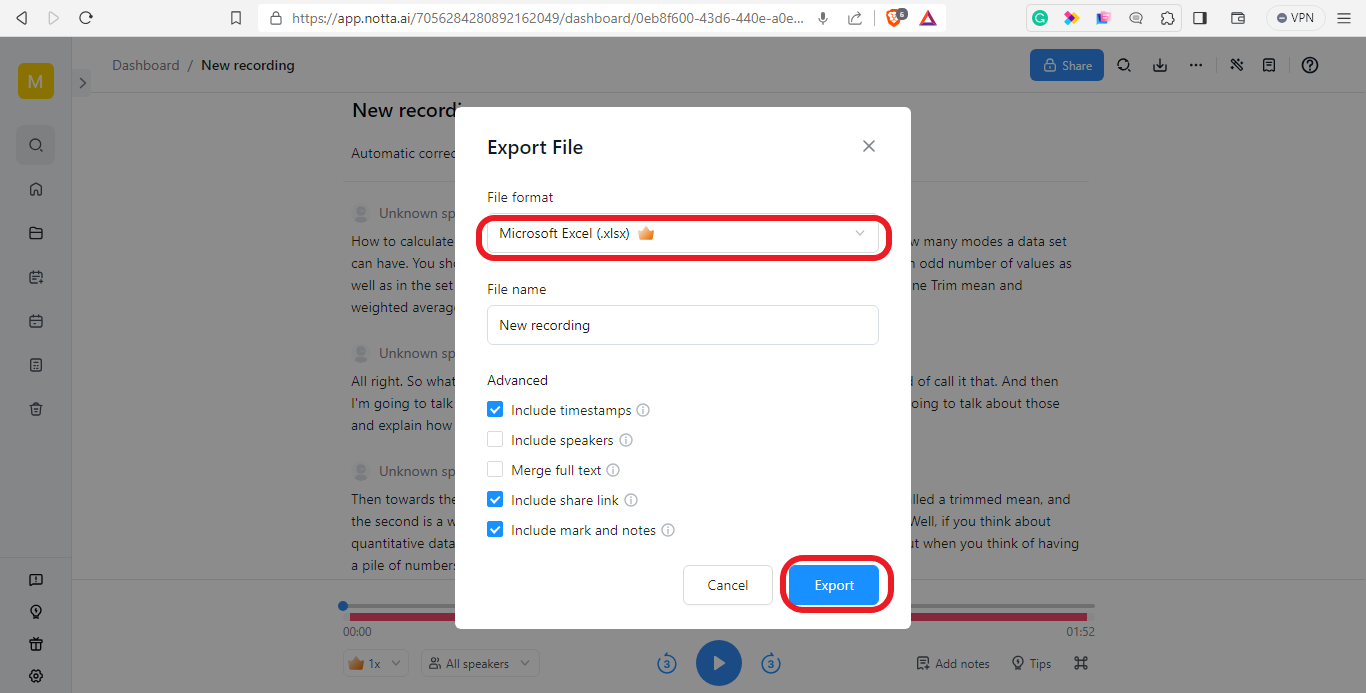
Step 6: Open the downloaded .xlsx file in your Microsoft Excel.
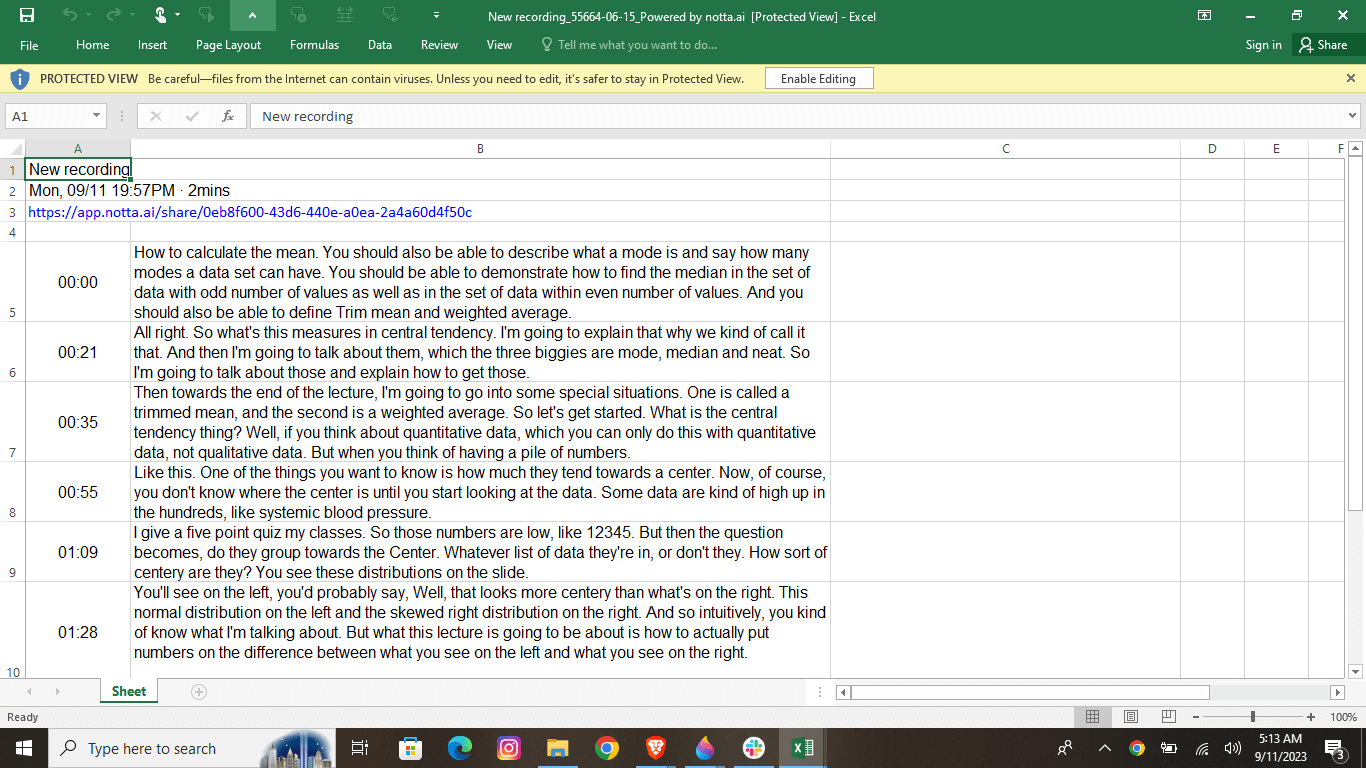
As you can see, dictating Excel speech-to-text is straightforward for both tools. So, what’s the differentiating factor?
Whether you're writing, researching, or brainstorming, allow Notta to enhance your workflow to unprecedented heights. Dictate from anywhere, on any device, and experience the difference.
Comparision beteween Windows Speech Recognition and Notta
| Microsoft Office Dictation Feature | Notta |
|---|---|
| Slightly Accurate- slight recording disturbance can affect the dictation quality. | Very accurate - 98.86% accuracy level |
| Needs training to recognize your voice | Does not need any training |
| Workload is extensive- You have to dictate one cell after another. This can be tiring if you have loads of data to dictate. | It uses AI to transcribe your audio and create your entire Excel file in minutes. |
Start voice dictation in Excel
The dictating feature is one of the most underutilized tools in Microsoft. Although we can list numerous reasons for this, massive changes in the technological landscape have once again put this tool in the limelight.
The advancement in AI and machine learning has dramatically impacted speech recognition, making it easy, fast, and affordable to convert speech to text. As a result, users can save time, improve their workflows, and increase efficiency.
Does this mean that the era of typing is coming to an end?
We cannot predict the future, but one thing is sure: the value of speech-to-text recognition tools is rapidly growing. For more accurate dictations in Excel, try using Notta today.