
How to Use Evernote Speech to Text
98% accurate, real-time transcription in just a few clicks. 58 languages and multiple platforms supported.
Are you an avid Evernote user who’s looking for a faster way to take notes? Evernote supports both the ability to type notes and take voice notes. Wouldn’t it be great if you could do both at the same time?
We’ve helped millions of journalists, bloggers, and students around the world do just that. Our automatic speech recognition solutions help them speed up their workflow.
In this article, we’re going to show you have to use speech-to-text within Evernote. This allows you to speak to your device as it types the words on the screen.
Can Evernote convert speech to text?
Evernote does not have a speech-to-text function built-in into their app. However, you can use native voice typing features on your device to convert speech to text within the Evernote platform. If your device does not support voice typing, there are also third-party solutions you can use, such as Notta.
How to dictate notes with Notta
The methods we discussed above can be a convenient way to get some rough notes down quickly. However, you may spend more time editing it than actually taking notes.
There are more accurate tools that you can use to save time and money. AI transcription services such as Notta can transcribe your voice with up to 99% accuracy. This is a much faster and more efficient method than using voice typing.
AI has not yet reached the accuracy of human transcription, but it is surprisingly close. It’s essential to have a high-quality recording without any background noise or crosstalk in order to get the best result.
Here’s how to use Notta to dictate your notes:
Step 1: Log in to your Notta account and click ‘Record an audio’ on the toolbar to the right.
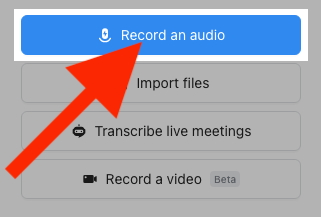
Step 2: Start speaking, and Notta will record and transcribe your voice in real-time.
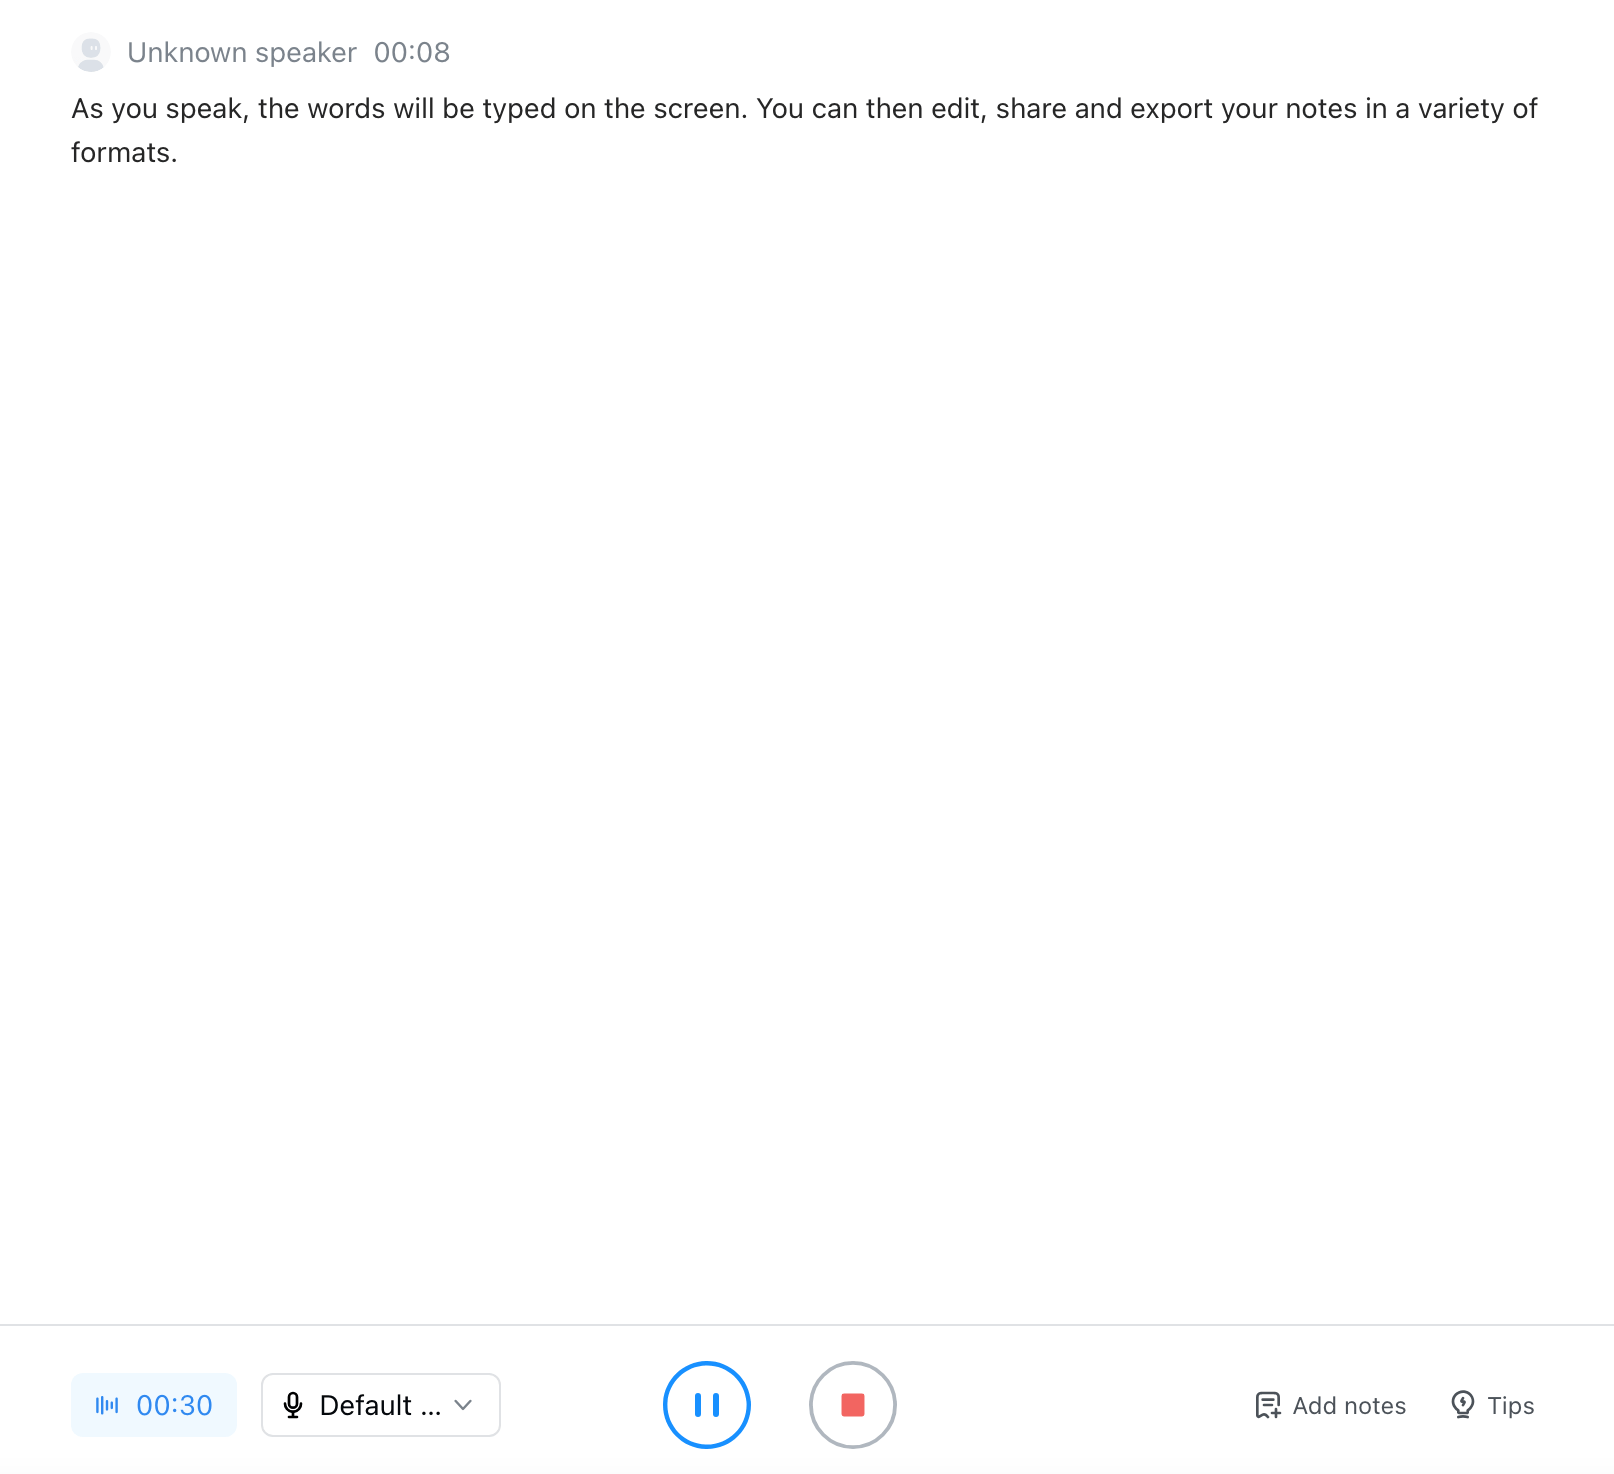
Use Notta's AI transcription tool to quickly and easily transcribe audio and videos. We guarantee accuracy and ease of use.
How to set up voice dictation on Mac
In order to use dictation, you’ll need Mac OS X Mountain Lion or later. Here’s how to configure voice dictation to use with Evernote on Mac:
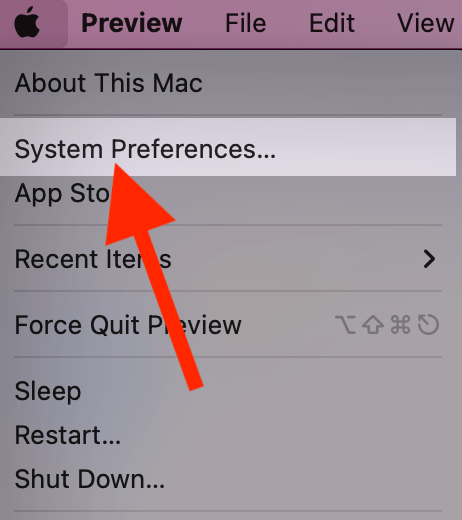
Step 1: Click the ‘Apple Icon’ at the top left of your screen. Then click ‘System Preferences.’
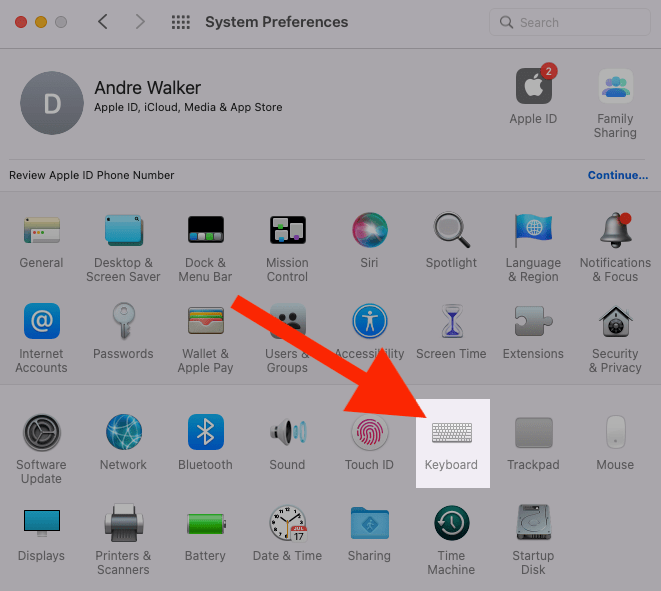
Step 2: Click ‘Keyboard.’
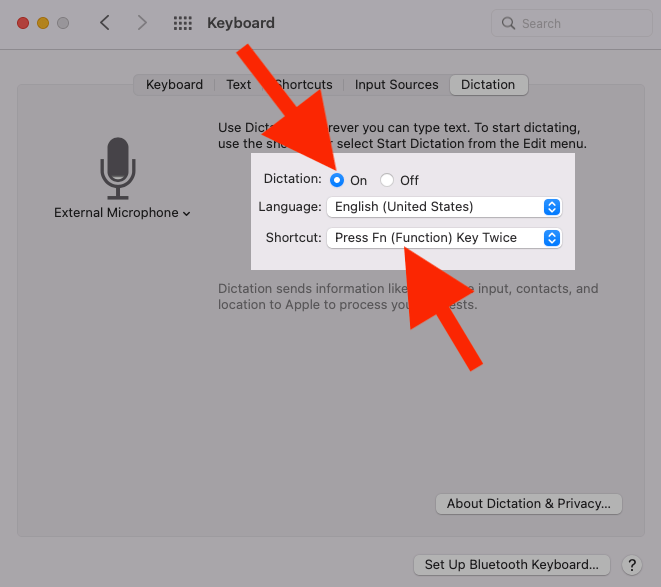
Step 3: Tick ‘Dictation’ on and set your ‘Shortcut’ key. The default shortcut key is to press Fn (Function) twice. You can leave it as default or change it to something more convenient for you.
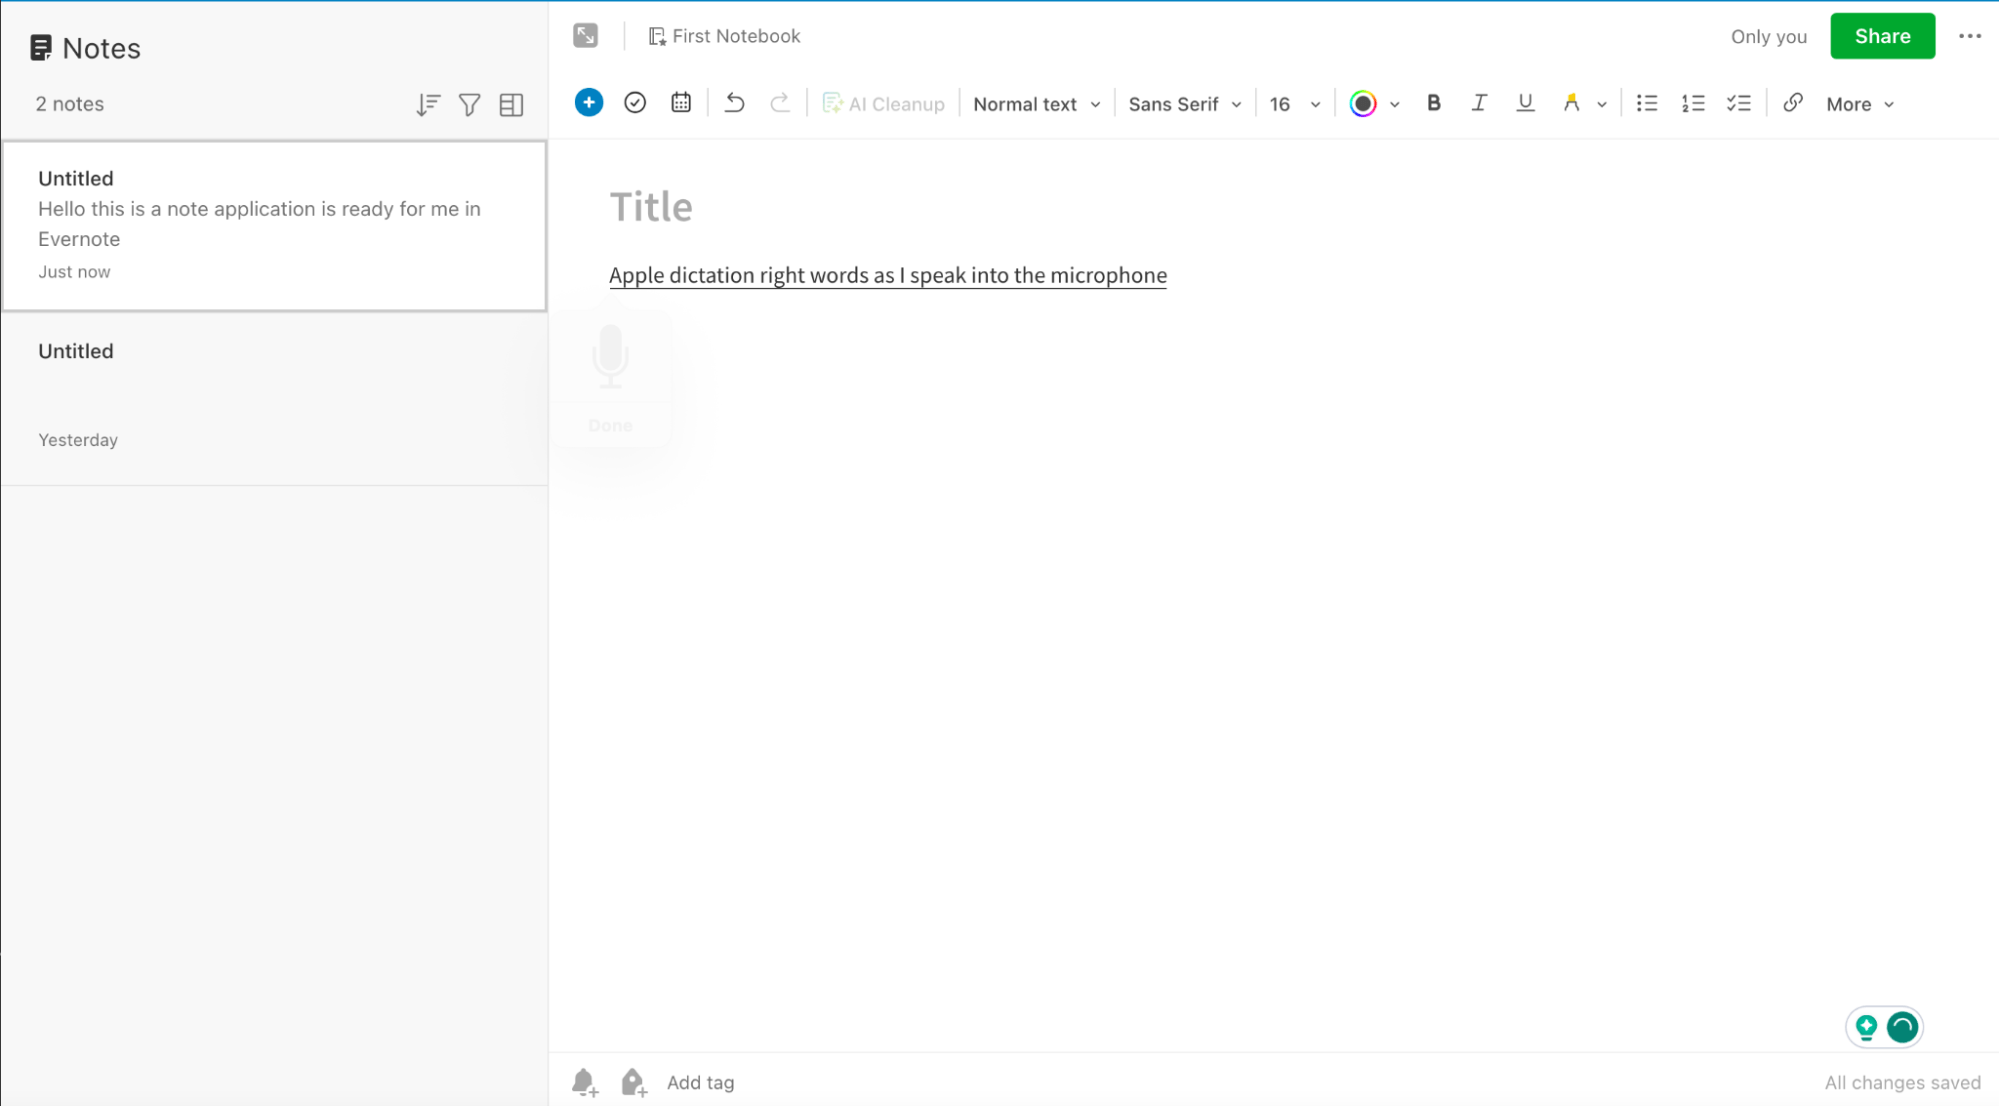
Step 4: Go to Evernote and create a new note. Click in the text field, then press your Shortcut key twice. You will then see a microphone icon pop up on the screen, indicating you to start speaking. As you speak, dictation will try its best to write what you say on the screen.
How to set up voice dictation on Windows
This process can be slightly different depending on which version of Windows you’re using. However, many of the steps can apply to any version of Windows that supports dictation.
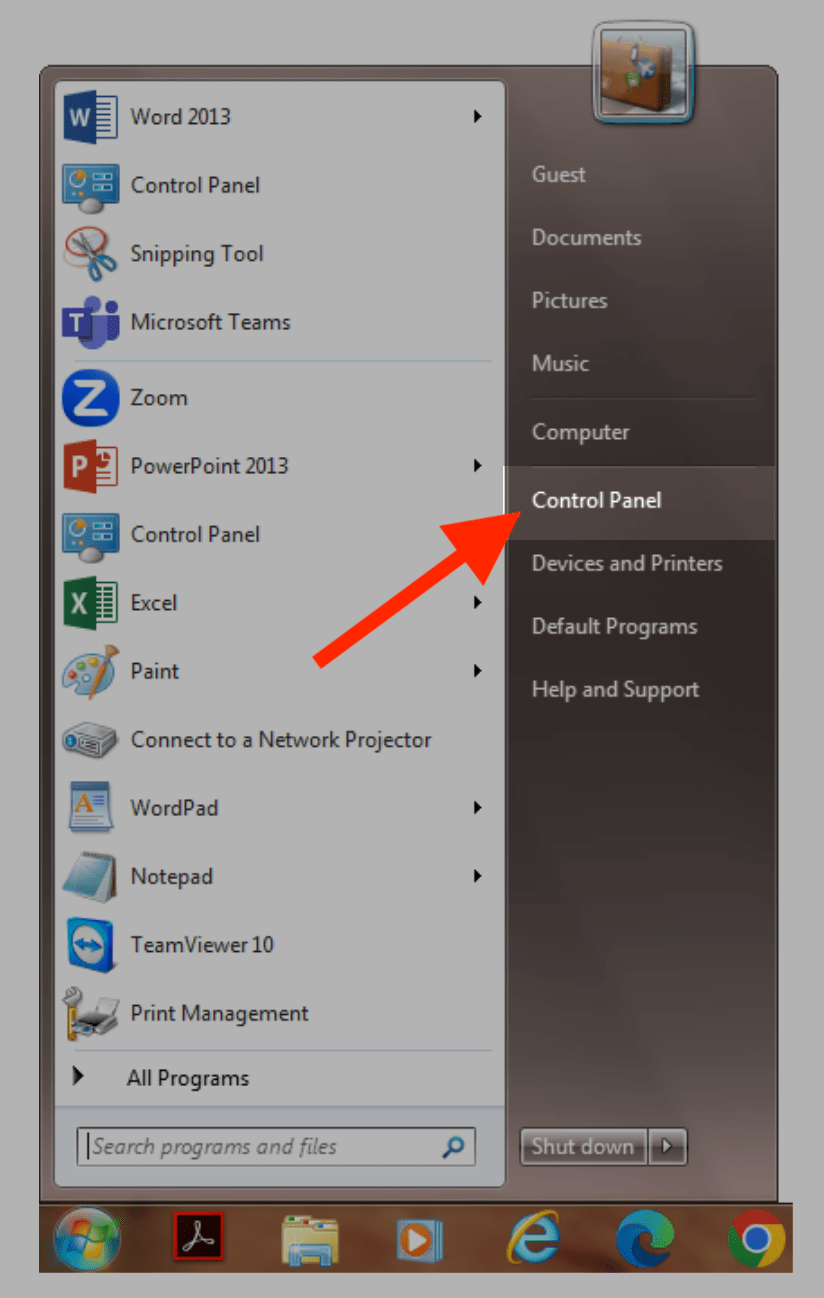
Step 1: Click ‘Start’ then click ‘Control Panel’ or ‘Settings.’
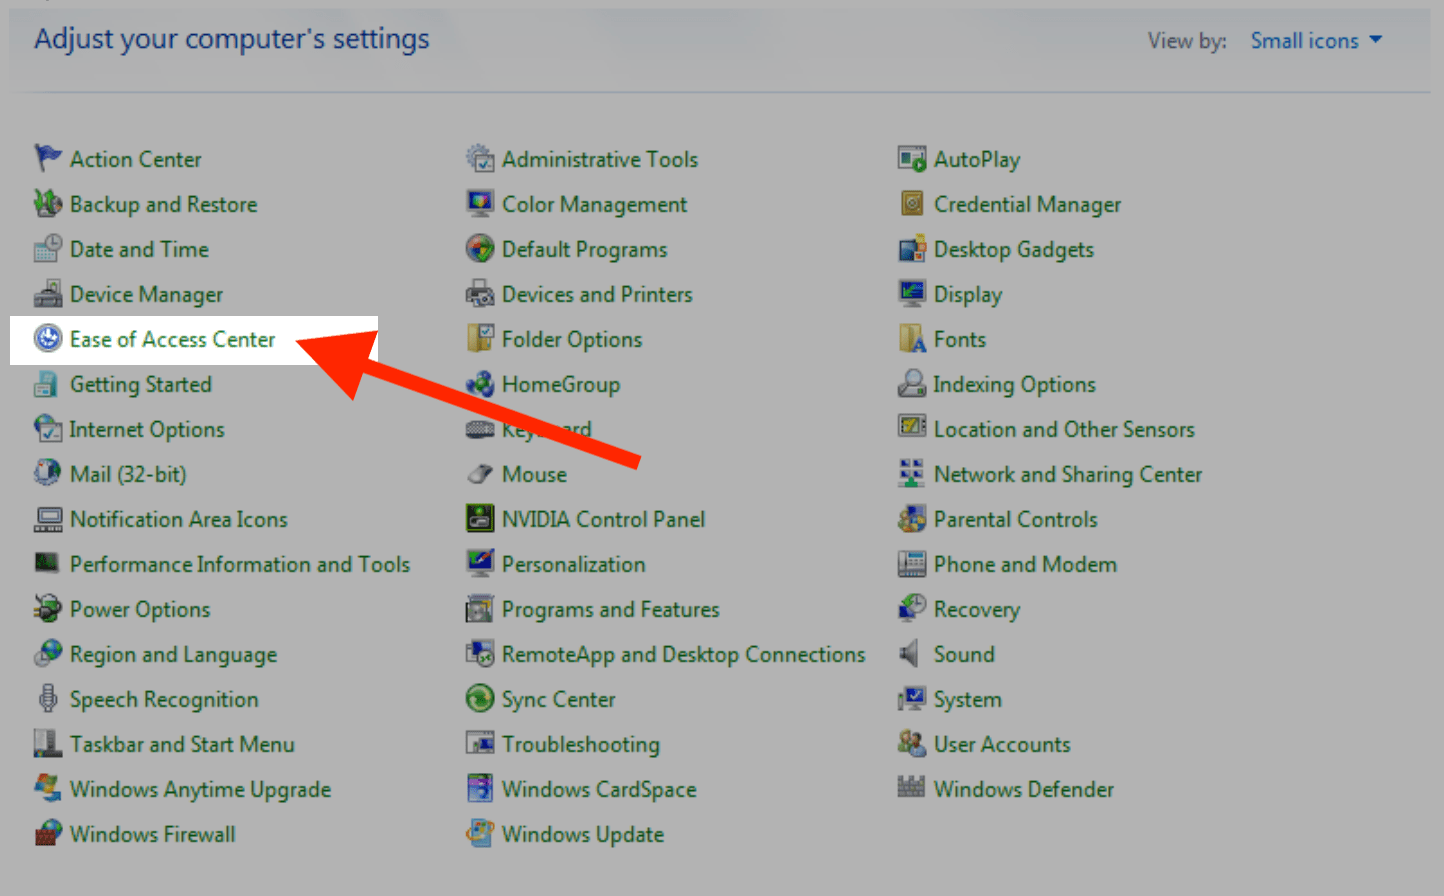
Step 2: Click ‘Ease of Access.’
Step 3: Click ‘Use the keyboard without a mouse or keyboard.’
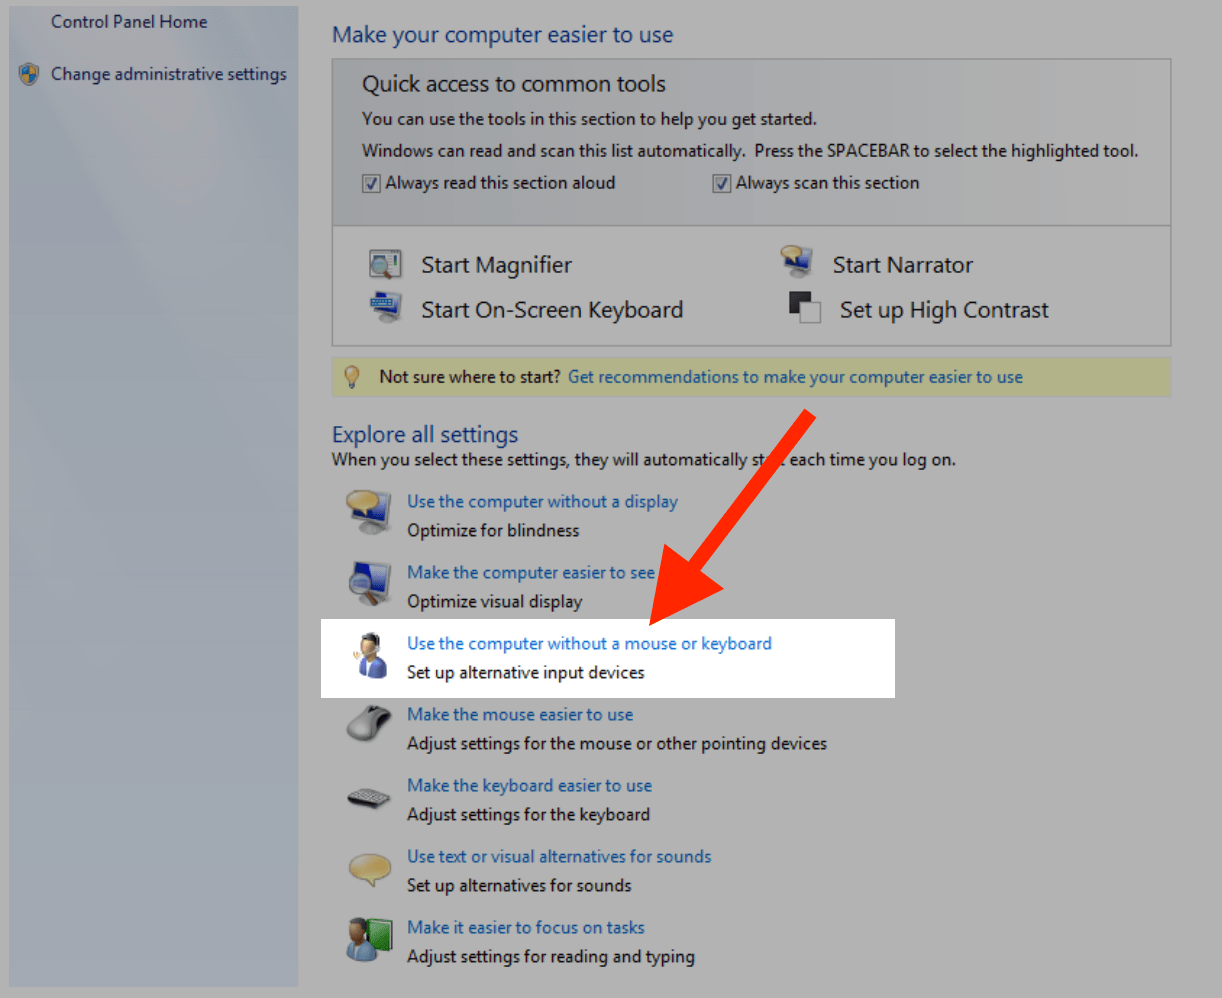
Step 4: Click ‘Use Speech Recognition.’
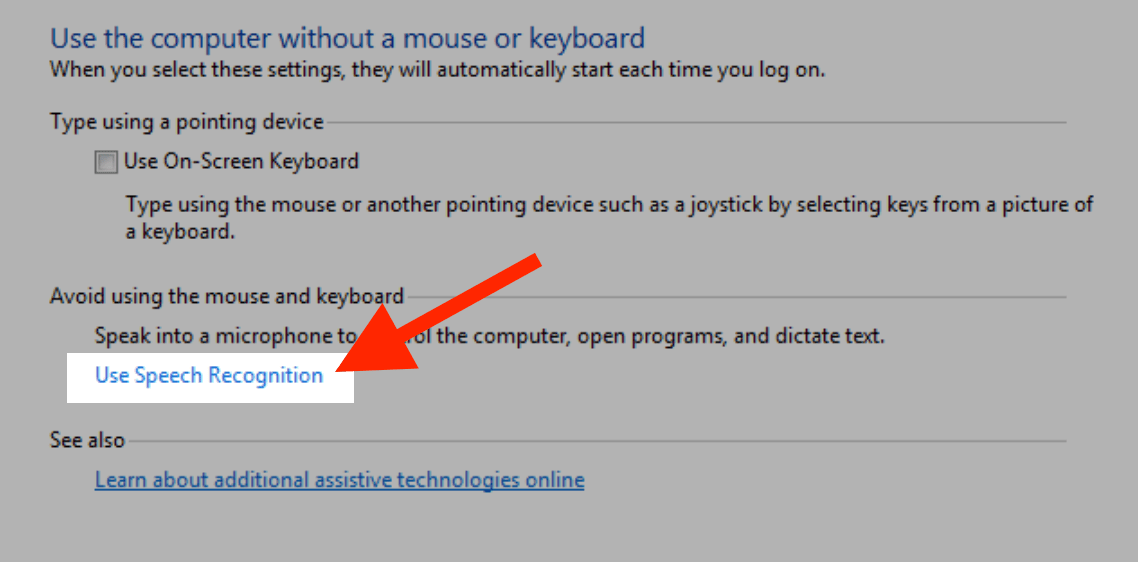
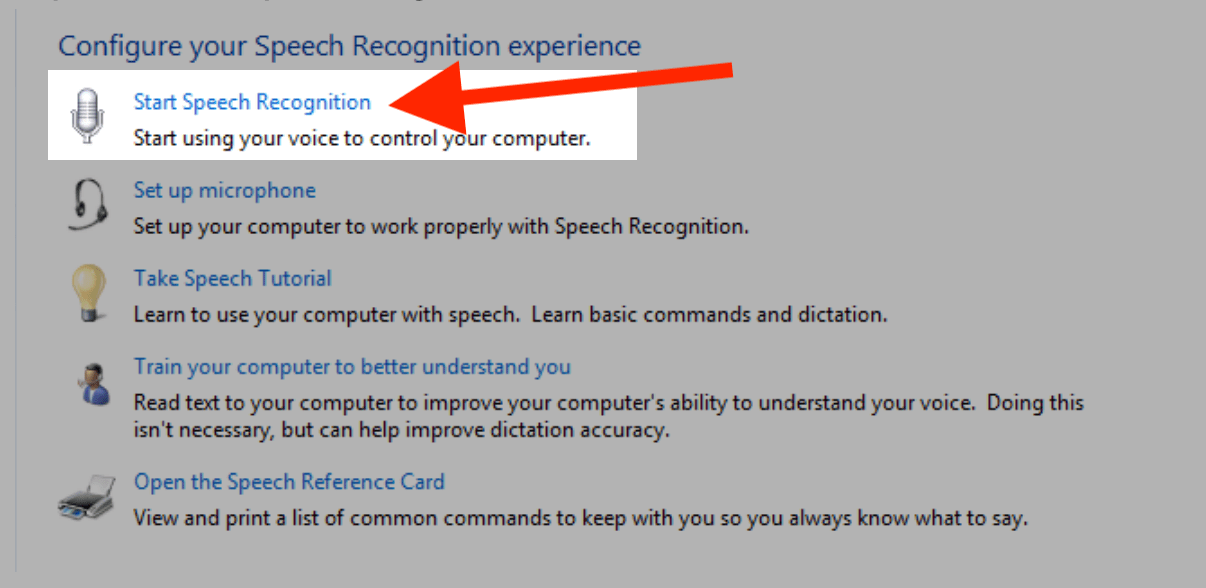
Step 5: Click ‘Start Speech Recognition.’
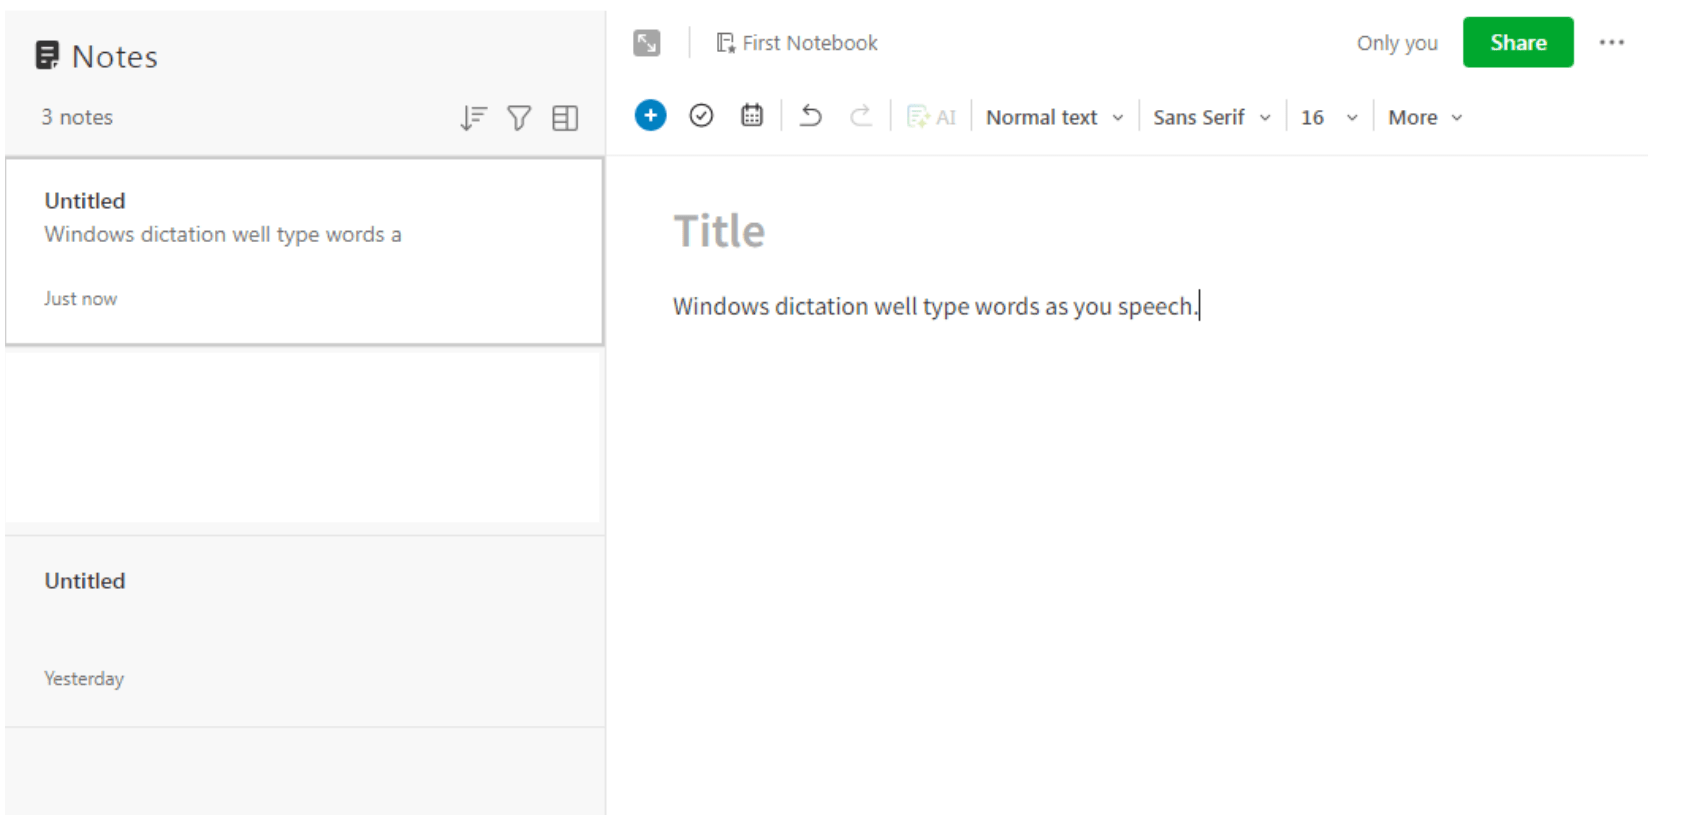
Step 6: Go to Evernote and create a new note. Click into the text field, and Windows will try to type the words you speak as you type.
Notta can convert your spoken interviews and conversations into text with 98.86% accuracy in minutes. Focus on conversations, not manual note-taking.
How to set up voice dictation on iPhone/iPad/iPod Touch
Setting up voice dictation on iOS devices is fairly straightforward. Here’s how:
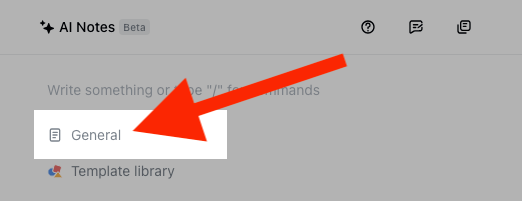
Step 1: Open Settings on your device and select ‘General.’
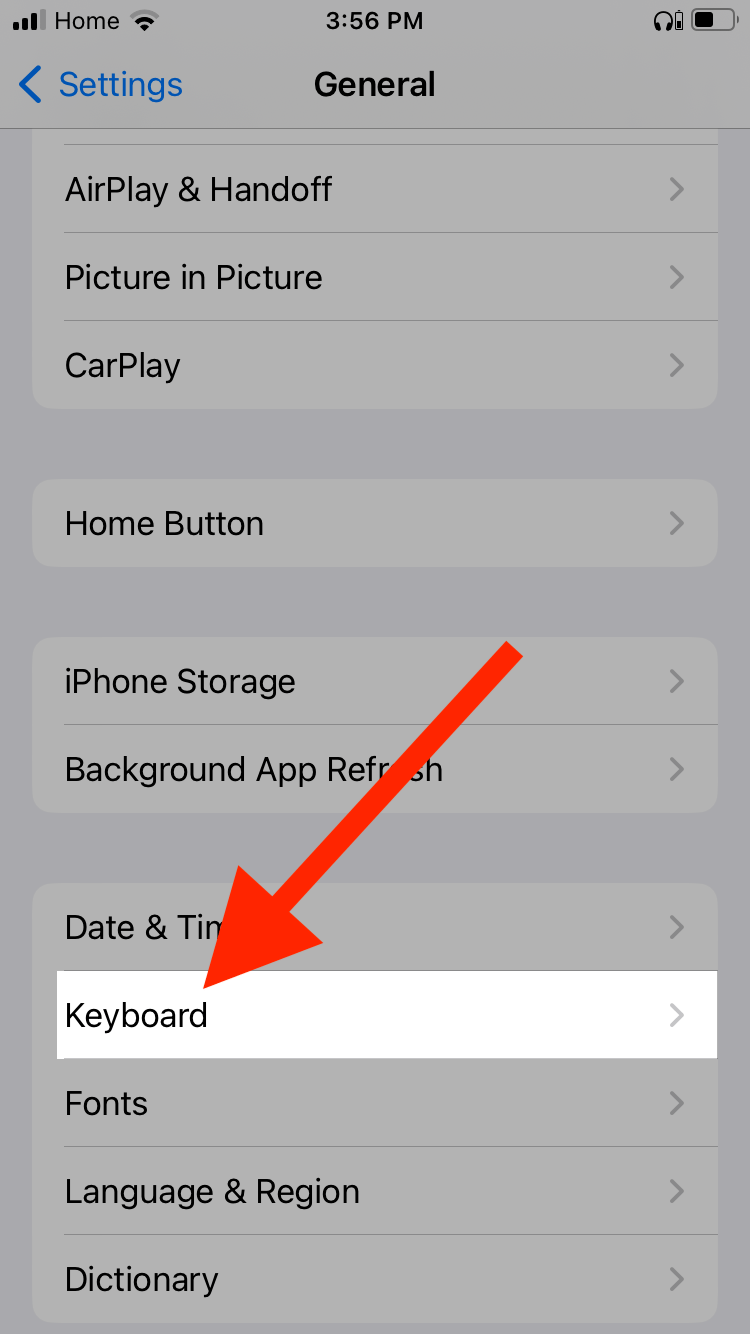
Step 2: Scroll down and select ‘Keyboard.’
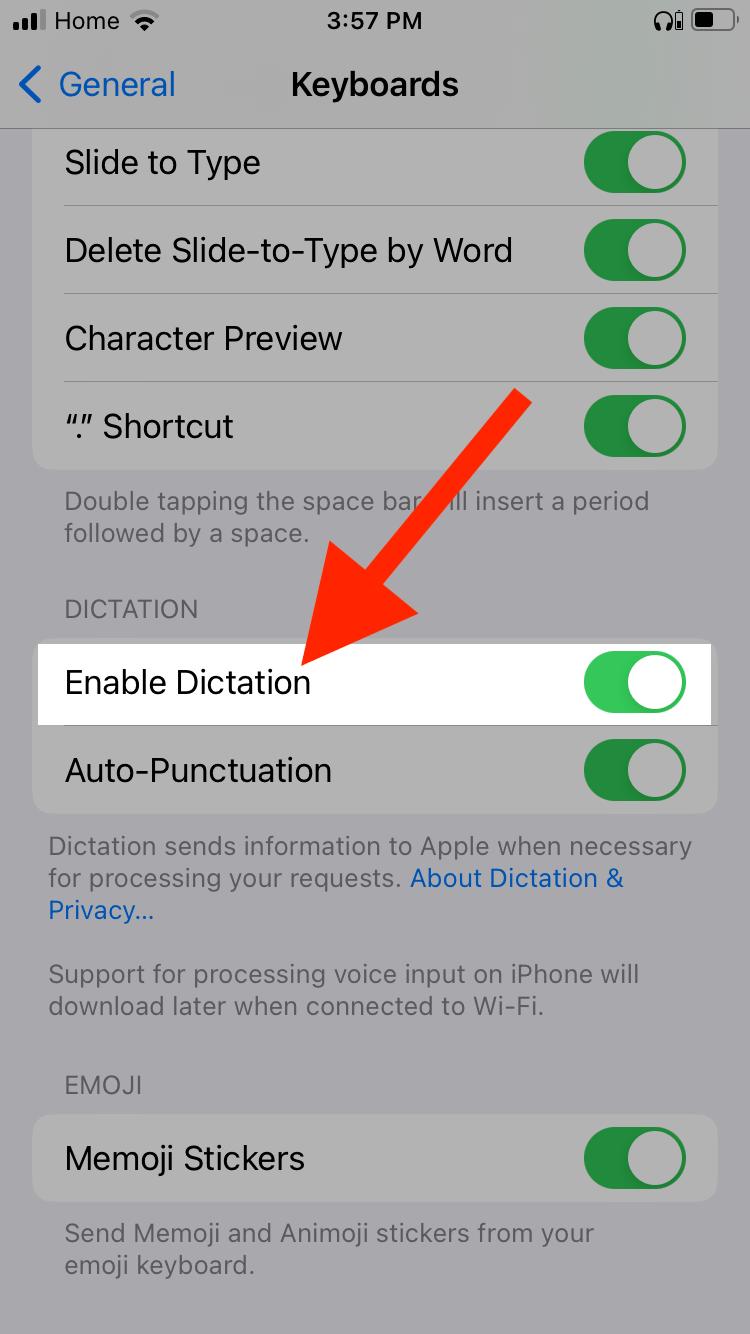
Step 3: Scroll down and tick the option for ‘Enable Dictation.’
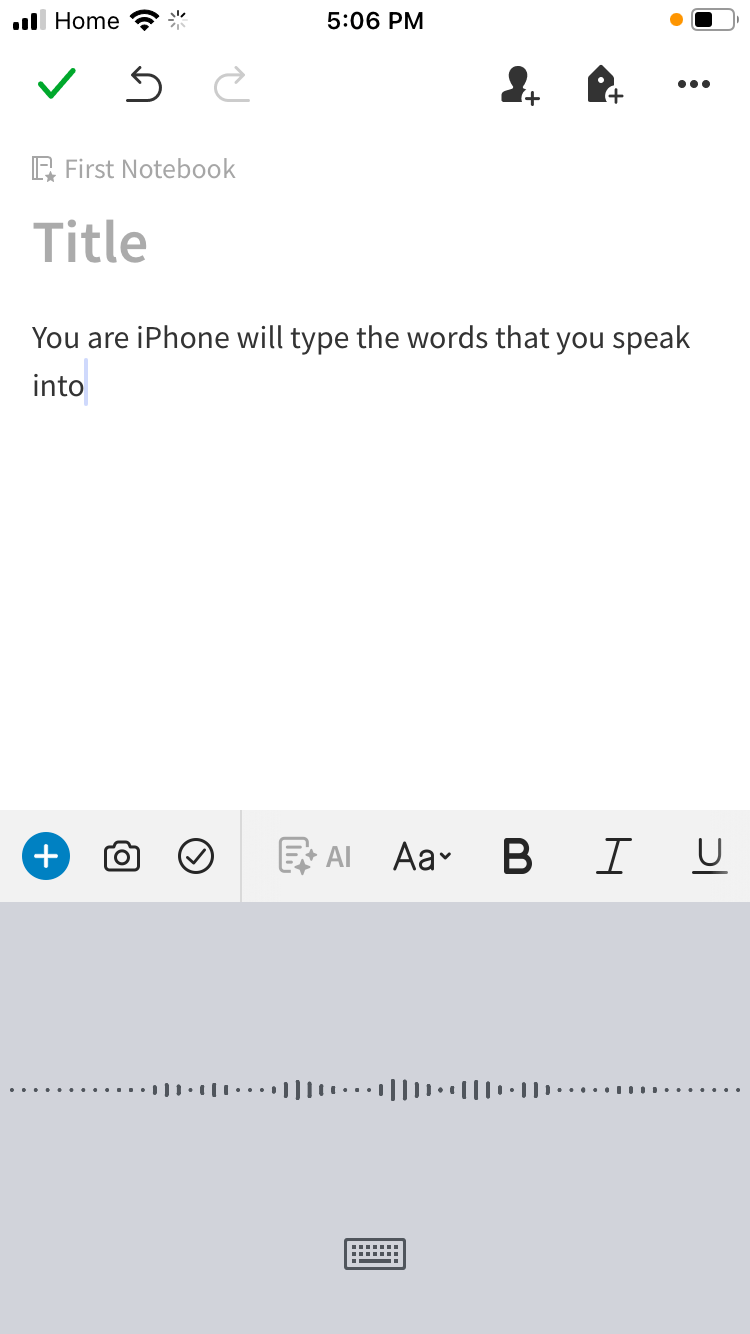
Step 4: Create a new note in Evernote, then tap the ‘Dictation’ key.
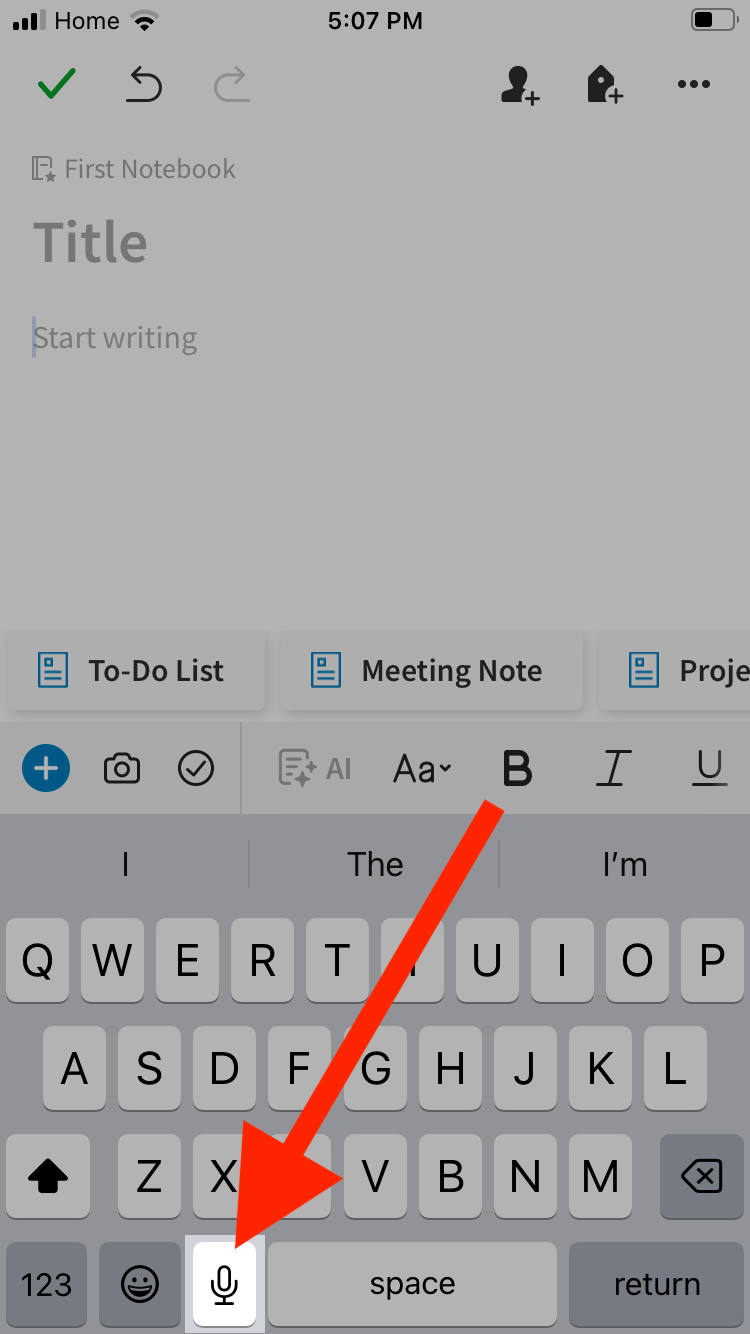
Step 5: Start speaking into your device, and it will try to type the words onto the screen.
How to set up voice dictation on Android
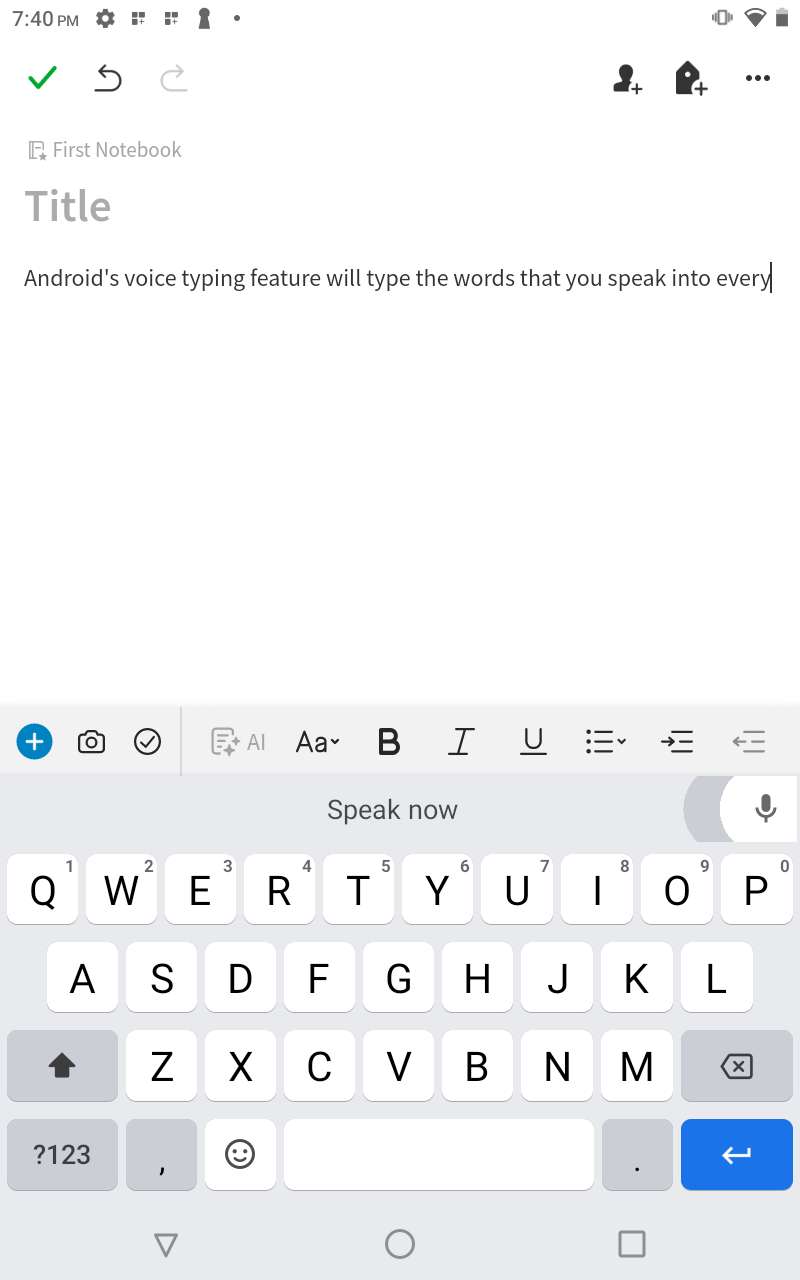
You can use speech-to-text in Evernote on most Androids with Gboard installed. If you don’t have it go ahead and install it from the Play Store. Then follow these simple steps to set up and use voice typing on Android:
Step 1: Open Settings on your Android. Scroll down and tap ‘System.’
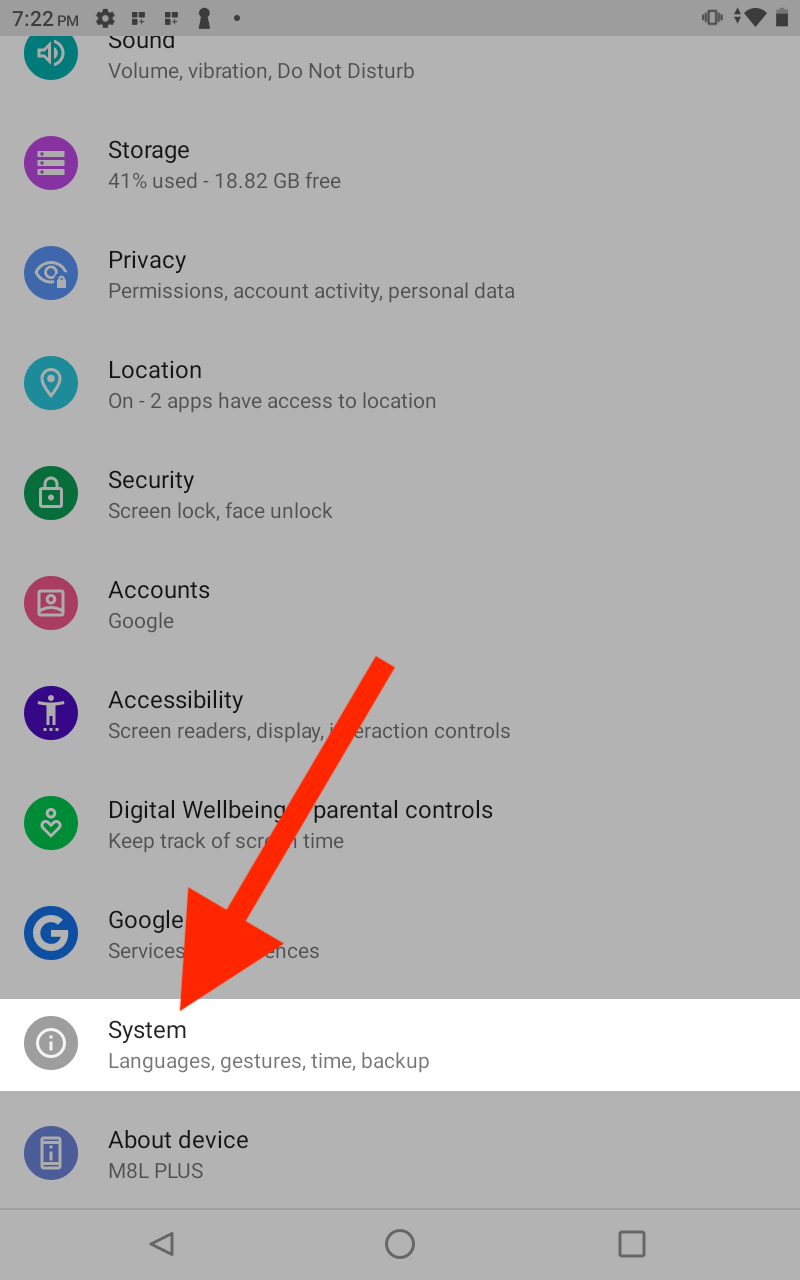
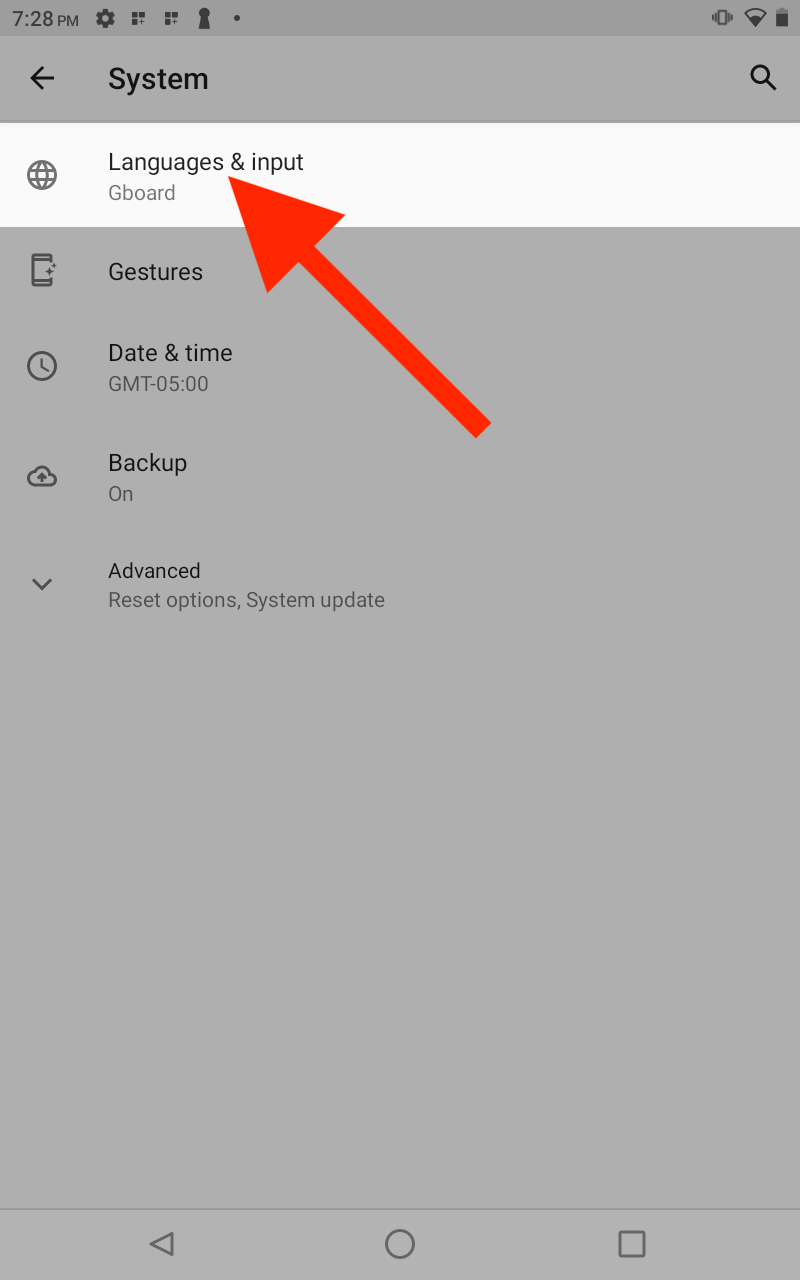
Step 2: Tap ‘Languages & input.’
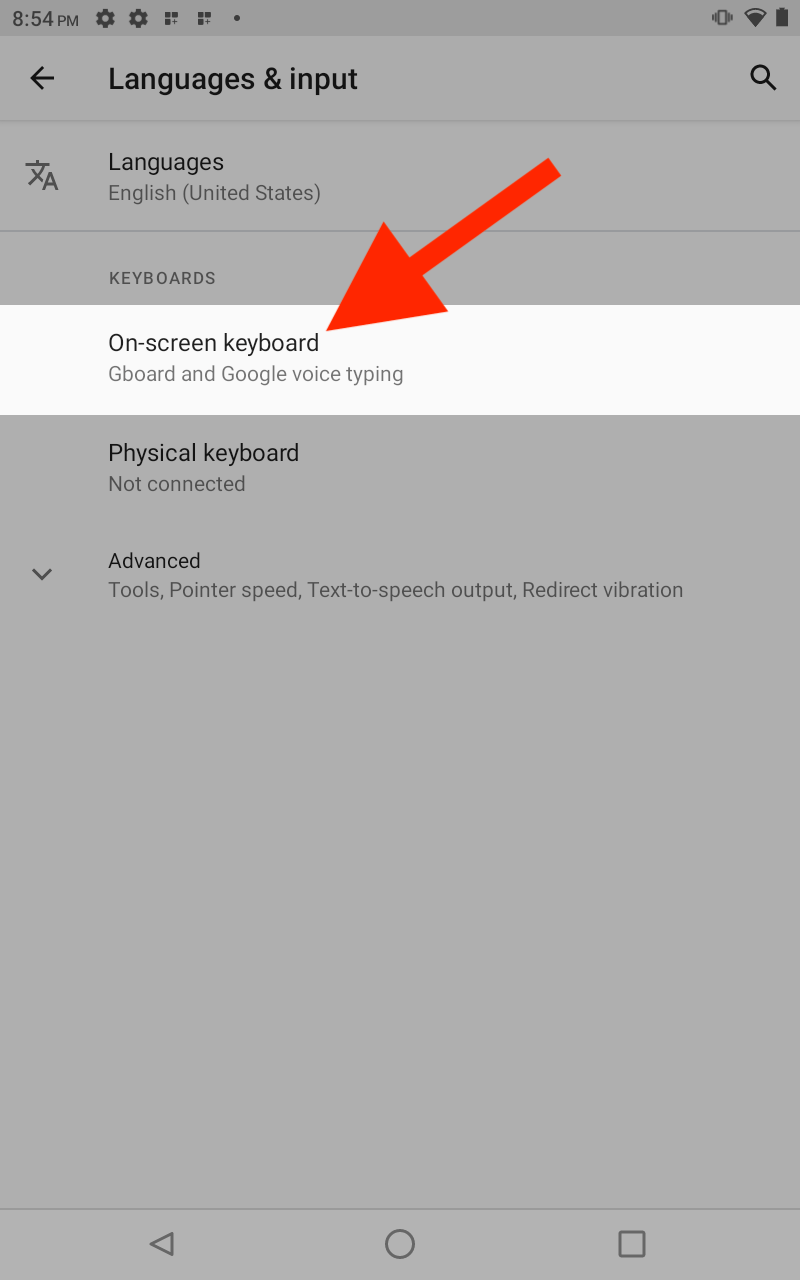
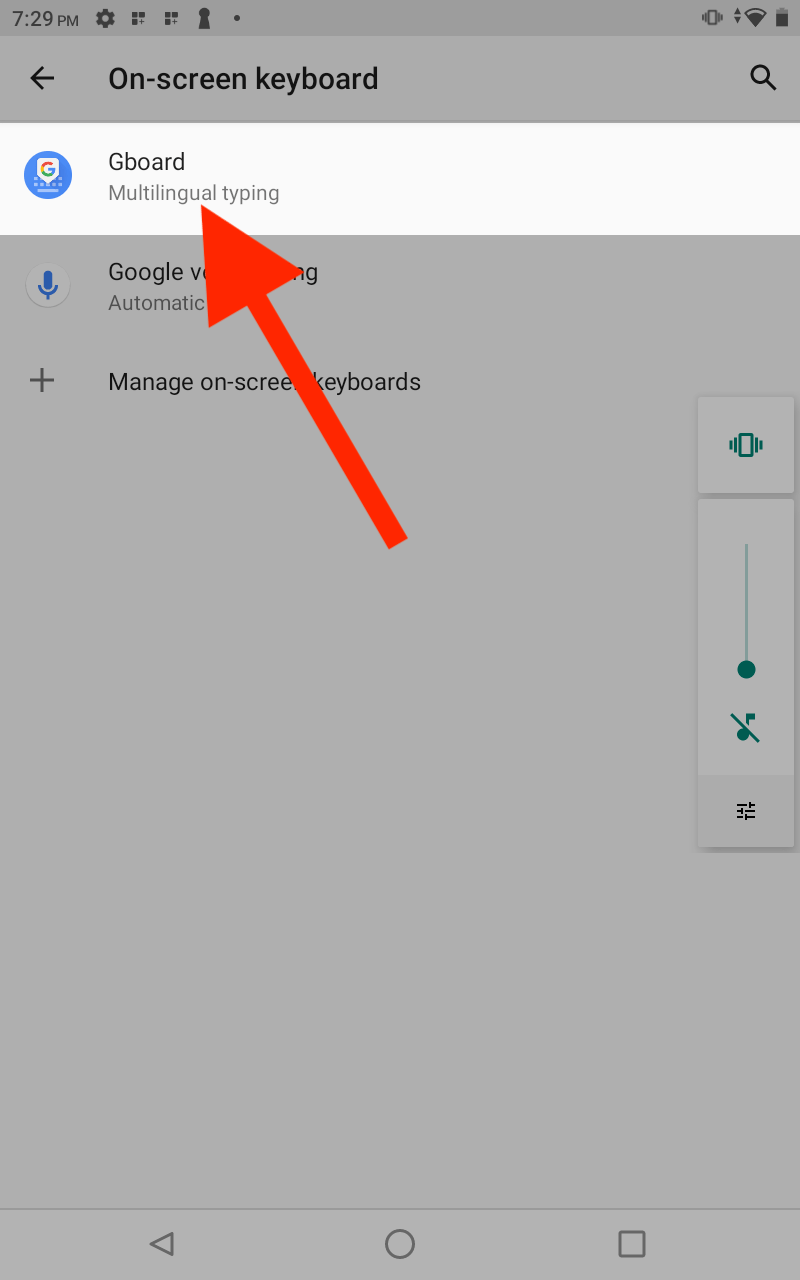
Step 3: Tap ‘On-screen keyboard.’
Step 4: Tap ‘Gboard.’
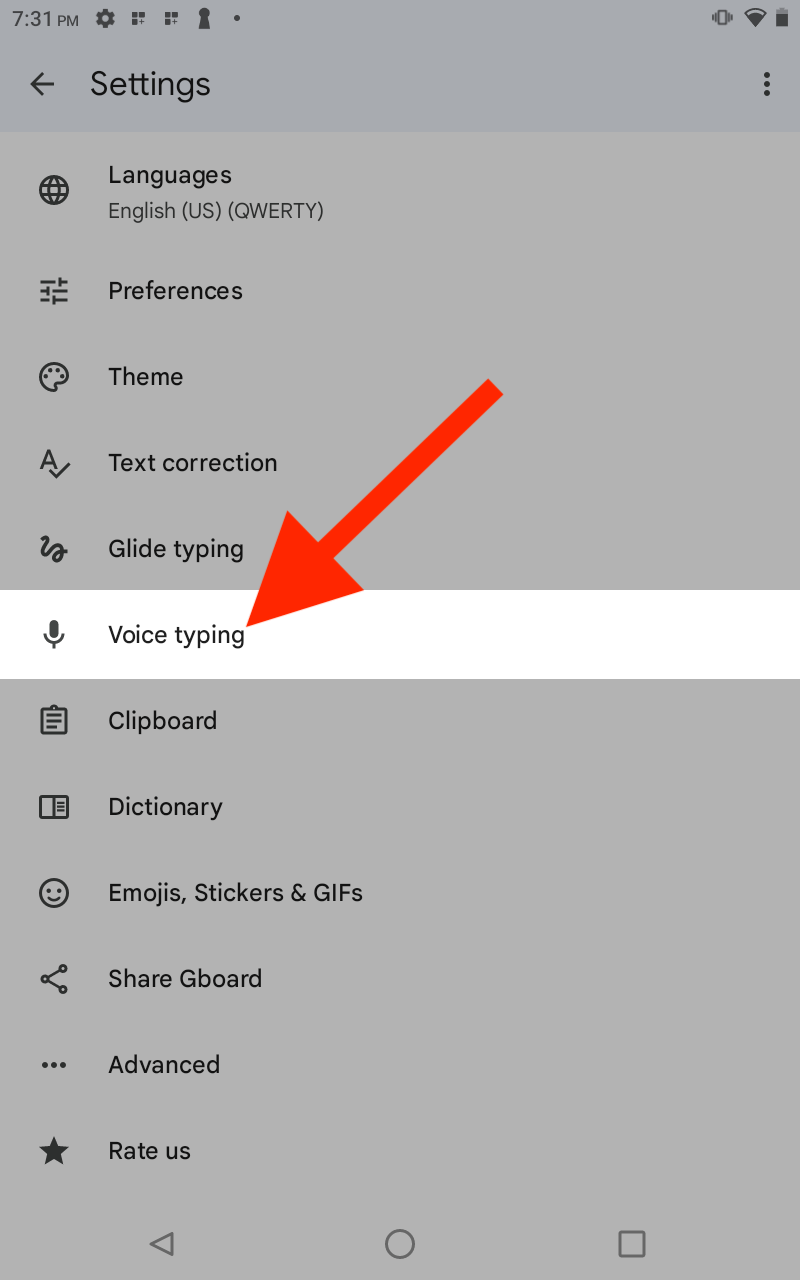
Step 5: Tap ‘Voice typing.’
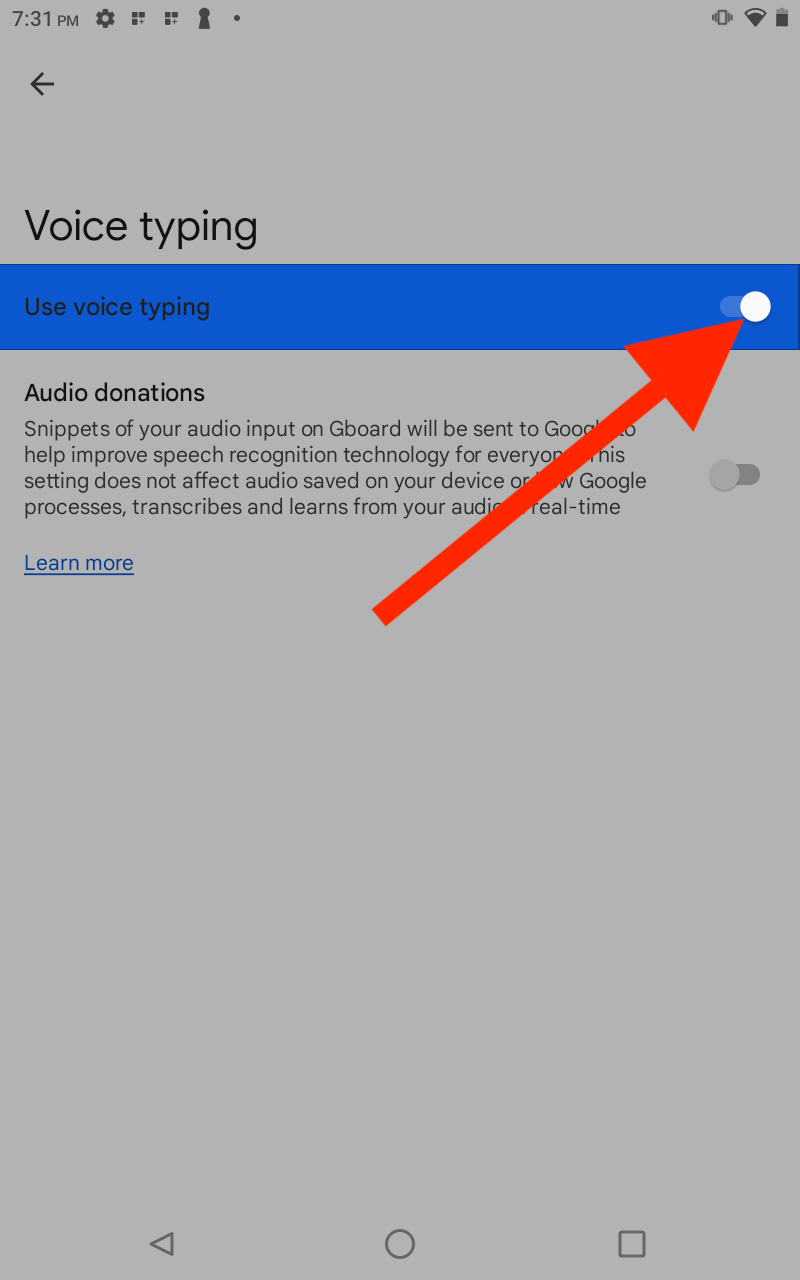
Step 6: Tick ‘Use voice typing’ to turn it on.
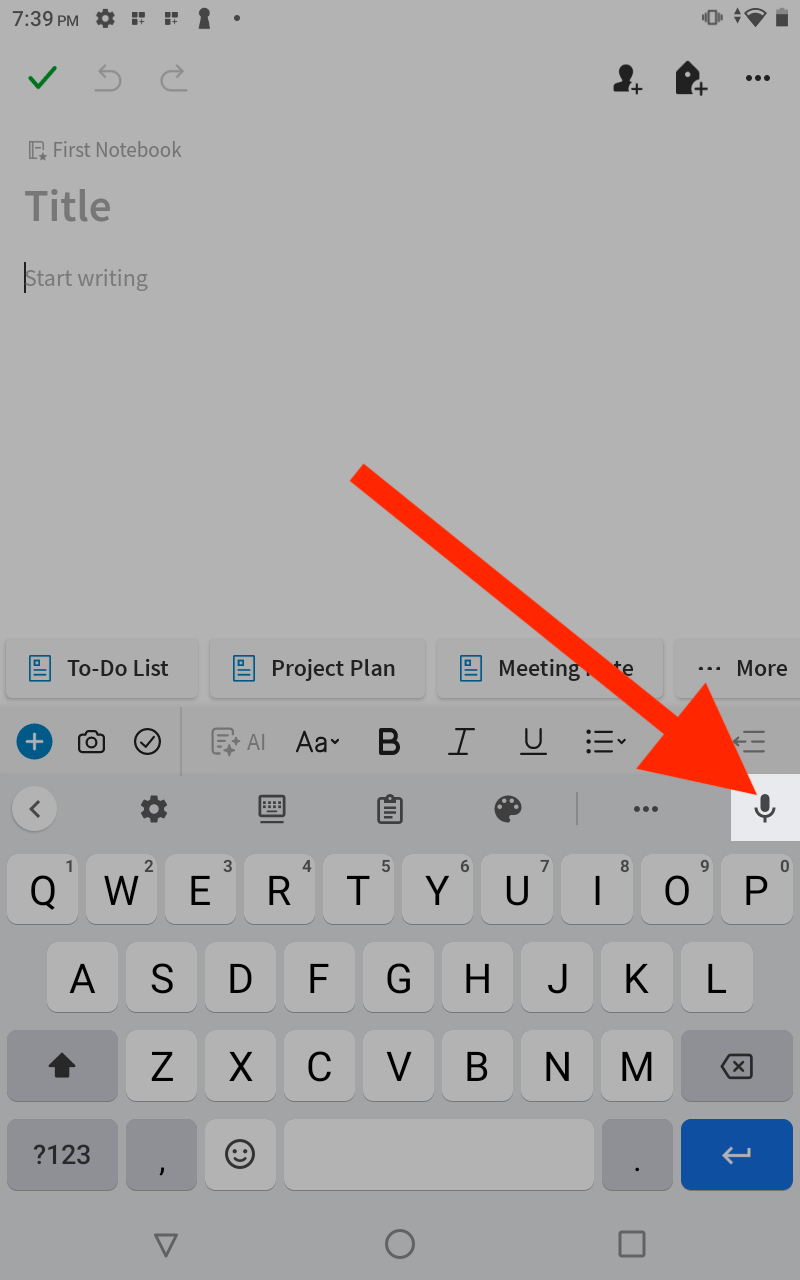
Step 7: Open Evernote and create a new note. Tap the ‘Voice Typing’ key and start speaking. Android will try to type the words you speak onto the screen.
FAQs
How do I turn a voice note into text?
The process for turning a voice note into text is very simple on most modern devices.
Windows:
Open Settings or Control Panel on your computer.
Click ‘Ease of Access,’ then select ‘Use Speech Recognition.’
In places where you would normally use your keyboard, start speaking into your microphone instead.
Mac:
Open System Preferences and click on ‘Keyboard.’
Open the tab for dictation, then tick the option to turn on dictation. Select your hotkey.
When you are within a text field, press your hotkey to turn on voice typing. Start speaking in your microphone to convert your speech to text.
iPhone, iPad and Android:
There will be an icon on your keyboard that looks like a microphone. Tap this icon to start voice typing.
Speak into your phone, and it will type the words on your screen.
Can ChatGPT transcribe audio to text?
ChatGPT has the ability to transcribe audio to text using the Whisper API from Open AI. However, it is not as simple to use as typing a text command into ChatGPT. You will need some Python knowledge to design a custom transcription app to use it.
How to improve your dictation accuracy
There is a slight learning curve with dictation. The best way to improve your accuracy is to start close and speak clearly into your microphone. Here are a few other tips:
Use a high-quality microphone.
Eliminate all background noise.
Make sure there is no crosstalk.
Does Google Docs have voice-to-text feature?
Yes, Google Docs has a voice-to-text feature. To use it:
1. Click Tools, then click ‘Voice Typing.’
2. A microphone icon will appear. Click on the microphone to start voice typing.
3. Then, start speaking, and it will type the words you say onto the screen.
Final thoughts
We hope this guide helps you use speech-to-text in Evernote. No matter what device you’re using, there’s a solution here for any Evernote user.
When you need a highly accurate tool to take notes, use Notta. It supports 58 languages with high accuracy. Sign up for your free account today.