Also read: How to spotlight on Zoom
How to Get a Transcript from a Zoom Recording: 4 Steps
98% accurate, real-time transcription in just a few clicks. 58 languages and multiple platforms supported.
If you’re one of Zoom’s 200 million daily meeting participants, having a reliable way to capture and reference what was discussed is crucial. One helpful Zoom feature is the ability to generate automated transcripts from cloud recordings. This makes it easier to revisit important conversations and keep accurate records.
Whether you're using the platform for interviews, team meetings, or webinars, knowing how to access and manage these transcripts can save time and streamline your workflow.
In this article, we’ll walk you through how to get a transcript from a Zoom recording after your meeting, ensuring you never miss a detail.
How to get a transcript from a Zoom recording
There are two recommended ways to quickly and easily get a Zoom transcript from recorded meetings.
Zoom native transcript: This is the official built-in transcription tool that Zoom offers through its cloud recordings. But, it’s not the most accurate approach. Plus, there are limited formatting options, which can make it challenging to edit transcripts on the go.
Notta: A third-party service like Notta helps you generate the most precise transcripts for your meetings. Notta offers a highly accurate AI-powered transcription service with tons of customization options that make transcription a breeze.
| Methods | Zoom Native | Notta.ai |
|---|---|---|
| Accuracy | 70-80% | 98.86% |
| Ease of Use | High | Moderate |
| Speed | Fast | Faster |
| Formatting Options | Limited | Customizable |
| Cost | Included in Zoom Plan | Subscription Based |
Notta can convert your Zoom recordings into detailed transcripts with 98.86% accuracy.
Requirements for getting transcripts from Zoom cloud recordings
Before you can access transcripts from Zoom cloud recordings, you need to meet a few prerequisites:
Have the correct Zoom license: You need a Business, Education, or Enterprise plan to access advanced features such as Zoom cloud recordings.
Enable cloud recording on your Zoom account: This allows you to activate the audio transcription feature.
How do you enable cloud recording on your Zoom account?
To turn cloud recording on (or off) for all your Zoom account users, follow the steps below:
Step 1: Log in to the Zoom web portal as an administrator with the necessary privileges to edit account settings.
Step 2: Click ‘Account management’ in the navigation menu and select ‘Account settings.’
Step 3: Navigate to the ‘Recording’ tab within the account settings.
Step 4: Locate the toggle switch labeled ‘Cloud recording.’ Click to turn cloud recording on or off according to your preference.
Step 5: If a verification dialog box appears, confirm your choice by clicking on the appropriate option to turn cloud recording on or off.
(Optional): If you want to enforce this setting for all account users, click on the lock icon and select ‘Lock’ to make it mandatory.
Receive accurate automated notes directly from your Zoom dashboard with Notta.
How to transcribe Zoom meetings natively: Step-by-step process
Here we show you how to use Zoom's built-in transcription tools to generate audio recording transcripts from your meetings.
Step 1: Sign in to your Zoom account
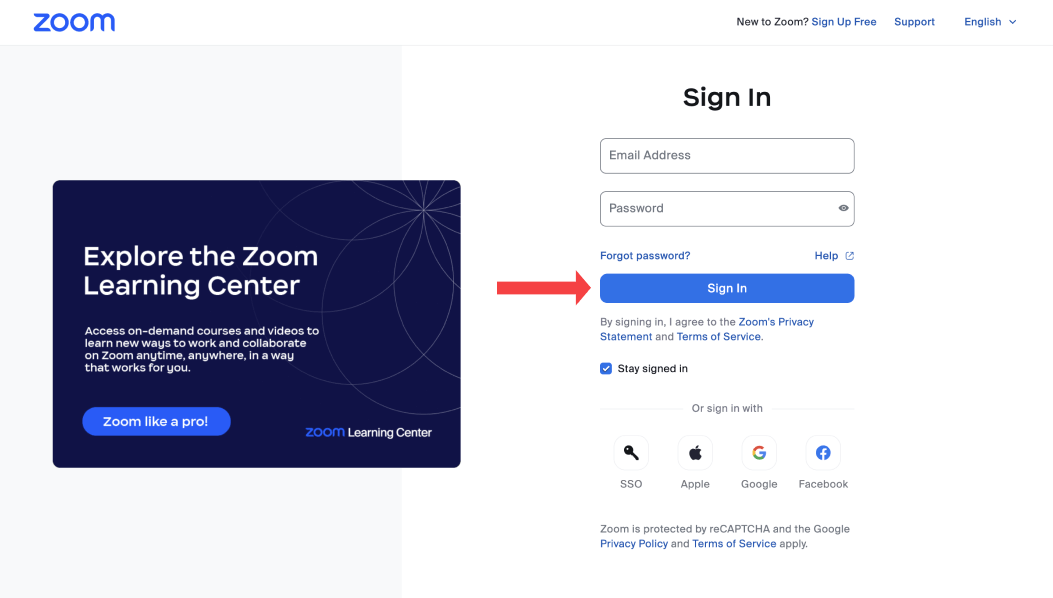
Begin by logging in to your Zoom account via the web portal, desktop, or mobile apps.
Note that cloud recording is available on all of Zoom’s platforms (with limitations for free users). However, transcription features are primarily accessible through the desktop app and web portal after the meeting has been recorded to the cloud.
Step 2: Activate ‘Automatic transcriptions’ in the settings
Next, you need to activate automatic transcriptions.
Go to ‘Advanced cloud recording settings’ in the cloud recording section.
Locate and activate the ‘Create audio transcript’ option, then save your changes.
Verify that Zoom's audio transcription function is enabled within your settings.
Step 3: Start recording your Zoom meeting
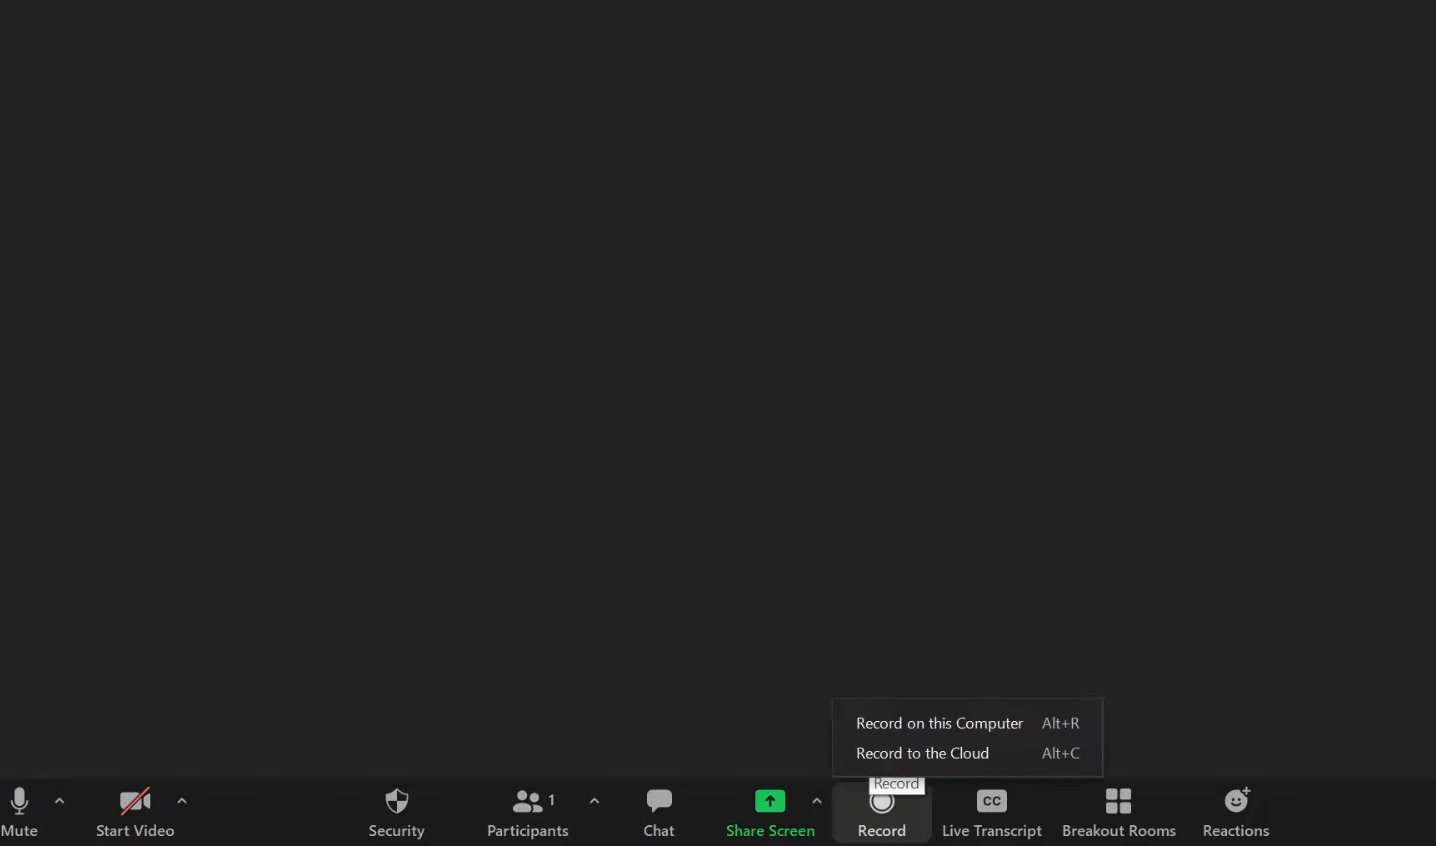
At the beginning of your meeting, start recording your Zoom meeting as you normally would. To activate live transcripts during the meeting, simply click the ‘Live transcript CC’ button.
At the end of your meeting, click ‘End recording’ followed by ‘End call.’ Zoom will now automatically transcribe your meeting.
Step 4: Retrieve your Zoom recording transcript
Post-recording, Zoom will send two emails to the host. The first email contains a link to your recording file, while the second email provides a link to your Zoom transcriptions.
It may take a few minutes for these emails to arrive. Once you receive them, click the links within to access your recordings and transcripts on the cloud.
How to edit and download Zoom audio transcripts
You can edit your Zoom transcripts in two ways. Either download the transcription as a VTT file and edit it using a text editor. Or, follow these steps to edit your transcriptions within Zoom.
Step 1: Sign in to the Zoom web portal using your credentials.
Step 2: Access the recordings section. Navigate to the navigation menu and click on ‘Recordings.’
Step 3: Locate your recorded meetings. Identify and click on the recorded meeting that you wish to edit.
Step 4: Initiate playback and view the transcript. Click on the play icon to start the playback of your recording. The transcription text will be displayed on the right side of your screen.
Step 5: Review and edit the transcript. To make edits, simply hover over a specific phrase and select the pencil icon that appears.
Step 6: If you need to edit a speaker's name, hover over the current speaker's name and click on the pencil icon.
Step 7: Once you’re satisfied with your review and edits, click the check mark icon to finalize the changes.
Step 8: After making all the necessary edits, save your changes. Then, download the completed transcription files for future reference.
Also read: How to annotate on Zoom
Accelerate your note-taking and transcription with AI-powered automation
How to convert a Zoom recording to a transcript with Notta
In some cases, the native features in Zoom can limit your editing capabilities. It’s a lot more manual to edit transcripts for punctuation and capitalization and enable automatic speaker identification. This is why it’s better to use a third-party Zoom transcription service like Notta for higher accuracy and great collaborative features.
Nottaruns on state-of-the-art AI that offers multilingual transcription services with a high accuracy of 98.86%.
The charm of using Notta lies in its user-friendly interface, which effortlessly adapts to your Zoom experience.
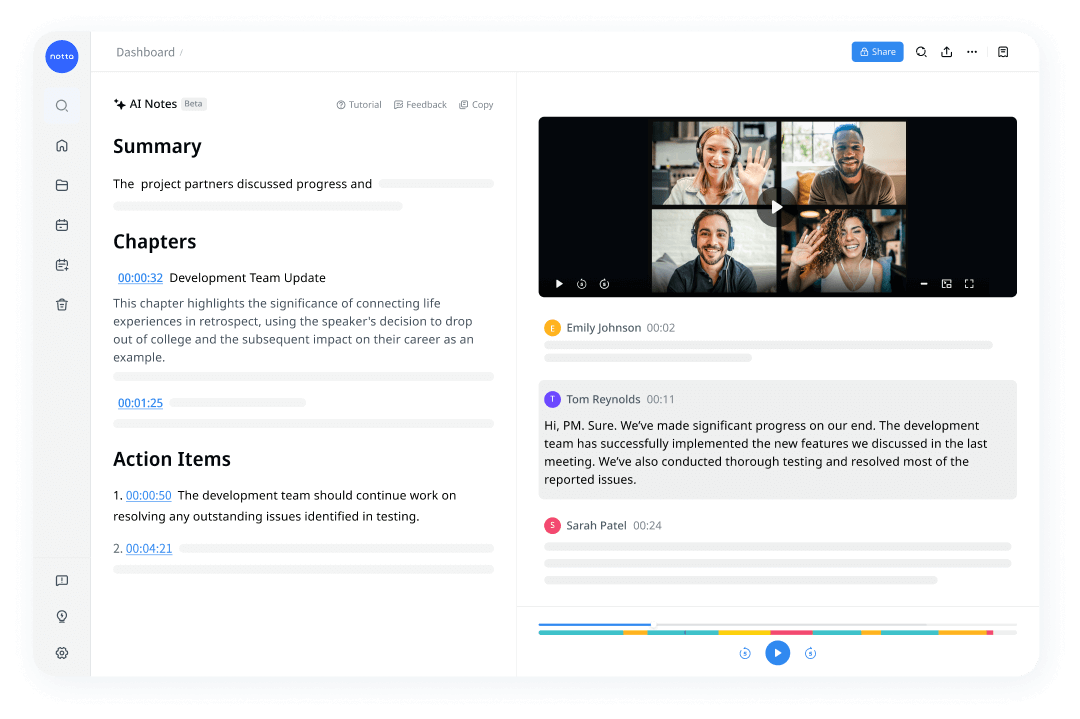
Think of Notta as your virtual assistant that caters to your every need. Whether you’re attending meetings from the comfort of your home, in an office, or on a desktop or mobile, Notta has you covered.
Plus, you can easily organize your recordings and transcripts. You can also record and transcribe in real-time during live sessions and generate AI-powered summaries.
Here’s the step-by-step process of converting Zoom recordings to transcripts using Notta.
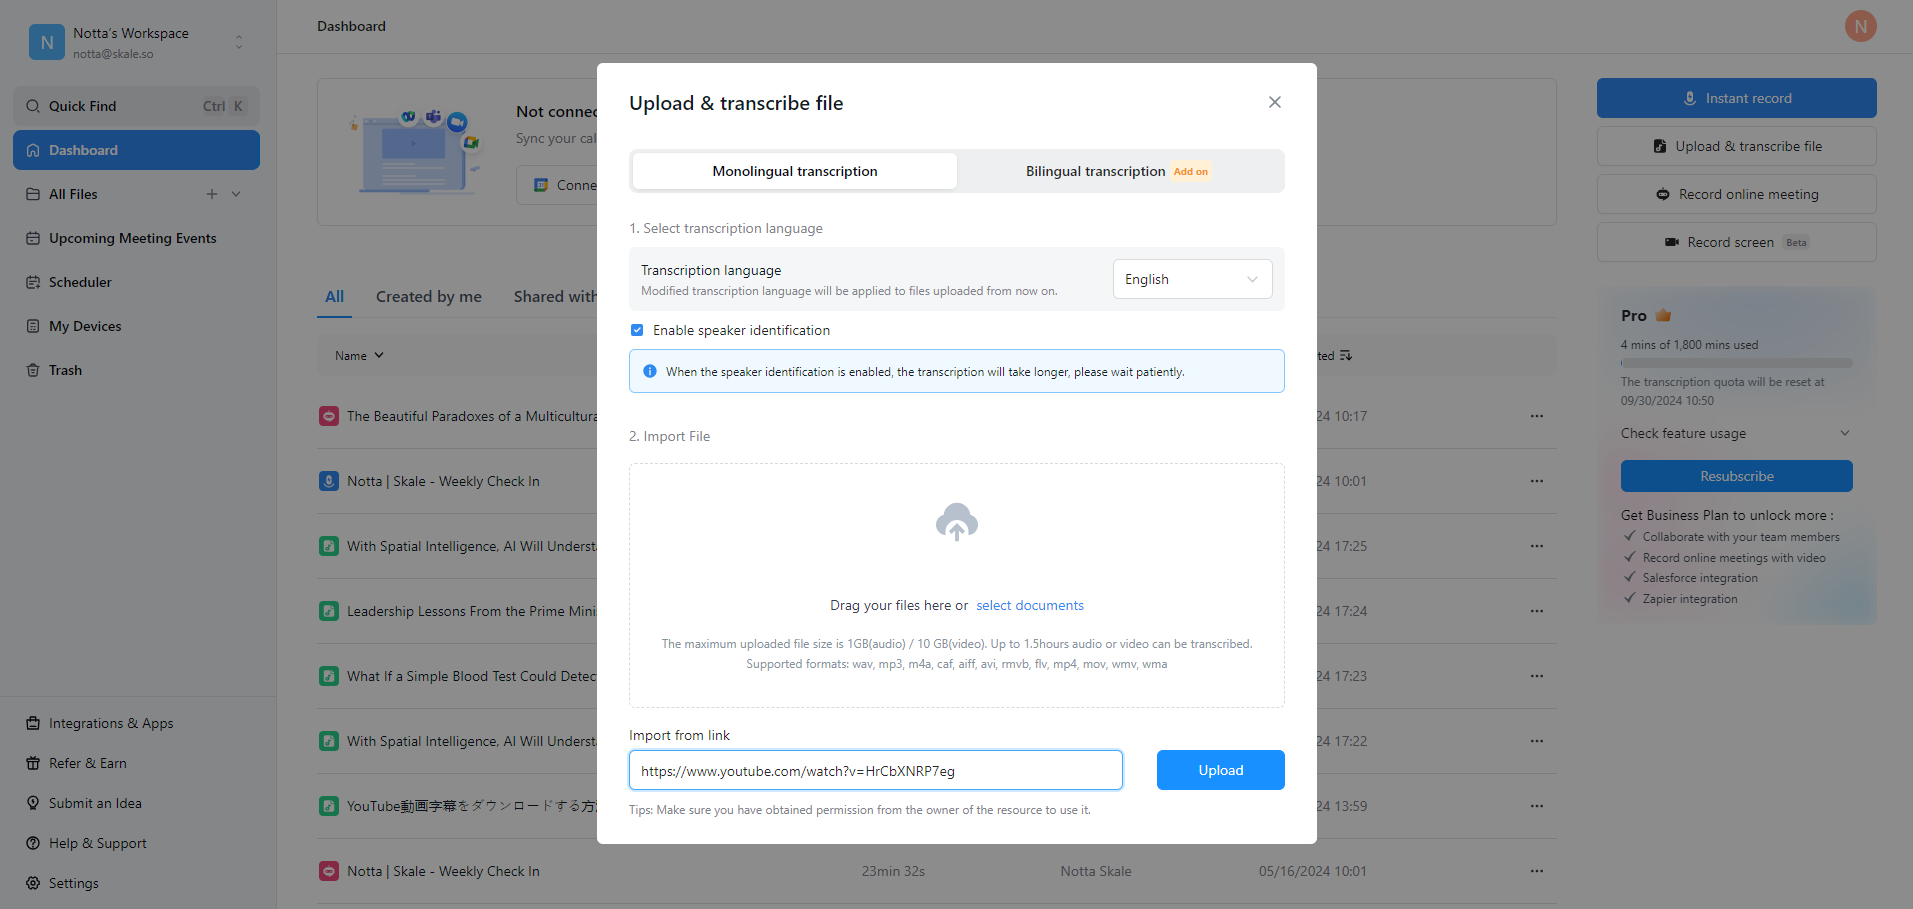
Step 1: Log in to your Notta account and select "Upload & transcribe file."
Step 2: Within the ‘Upload & transcribe file’ feature, you'll find a designated field to import your Zoom meeting recording. Upload the recording(MP4) to initiate the transcript generation process.
Also read: How to convert Zoom recording to MP4
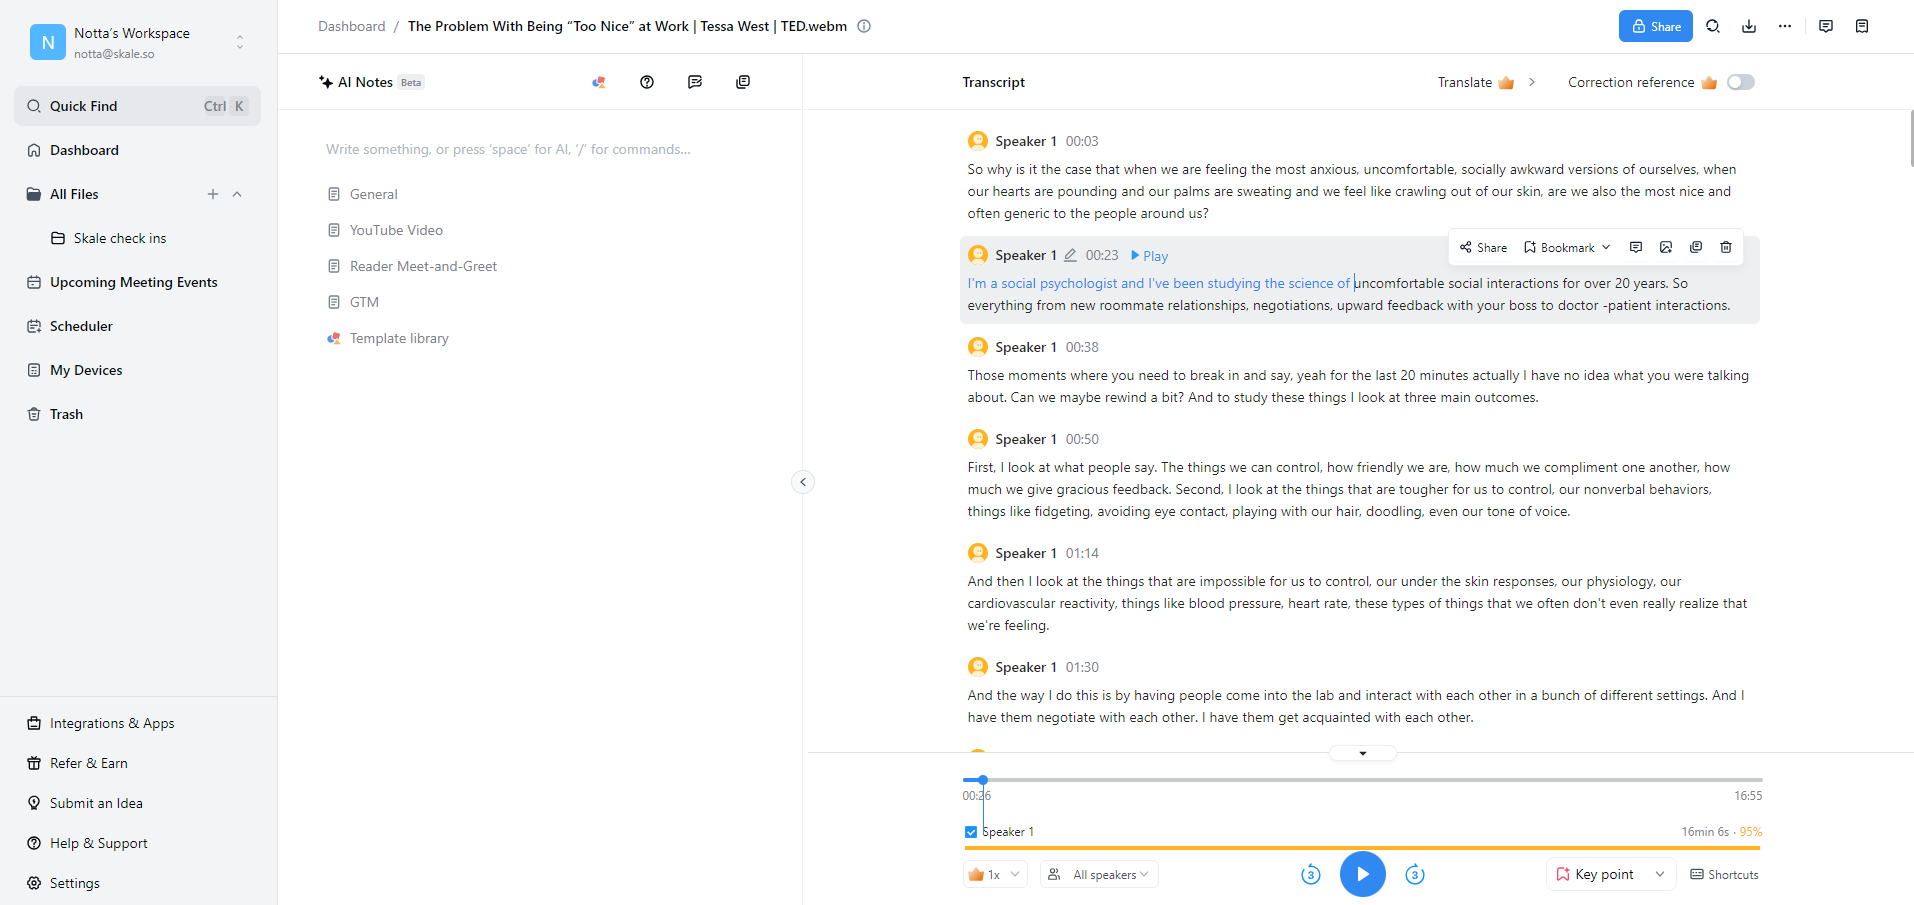
Step 3: Review the recording and transcript. The transcript will be showcased on the right side of the screen and will progress synchronously with the audio playback.
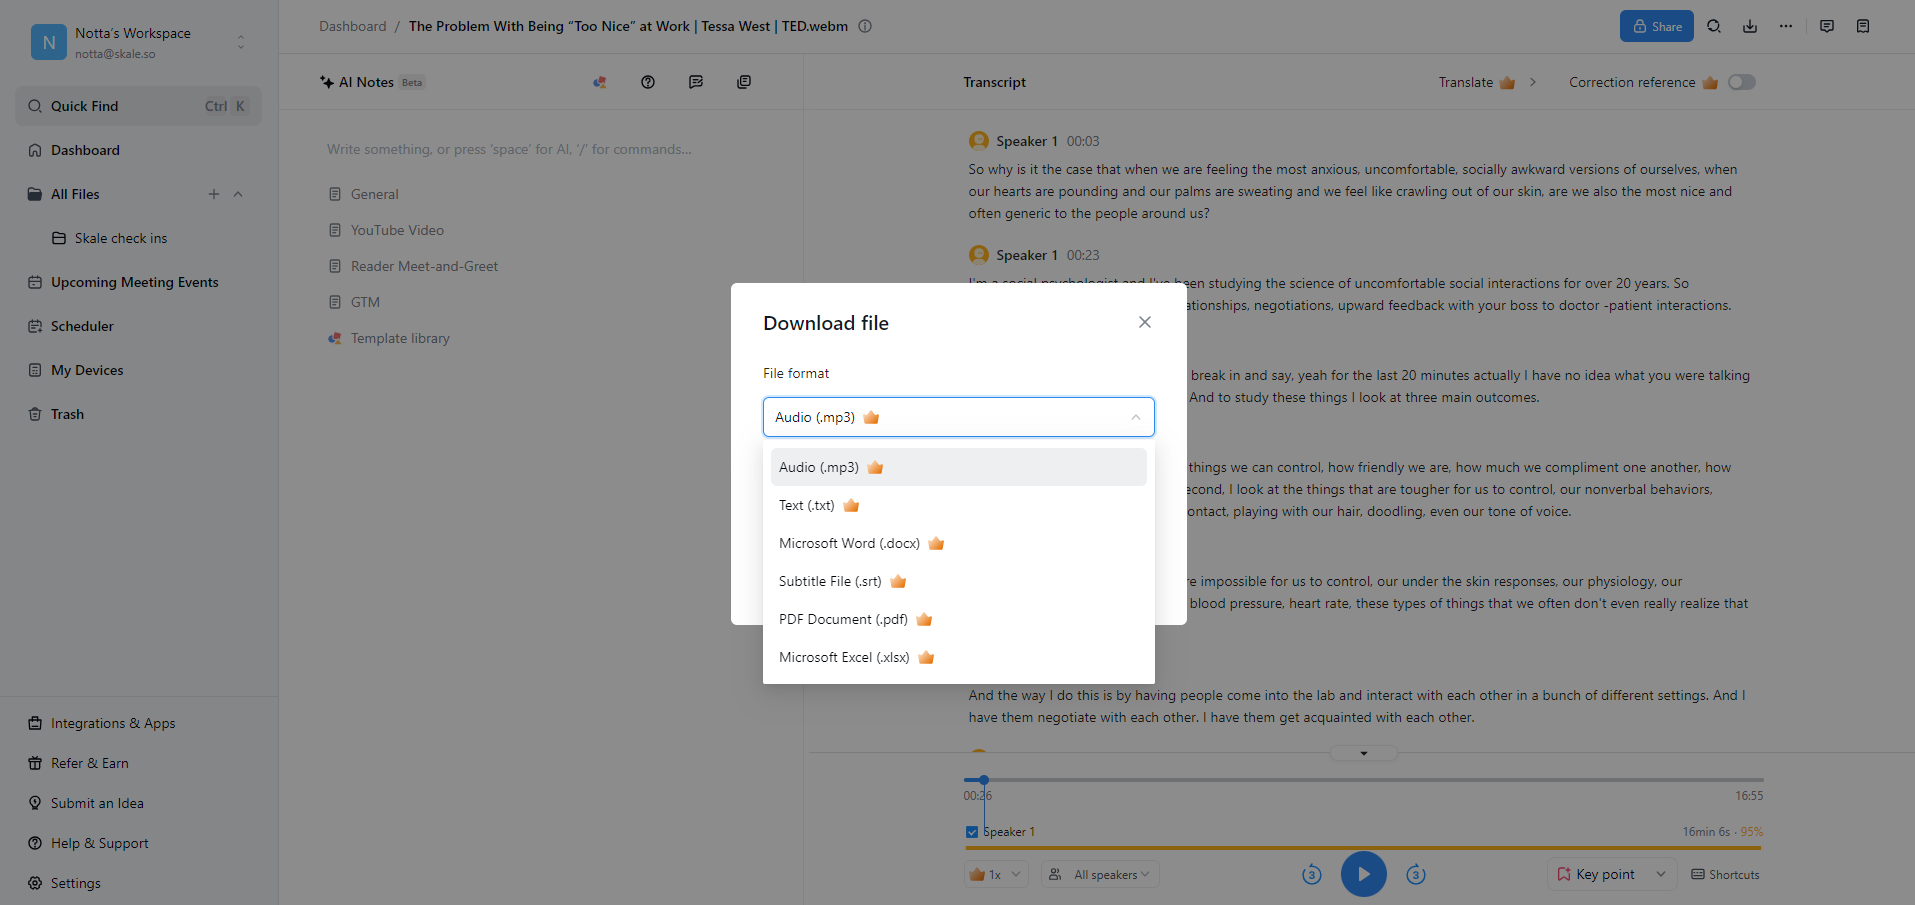
Step 4: Convert the recording and transcript. You can convert the recording and transcript to a different file format if needed. Simply click the download icon, and choose between a Word Document (.docx) or a PDF (.pdf) format for the file.
 That’s it!
Zoom native vs Notta: Which transcription service delivers better results?
Virtual meetings play a significant role in our lives. And it’s easy for crucial information to slip through the cracks, especially when you’re juggling multiple meetings a day. That’s where accurate and efficient transcription of Zoom meetings becomes essential.
In this article, you learned how to get a Zoom transcript after a meeting in the two best ways available.
While Zoom’s native transcription feature is a solid choice, it has limitations in accuracy and formatting. That’s where alternative solutions like Notta truly shine.
Powered by advanced AI technology, Notta overcomes these limitations. It offers superior accuracy, a user-friendly interface, real-time transcription capabilities, and customizable formatting options.
Get started with Notta for free today!
FAQs on Zoom transcriptions
Does Zoom provide free transcription services?
Yes. Zoom provides free transcription services for all recorded meetings stored on Cloud servers. Certain limitations exist, but you can get a Business or Enterprise level license to overcome most of them.
Where does Zoom store the transcripts?
Depending on the settings that you have enabled, your Zoom transcripts can be stored on a local device or in the Zoom cloud server. Either way, after your meeting you’ll receive an email with the links to your transcriptions.
Alternatively, navigate the Zoom web portal and locate the Cloud Recordings, where the files will be saved.
How long does it take for Zoom to transcribe a recording?
The duration required for Zoom to transcribe a recording varies based on factors such as the length of the recording and Zoom’s server load. Typically, Zoom takes about twice the meeting length to produce the transcription.
Can I edit the transcripts generated by Zoom?
Yes. Zoom allows you to edit transcripts from your meetings. You can hover over the author's name or text and click the pencil icon to start editing. However, the built-in editor might not have advanced formatting options and customization features. For that, you may need to integrate a third-party transcription tool like Notta into your Zoom ecosystem.
How accurate are Zoom transcripts?
Zoom does a fairly good job of transcribing your meetings. It’s believed to have an accuracy of 70–80%, while apps like Notta have a 98.86% accuracy.