
How to Record PowerPoint Presentation with Audio & Video
Record, transcribe and summarize conversations with one click.
Over the past three decades, PowerPoint has become synonymous with presentations. I've used PowerPoint to create presentations for many purposes, such as sharing finances in board meetings, launching a new product, and everything in between. That's easy enough if you have Microsoft Office installed and are presenting from your laptop.
But what if you want to make your presentation more creative and engaging? That's where recording PowerPoint presentations with audio and video comes into the picture. In this ultimate guide, I'll walk you through how to record PowerPoint with audio and video using the built-in recording tool and third-party apps so you can create presentations that keep viewers engaged.
How to record a PowerPoint presentation
Here's a secret: you don't need a dedicated screen recording tool because major OS already offers that feature.
But that does not mean an online screen recorder is of no use. It offers editing features and, in some cases, makes it easy to share the recordings with team members.
In this section, I'll reveal how to add narration to PowerPoint using the built-in audio recorder and a third-party app.
Record audio & video in PowerPoint
We have often heard the phrase — show, don't tell. But when it comes to presentations, it becomes equally important to 'show' and 'tell' — and PowerPoint's built-in audio recorder makes it easy.
Recording the presentation with audio and video lets the viewer understand what's happening on the screen clearly and what information each slide contains. Here's a simple tutorial on how to add narration to PowerPoint slides.
Step 1: The first step is to open the PowerPoint presentation and select the 'Slide Show' option available on the top Office-style toolbar.
You'll see different options, including Record from Current Slide and Record from Beginning.
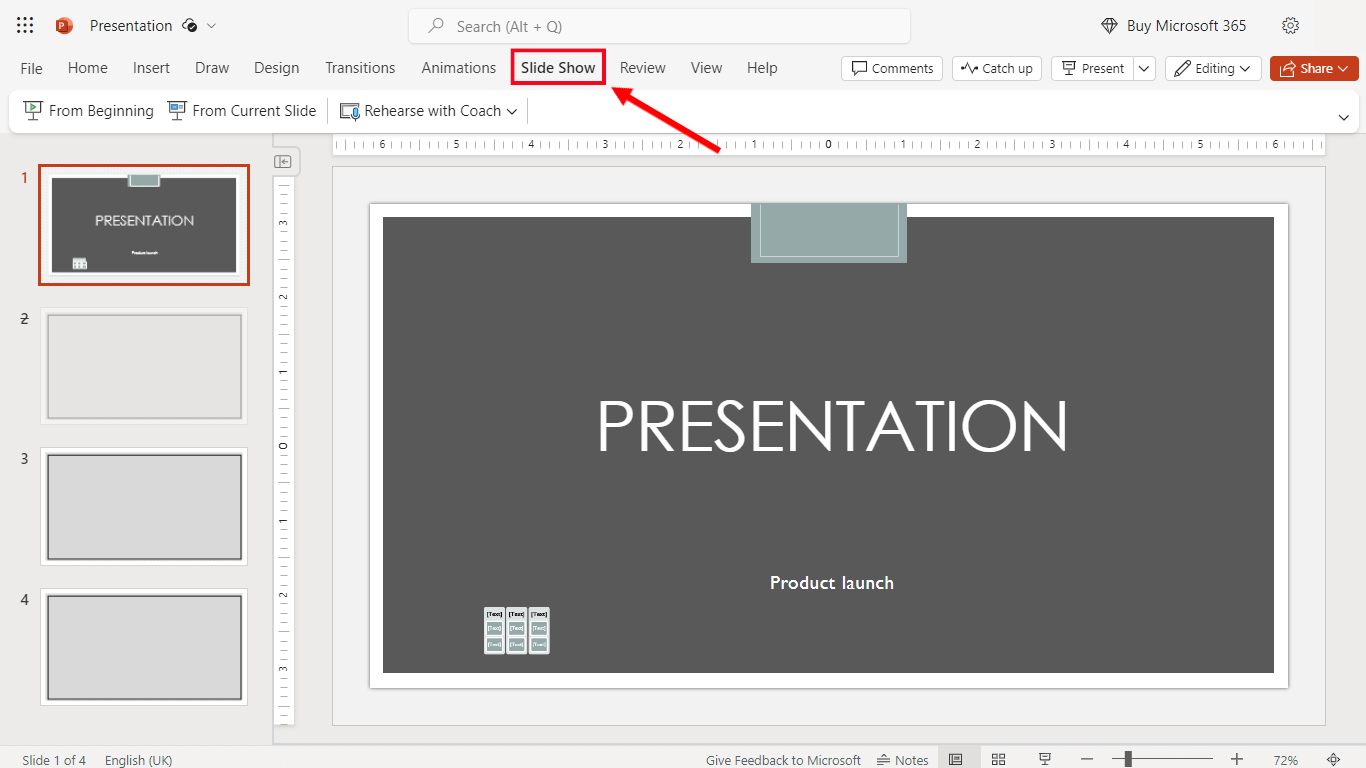
If you want to record audio and video right from the beginning, choose 'Record from Beginning,' but select 'Record from Current Slide' to record a particular slide.
Step 2: By default, PowerPoint will start recording both video and audio. You can, of course, turn the camera off if you don't want video in your presentation. Once you have modified the settings, select the 'Record' button to start recording.
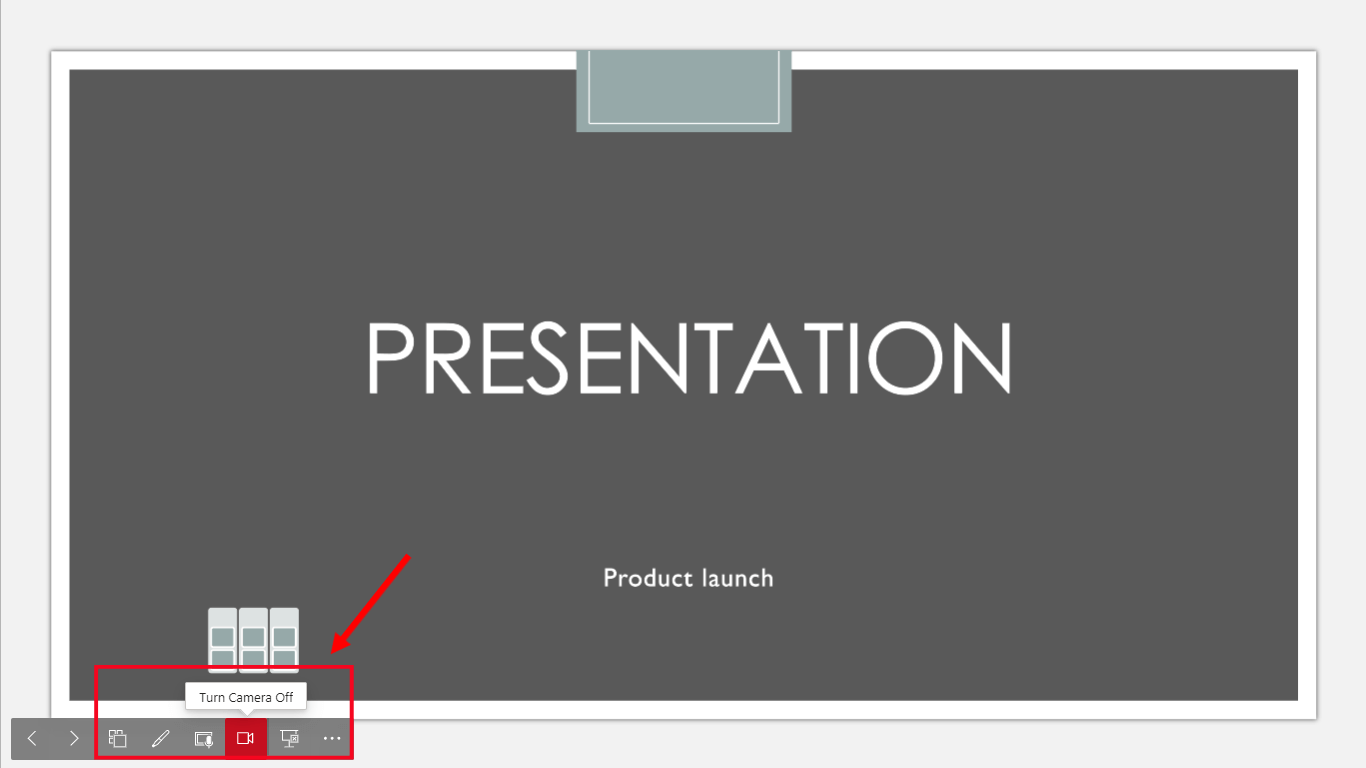
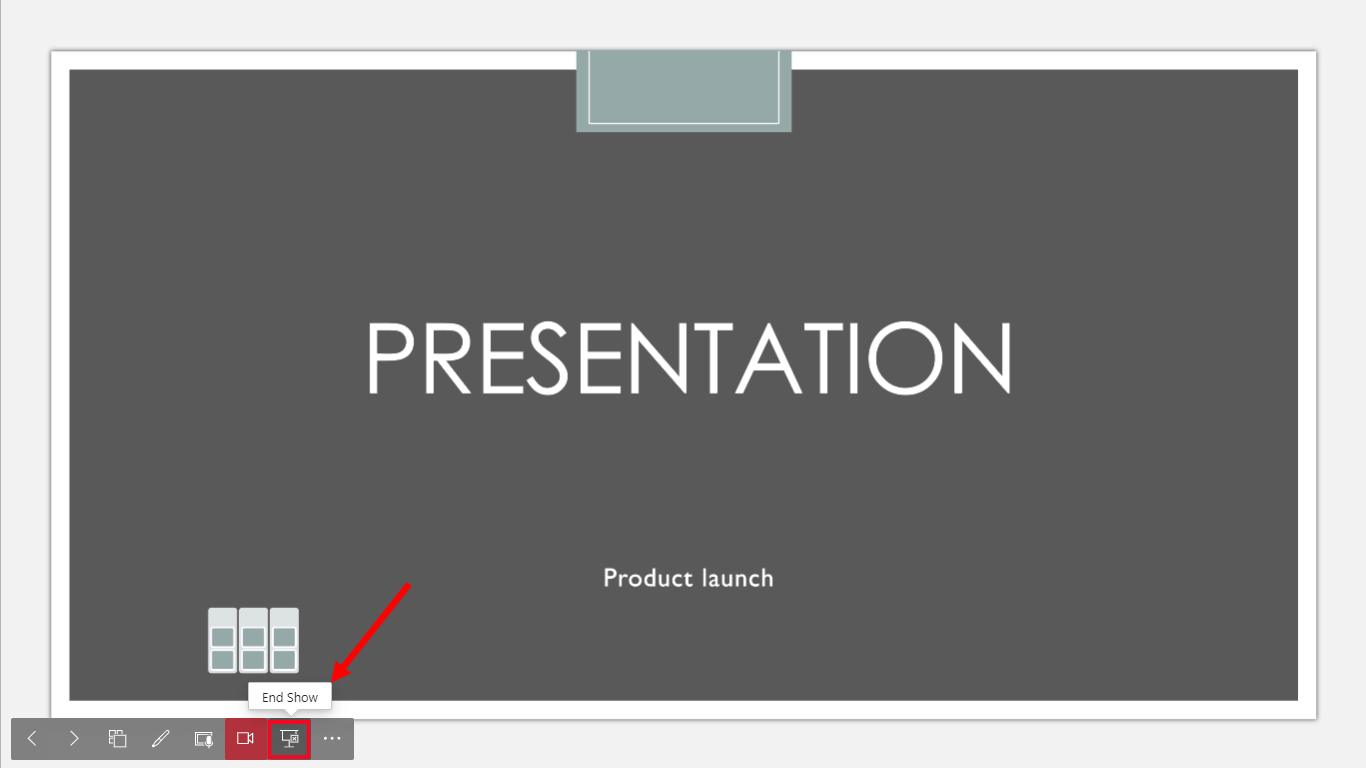
Step 3: Take your time to record the narration for the entire presentation. Just click the directional arrow buttons if you want to switch between the slides. Click 'End Show' to finish the narration.
Step 4: Next, save the PowerPoint presentation — and that's quite easy: Go to the 'File' menu, choose 'Export,' and finally select 'Create a Video.'
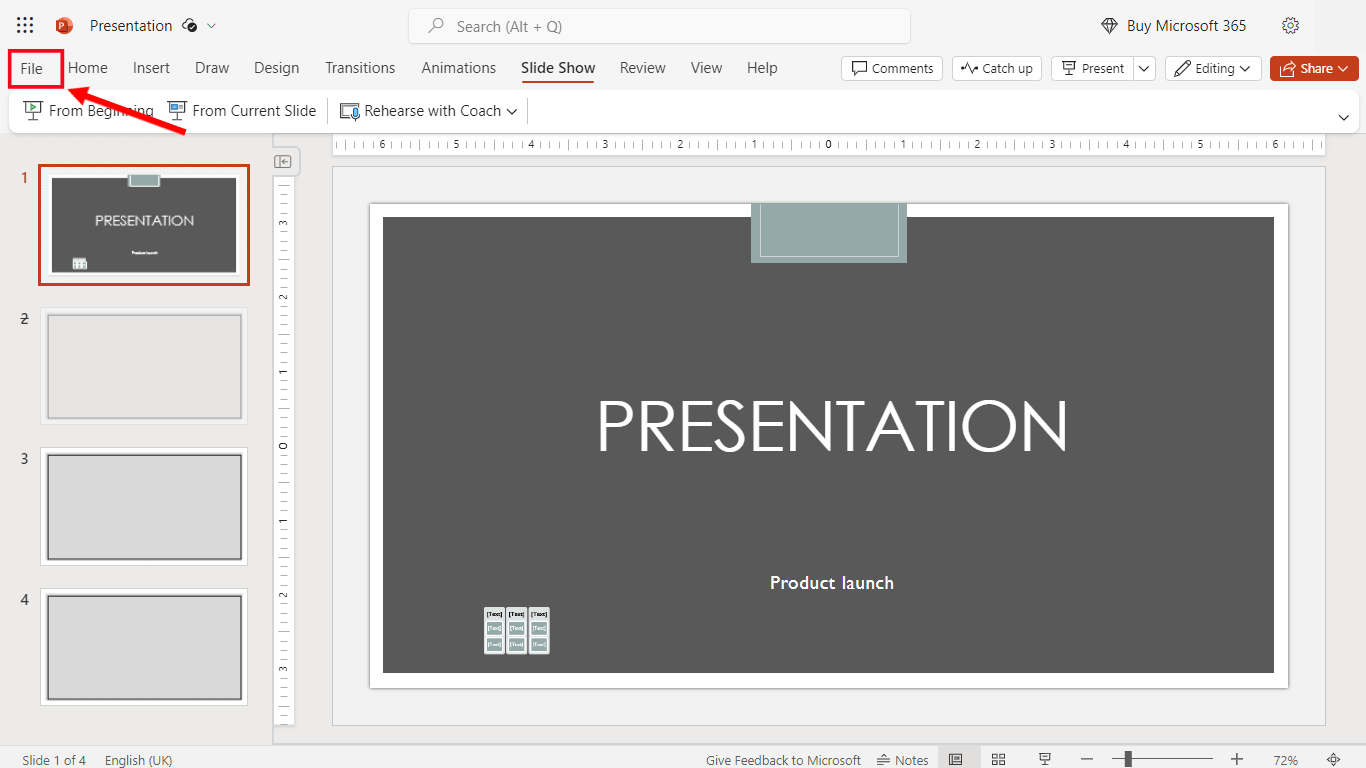
You can also alter the video quality and choose ‘Use Recorded Timings and Narrations’ before you finally hit 'Create Video.' That's it! The video presentation with narration will be saved on your device.
Note: Those who want to record camera video during the presentation can attach a webcam to their computer.
Add pre-recorded audio in PowerPoint
If you are not making presentations for fun, you are probably using them for something important and more practical: product launches, budgets, or reports. That's why you'll need to record audio in high-quality and clear voice — and PowerPoint's built-in recorder might fall short here.
Notta is one of the most powerful and popular recording and transcribing tools for good reason. There's an audio recording — and even live video recording — feature for almost every imaginable purpose. Here's how to record audio for PowerPoint presentation using Notta.
Step 1: New users can sign up for free to get started with Notta. If you are already a Notta user, simply enter your login details to sign in. Upon entering the dashboard, select the 'Record an Audio' option available in the right sidebar.
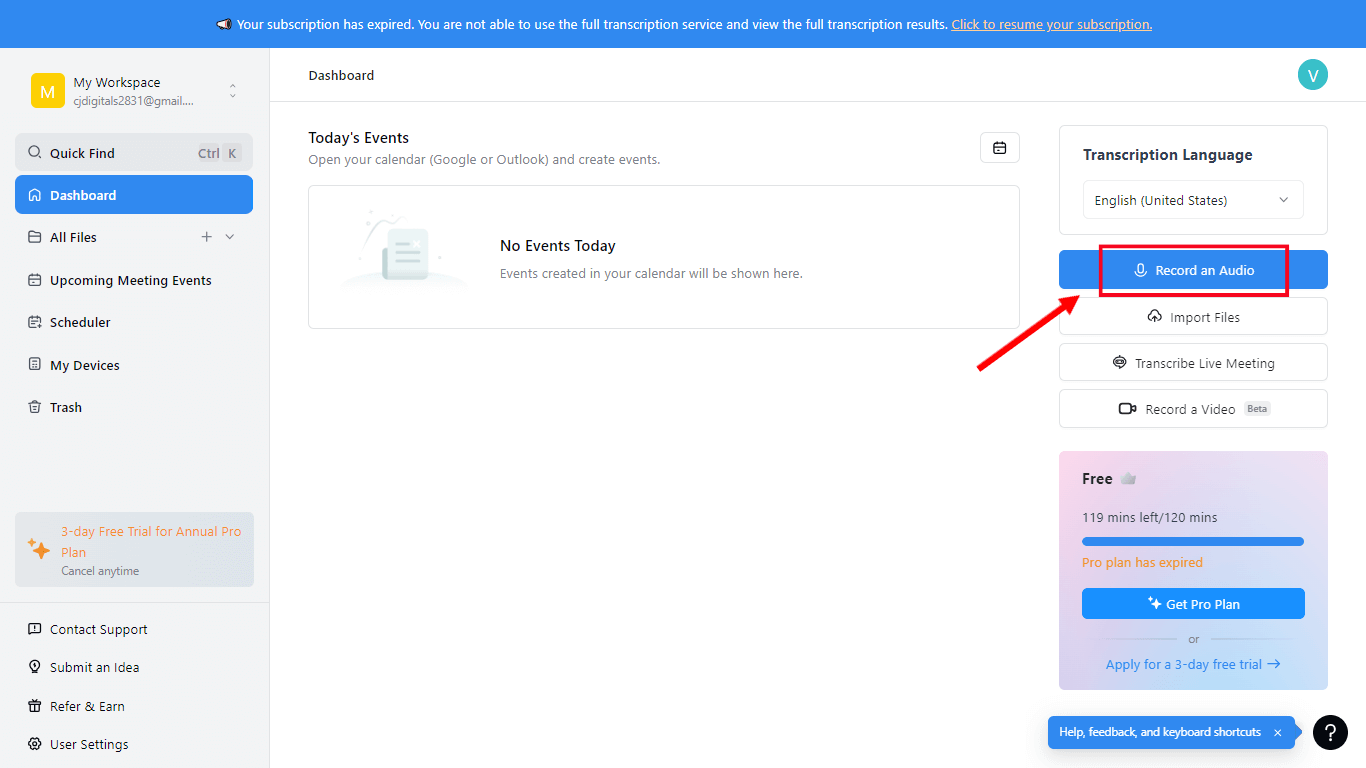
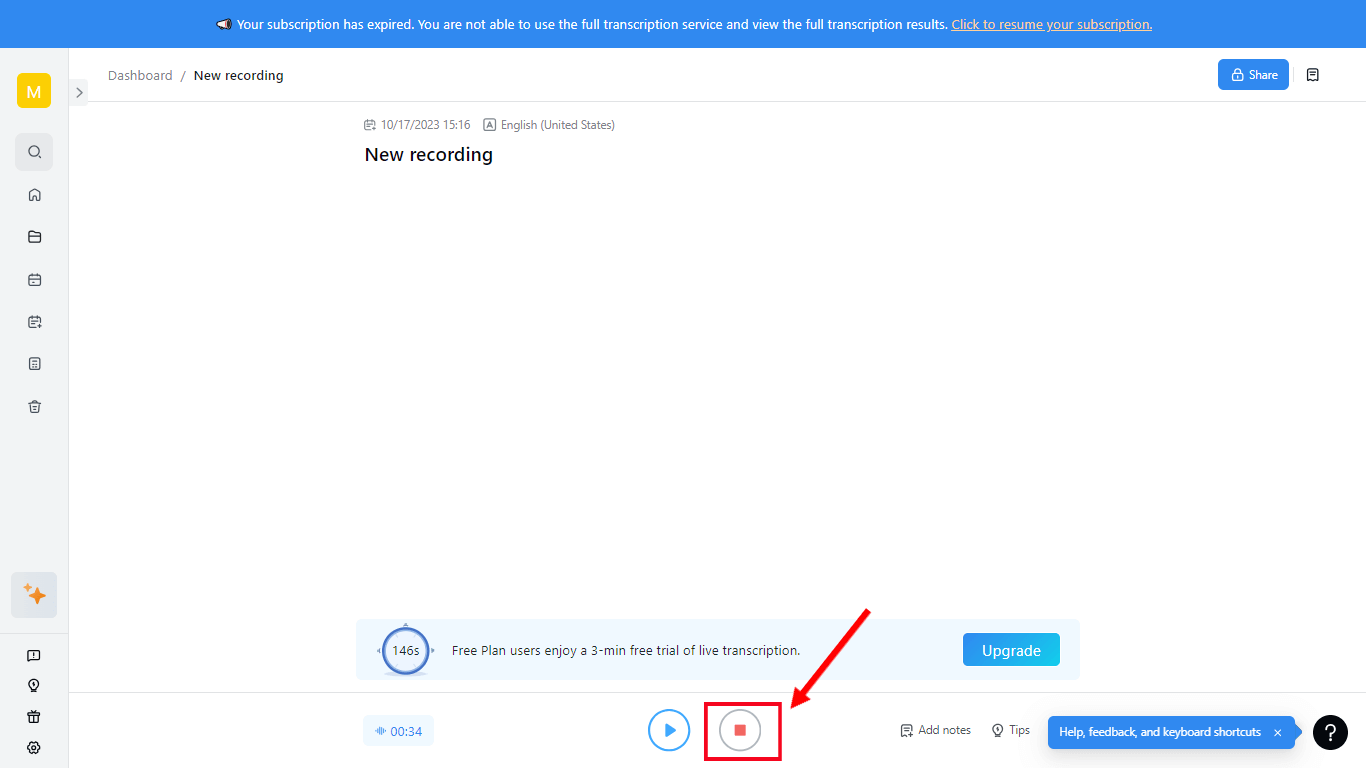
Step 2: Notta will immediately start the audio recording and transcribing process, which can be later saved to your computer or sent directly to third-party apps like Notion or Salesforce.
Step 3: Select the 'Red' button to stop the audio recording, followed by the 'Download' icon located at the top-right corner. Make sure you save the audio file with a search-friendly name so you can access it easily.
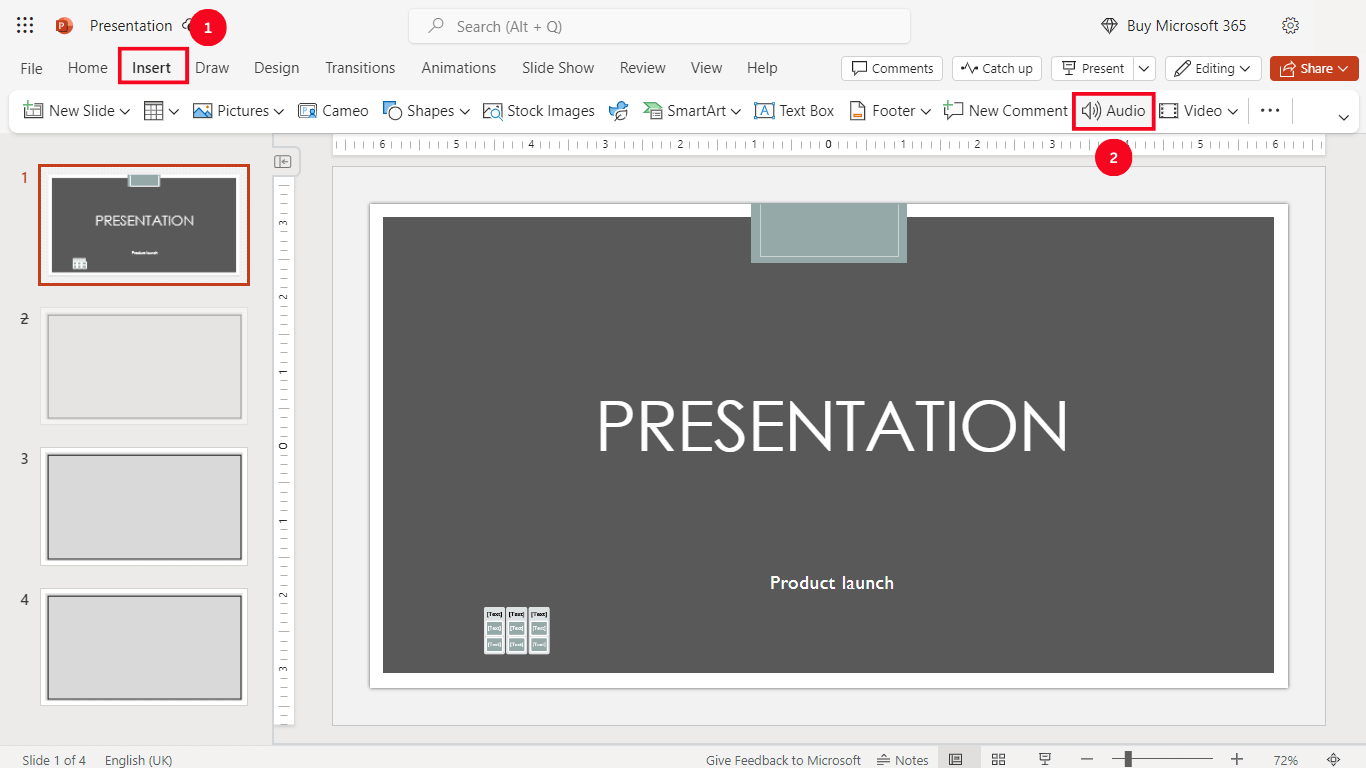
Step 4: Once you have the audio file ready and saved on the computer, open the presentation in PowerPoint and choose 'Insert' in the Office-style toolbar.
Upon clicking, you'll see options like New Slide, Pictures, Cameo, Shapes, Audio, Video, and more. Select 'Audio' and choose the recently saved file you wish to insert — and that's it! The audio will be inserted and played when you are giving the presentation.
While PowerPoint's in-built recording feature gets the job done, it still lags behind if you expect ease of use and high-quality sound from Microsoft's product. That's why it's better to choose a third-party recording tool like Notta.
One main benefit of creating and saving audio files using Notta (instead of recording and embedding audio directly into the presentation) is that you'll have easy access to audio files all the time — even outside of your PowerPoint presentation.
Notta's audio recording capabilities are a step up from PowerPoint's in-built features, as the former offers a clean, easy-to-use interface. The app doesn't skimp on shareability, either. With one click, you can simply generate a shareable link to the audio recording and send the recording to anyone you like.
Notta can convert your spoken interviews and conversations into text with 98.86% accuracy in minutes. Focus on conversations, not manual note-taking.
Key takeaways
PowerPoint for Windows and Mac is a popular presentation software — especially among those who prefer Microsoft products. Once you discover how to record PowerPoint with audio and video, the temptation to add audio to slides is real.
But this can leave you with a problem: complexity. That's where the third-party audio recording tools make it easy for you. Whether you are looking for a tool for personal use or you work in a large enterprise that has more advanced needs, you might find Notta helpful.
FAQs
Why is there no sound on my PowerPoint recording?
You'll need to provide microphone access to record PowerPoint with audio. Here’s how: Open the Settings app and then move to Privacy. On the left side, you can find a Microphone. Select the toggle next to Allow apps to access your microphone. If the toggle is already on, run the audio troubleshooter and relaunch PowerPoint.
Can I add audio and captions to PowerPoint slides?
Yes, you can add audio to your slides using the built-in recording tool of PowerPoint or using third-party tools like Notta. To add closed captions, the first thing is to check how the PowerPoint was installed. That's because closed captioning is only available for Click-to-Run installations of Office 2016.
If you've recorded the presentation in the compatible PowerPoint version, go to Playback and select the slide video. Then, click the 'Insert Captions' option and choose the caption file you wish to add.
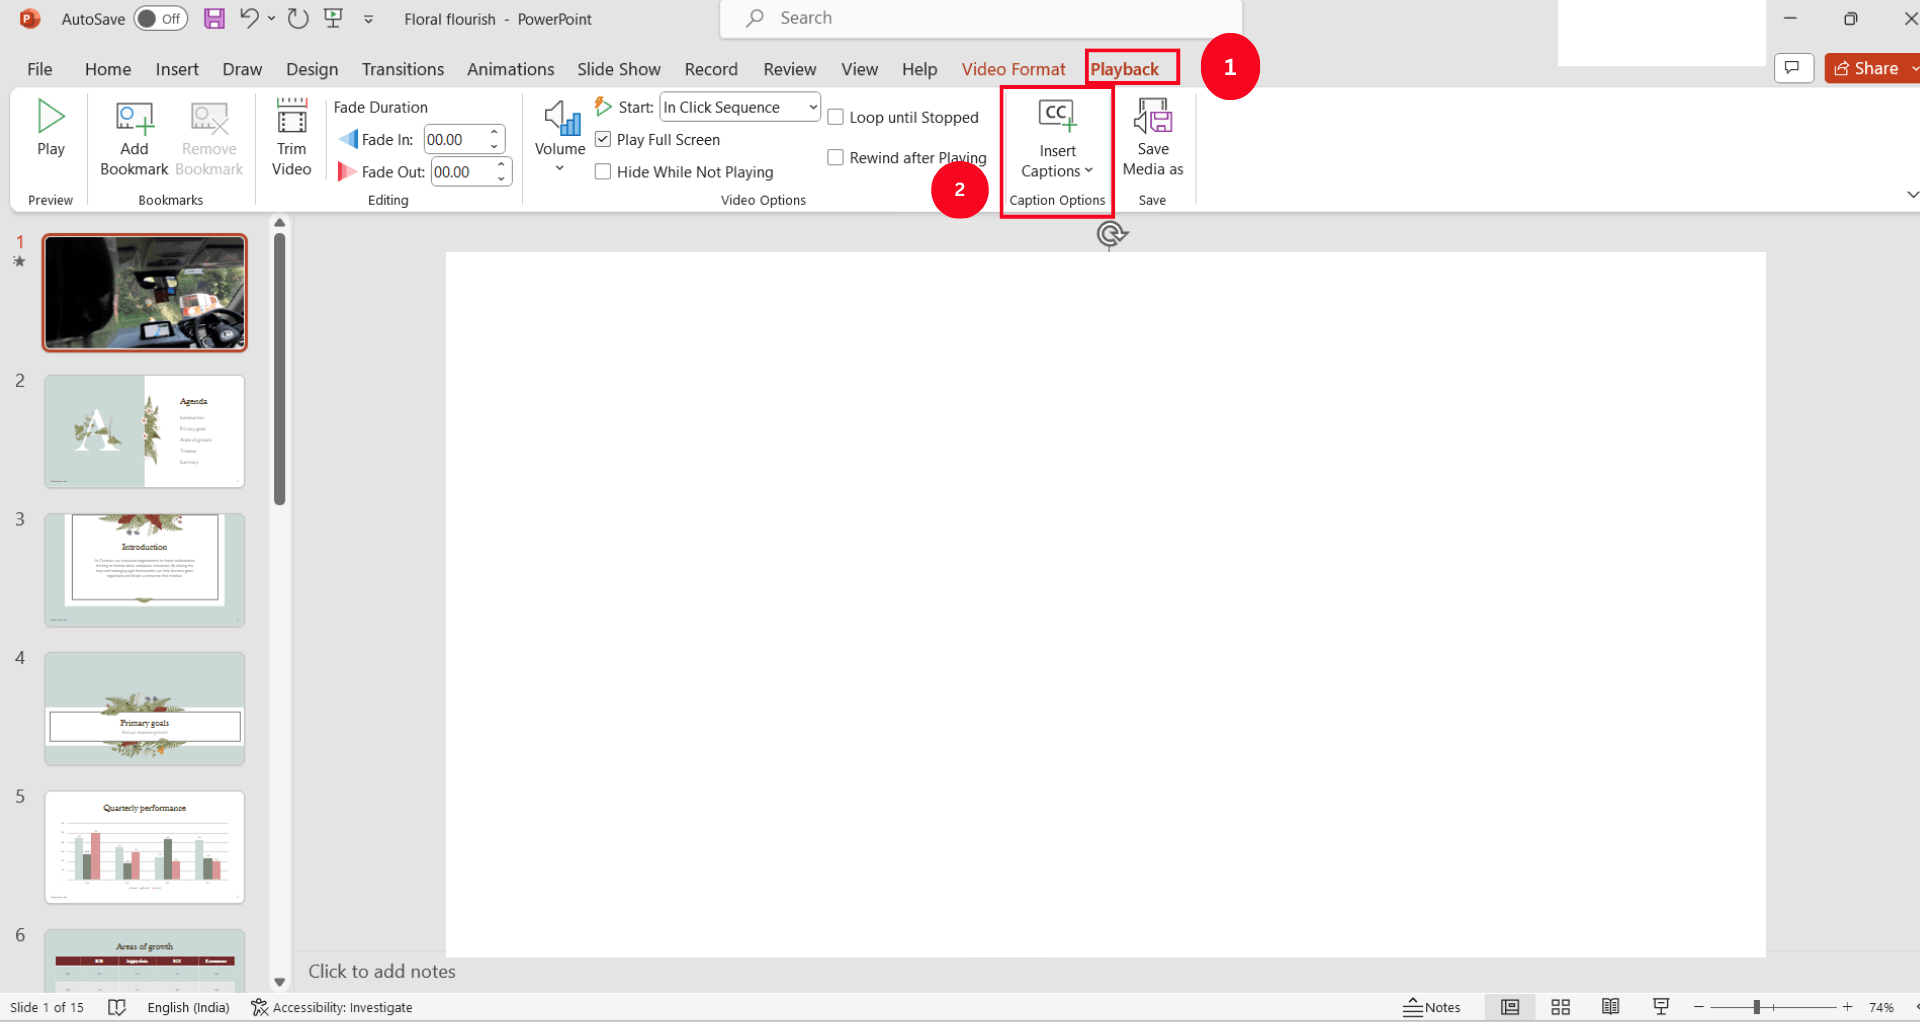
Note: If you have a compatible PowerPoint, the layout will resemble the above image.
Another option to add audio to your PowerPoint presentation is by Notta — just record your voice and download the audio file in MP3 format. Notta also lets you export the text file from the recording in multiple formats, including SRT, TXT, DOCX, PDF, and EXCEL. You can also save the transcript of your entire audio and share it with the presentation attendees.
video and audio file formats supported in PowerPoint
Some of the supported video file formats for Windows include ASF, AVI, WMV, MPG or MPEG, MP4, M4A, and MOV, while the audio file formats are AIFF, AU, WMA, MP3, WAV, M4A, MP4, MID, and MIDI.
If you are a macOS user, the supported file formats include AVI, VFW, MP4, MPG4, M4V, MPG, MPEG, MPE, M75, M15, M2V, TS, MOV, QT, and DIF. The audio file formats supported by PowerPoint on macOS are the same as those on Windows, including WAVE, BWF, AAC, and CAF.