How to Write a Transcript of Your Audio or Video
98% accurate, real-time transcription in just a few clicks. 58 languages and multiple platforms supported.
Transcripts serve as written or typed documentation of various events. It encompasses court proceedings, corporate gatherings, and more. It can also capture the content of radio, film, and television broadcasts. You need to have proper attention and proficient typing skills to craft a transcript. Your transcripts will aim to capture spoken words in written form. While transcribing an audio or video, you might face some challenges. Such as handling background noise, unclear speech, technical issues, etc.
In this guide, we will discover how to write a transcript and handle these problems.
How to write a transcript manually
Learning to write a transcript is easy. We'll guide you through the steps, offering tips for accuracy and quality. Below are the steps for transcript writing –
Step 1: Divide time for transcription
Transcription writing might need more time than you expected. On average, transcribing one hour of a recorded proceeding takes about 4 to 6 hours. The actual time can fluctuate depending on your typing skill as well. Additionally, the duration may be extended if there are many voices on the recording. Also if you are new to transcribing.
Avoid procrastinating when it comes to transcription tasks. Start as early as possible instead of waiting until the last minute.

Step 2: Listen to the audio
Optimize your transcription journey by finding a quiet room, and avoiding distractions and noise. Some prefer working at night for a calm environment. Beginners should consider extra time, especially if typing skills are basic. Before transcribing, listen to the entire audio. Focus on understanding the content, flow, and voices. Adjust volume and playback speed if necessary. You can use transcription software features like dynamic range compressor for background noise. Look up unfamiliar terms for better context and clarity before starting transcription. Prepare materials, put on headphones, and immerse yourself in the transcription process.

Step 3: Adjust the speed of the audio recording as needed
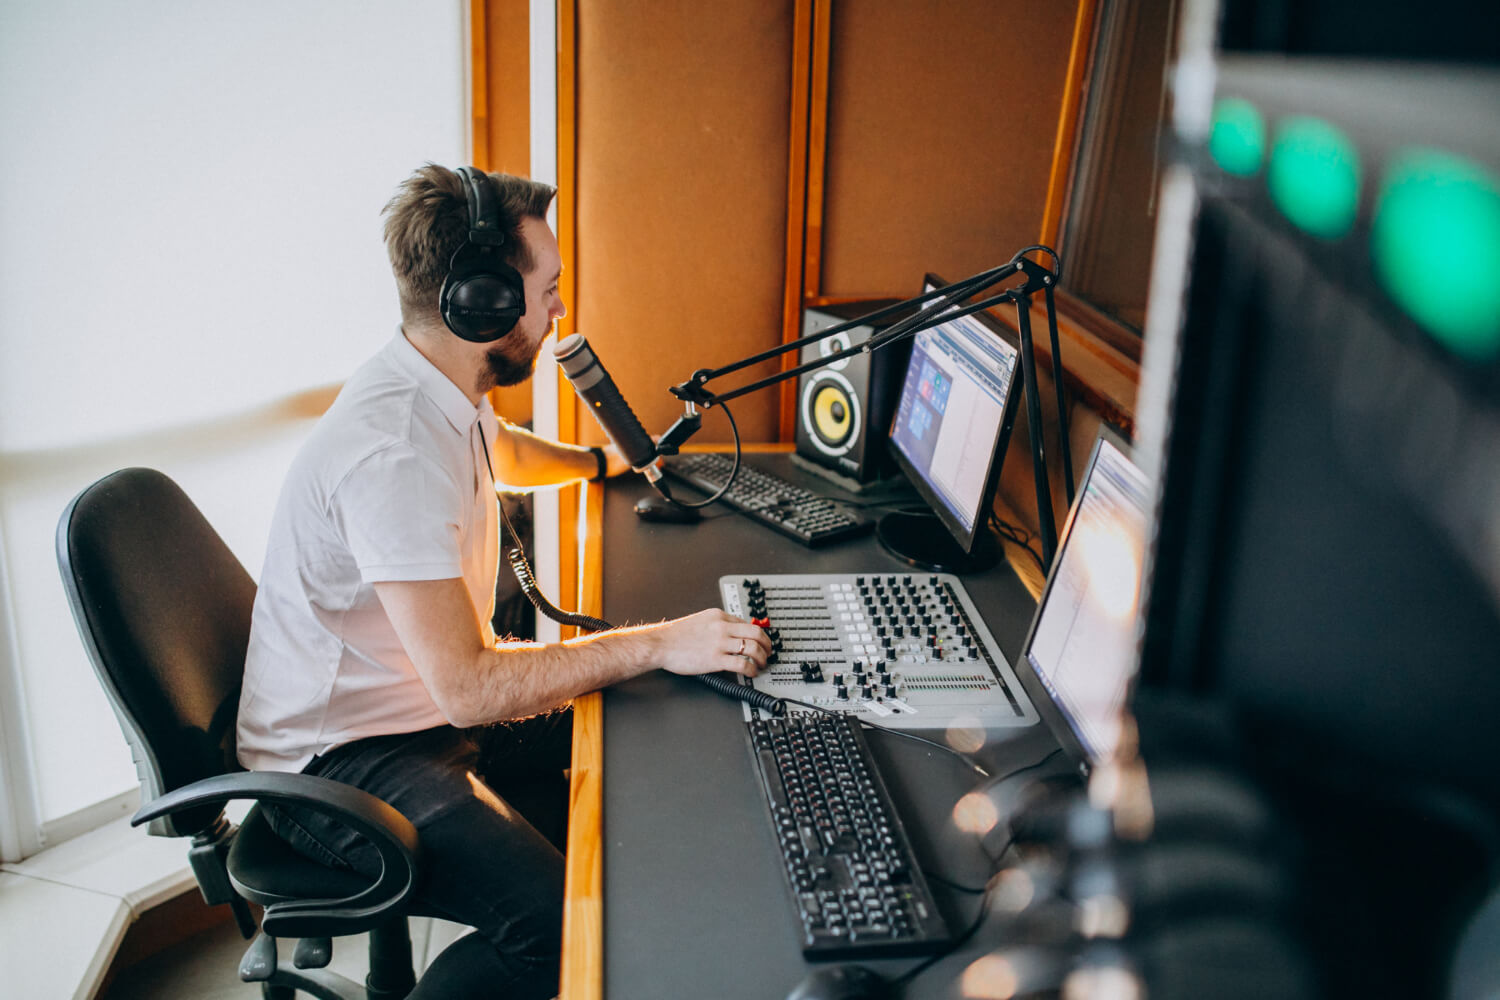
You have the option to slow down, stop, or pause the audio recording to enhance your comprehension. For a more efficient transcribing process, consider acquiring a foot pedal. It should enable you to control the recording using your feet. This will free up your hands and hurry the transcription.
Step 4: Structure and format your transcript
Ensure your transcript is well-organized by using page numbers, a title, and the date. Consider adding an abbreviated version of the title and date in a header or footer on each page. Use the first letter of each person's name to identify the different voices on the recording.
To improve readability, begin a new paragraph whenever a new voice emerges. Also when a fresh topic emerges, or when someone quotes another person's words.
Avoid presenting your transcript as one long block of text. This will provide better clarity and structure.
Step 5: Transcribe every word
Ensure that your transcriptions mirror the recording exactly. Avoid adding or omitting any words, except for "ums" and "uhs". Refrain from correcting grammatical errors within the transcript.
To state a grammatical error in the original speech, use "[sic]" within the transcript. For instance, if someone says, "They is not ready", you would type "They are [sic] not ready". This won't alter the grammar.
When encountering an inaudible word, use "(inaudible)" or a symbol (e.g., , **) to state the missing word. Additionally, include the timestamp in the recording where the inaudible word occurs. This will assist you when reviewing the transcript to decipher said word.
Step 6: Recognize nonverbal cues and signals
Conversations encompass more than words. People often express emotions like laughter, sighs, and more during these interactions. If someone laughs after saying something, include "[laughing]" following their words. For instance, "My dog is so funny. [laughing]" is an appropriate notation.
When noting nonverbal cues, refrain from adding your interpretation. Instead of writing "[sighing with relief]," type "[sighing]". This will maintain accuracy in the transcript.
Step 7: Mark pauses in the conversation
Conversations have moments of ebb and flow, and your transcript should capture this rhythm. When someone pauses after speaking, maintain consistency by indicating it with either ellipses or the word "pause".
Step 8: Review and edit the transcript for accuracy and clarity
Use a dictionary or computer spell check to ensure accurate spelling throughout the transcript. Yet, refrain from editing the transcript for other errors. Such as grammar or improper word usage. As it should represent the language used in the proceeding.
If required, revise the transcript to follow any specified form or format.
Additionally, take this opportunity to verify proper punctuation within the transcript.
Step 9: Listen to the recording while reading your transcript
This helps to verify the accuracy of your transcription and can aid in filling in any inaudible words. Remember, your transcript must mirror the recording without any alterations.

Are transcription workflows bogged down by redundant steps and low efficiency? Notta introduces automated solutions to streamline your process,it can help you transform into a top-level transcriptionist.
How to write a transcript of audio recording
Here are the steps to write a transcript of the audio recording –
Step 1: Choose the right recording device
Even if you are listening, there's still a chance of missing or misunderstanding words or sentences. Having an audio recording can ease the transcribing process. The choice of device will depend on your budget and recording requirements. If possible, it's advisable to invest in a digital recorder instead of using a smartphone. The recorder offers better sound quality.
If you own an iPhone or an iPod touch, you have the option to record using the Voice Memo app. Consider using Notta for the Voice Memo app. As it offers automatic transcription and other useful features for your recordings.
Android users can download the Smart Voice Recorder app or the Easy Voice Recorder app. Both are available for free.
You can get a high-quality digital recorder for $100 or less.
Step 2: Get ready to jot down some notes
Ensure you are seated with all the necessary note-taking supplies. This includes a computer, paper, pens, and pencils. By developing your shorthand, you can abbreviate words and summarize phrases. You won't sacrifice their precise wording or meaning.

Step 3: Prepare and arrange a recording device
An essential part of transcription is setting up the recording device. Place it close to the desired voices, and if possible, perform a test recording in the same room. It's wise to have a backup recording device, but it might not always be workable. For battery-operated recorders, ensure they're charged and bring spare batteries. If using a smartphone, make sure it's charged and have a recharge plan if necessary.
Step 4: Be sure to take comprehensive and accurate notes during the proceeding
While recording the proceeding, maintain focus and attentiveness. Take notes on the discussions. Observe the body language of the speakers. jot down your thoughts and reactions to their statements. These detailed notes will offer valuable context when transcribing the document.
Additionally, make sure to document the names of all speakers and any notable characteristics about them.

Step 5: Move the recording to a computer
Digital recorders come with software that facilitates uploading the recordings to your computer. If you are using a smartphone, you will need a USB cable to transfer the recording to your computer.
For Apple devices, you can download recordings to your computer using iTunes. During the syncing process, make sure to select "Include Voice Memos" to transfer them.

After moving the recording to your computer, you can use Notta to transcribe your voice to text. Introducing Notta - the AI-powered automatic transcription software. It supports 58 transcription languages and 42 translation languages. It can make real-time conversations and pre-recorded audio transcriptions. It's ideal for meeting minutes, interviews, and capturing ideas. This tool handles audio and video files up to five hours long. It offers live video transcription and boasts versatility with app, web, and Chrome extension access. Security is paramount, encrypting data for peace of mind in sensitive meetings. For individuals, Notta Basic provides quick, easy, and free automated transcriptions. Teams can opt for Notta Business and Notta Enterprise. Notta is the standout choice for efficient audio-to-text conversion.
Features:
Provides Audio and Video Transcription through a file upload or URL.
Notta is available on the Web, iOS apps, and Android apps.
Offering a Chrome extension.
Provides support for many languages in both transcription and translation.
How to write a transcript with Notta
Here are the steps to write a transcript with Notta –
Step 1: First, you need to create an account and sign in on Notta's website.
Step 2: Once you're logged in, tap "Record an audio" at the top right of the home screen.
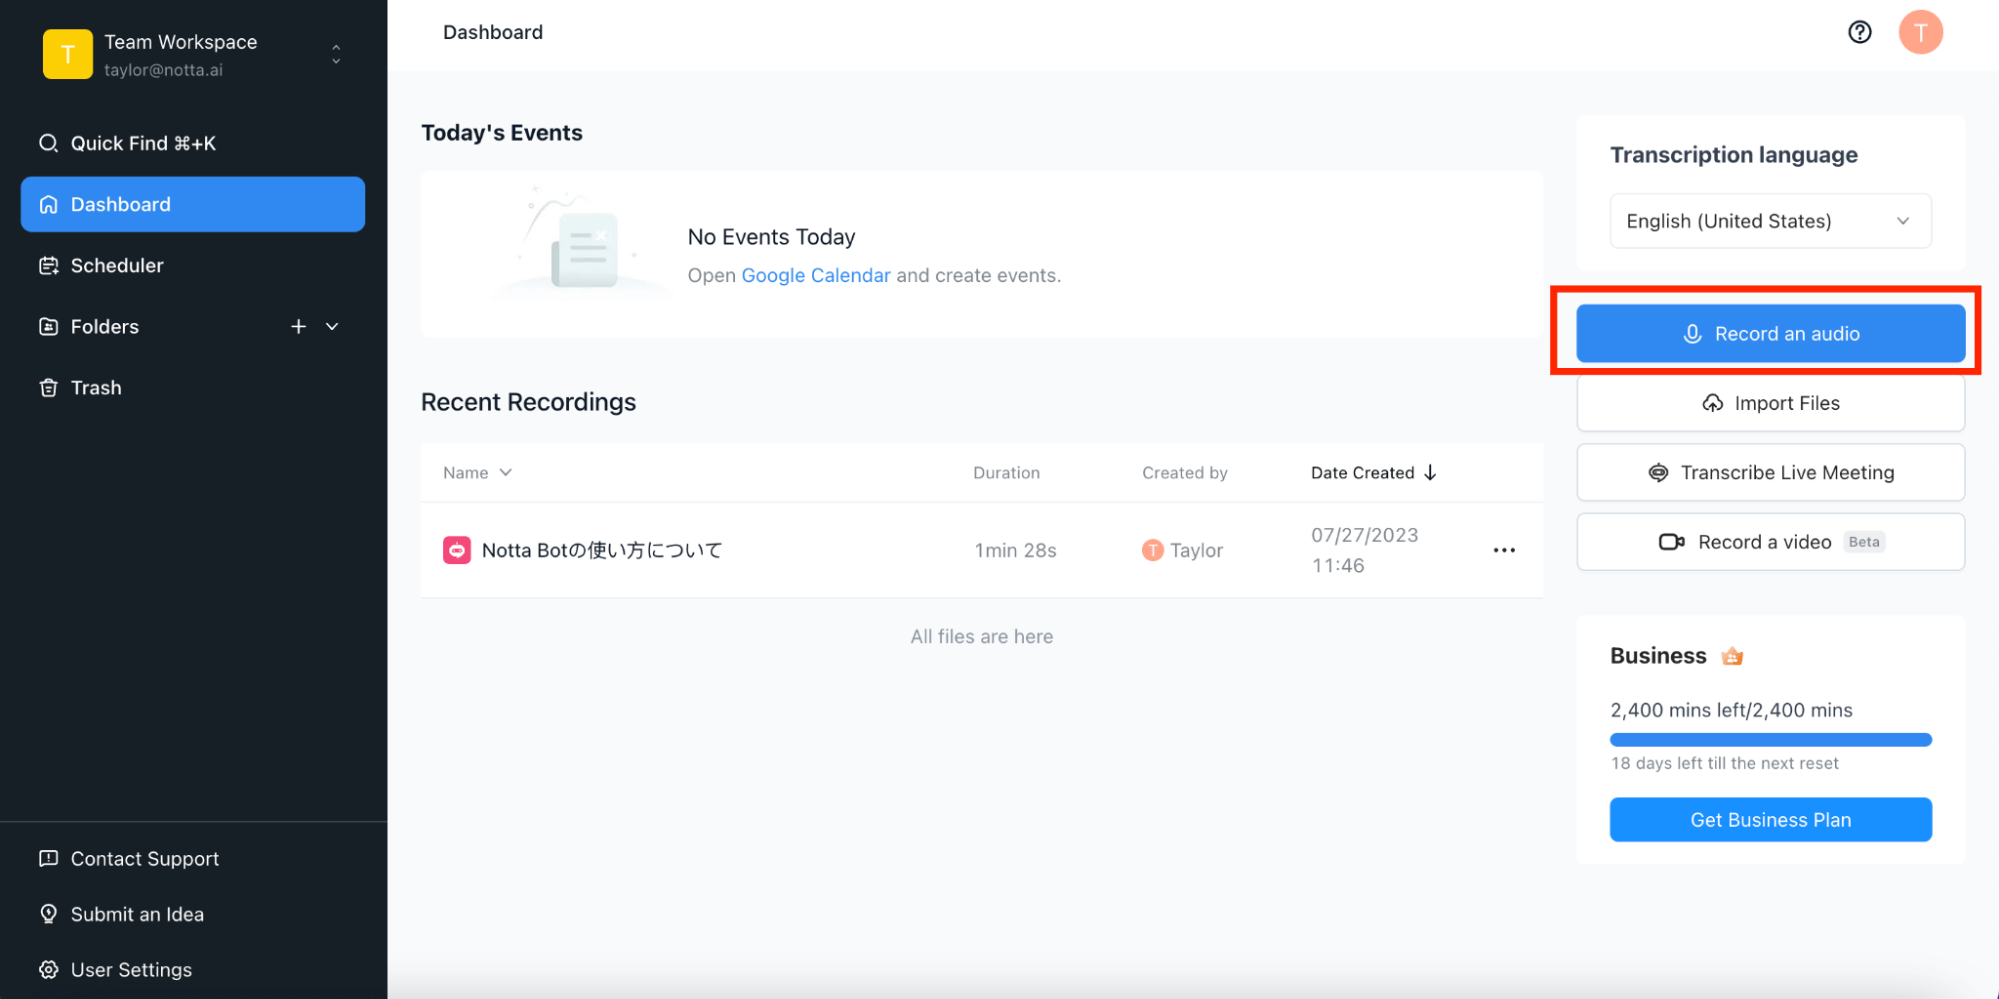
Step 3: After tapping “Record an audio”, the automated transcribing process will start with it.
Step 4: Highlight important parts of the audio by tapping the "Tagging" icon, while recording.
Step 5: To pause or resume recording, tap " || " at the bottom center. To stop recording, tap the " ■ " button.
For recording shortcut keys, tap the "Shortcut Keys" icon at the bottom right.
Step 7: Once the recording is complete, click on "Home" on the left sidebar. When you visit the "Home" tab, you'll see the recording and transcription file.
Also, you can use the Notta Chrome extension to record on-screen videos from YouTube and live streams.
Notta can convert your spoken interviews and conversations into text with 98.86% accuracy in minutes. Focus on conversations, not manual note-taking.
What to prepare before writing a transcript?
Experienced transcriptionists own essential tools and equipment for precise and efficient transcription. To excel in audio or video transcription as a full-time profession, we recommend investing in top-notch products. Though they may come with a price, they are a worthwhile long-term investment.
Headphones tailored for transcription purposes
Transcriptionists rely on specialized headphones, noise-canceling, for optimal focus on audio files. Closed headphones suit noisy environments. While open headphones work well in closed spaces like studios. Studio headphones with dynamic and electrostatic drivers offer high-quality audio across a broad frequency range. Over-the-ear headphones provide comfort, superior background noise isolation, and improved transcription accuracy.
Ergonomic seating
For transcription learners, an ergonomic desk chair is crucial. Regular seats might suffice for short sessions. But extended hours can result in back pain, stiff neck, and discomfort. Opt for a chair with comfortable surfaces. With proper backrest alignment, and adjustable features like height and angle. This should have a headrest and neck support. It'll bring optimal comfort during long transcription sessions.
Software for transcription
We recommend transcription software over word processors and multimedia players. It streamlines the process, saves time, and reduces errors. Uploading audio or video files and pressing a few buttons enables transcriptionists to have the program transcribe the material. Notta can transcribe both audio and video files into text. To ensure accuracy, reviewing and editing the transcript is crucial.
Good transcription software includes features like dynamic range compression for audio enhancement. With an intuitive text editor, time-stamped audio player, and helpful keyboard shortcuts. Word expanders and spelling checkers improve efficiency and ensure a polished transcript. Some software even offers audio speed controls and convenient shortcuts. For pausing, rewinding, forwarding, and skipping. Familiarizing yourself with these features before starting transcription optimizes the process and minimizes errors.
Foot pedal for transcription
For newcomers to transcription, a transcription foot pedal might be unfamiliar. It's like an oversized laptop trackpad operated with your foot. It helps control audio speed. Enables focus on typing while adjusting playback with foot-operated functions. Such as play, pause, rewind, fast-forward, slow down, and skip.
In sum
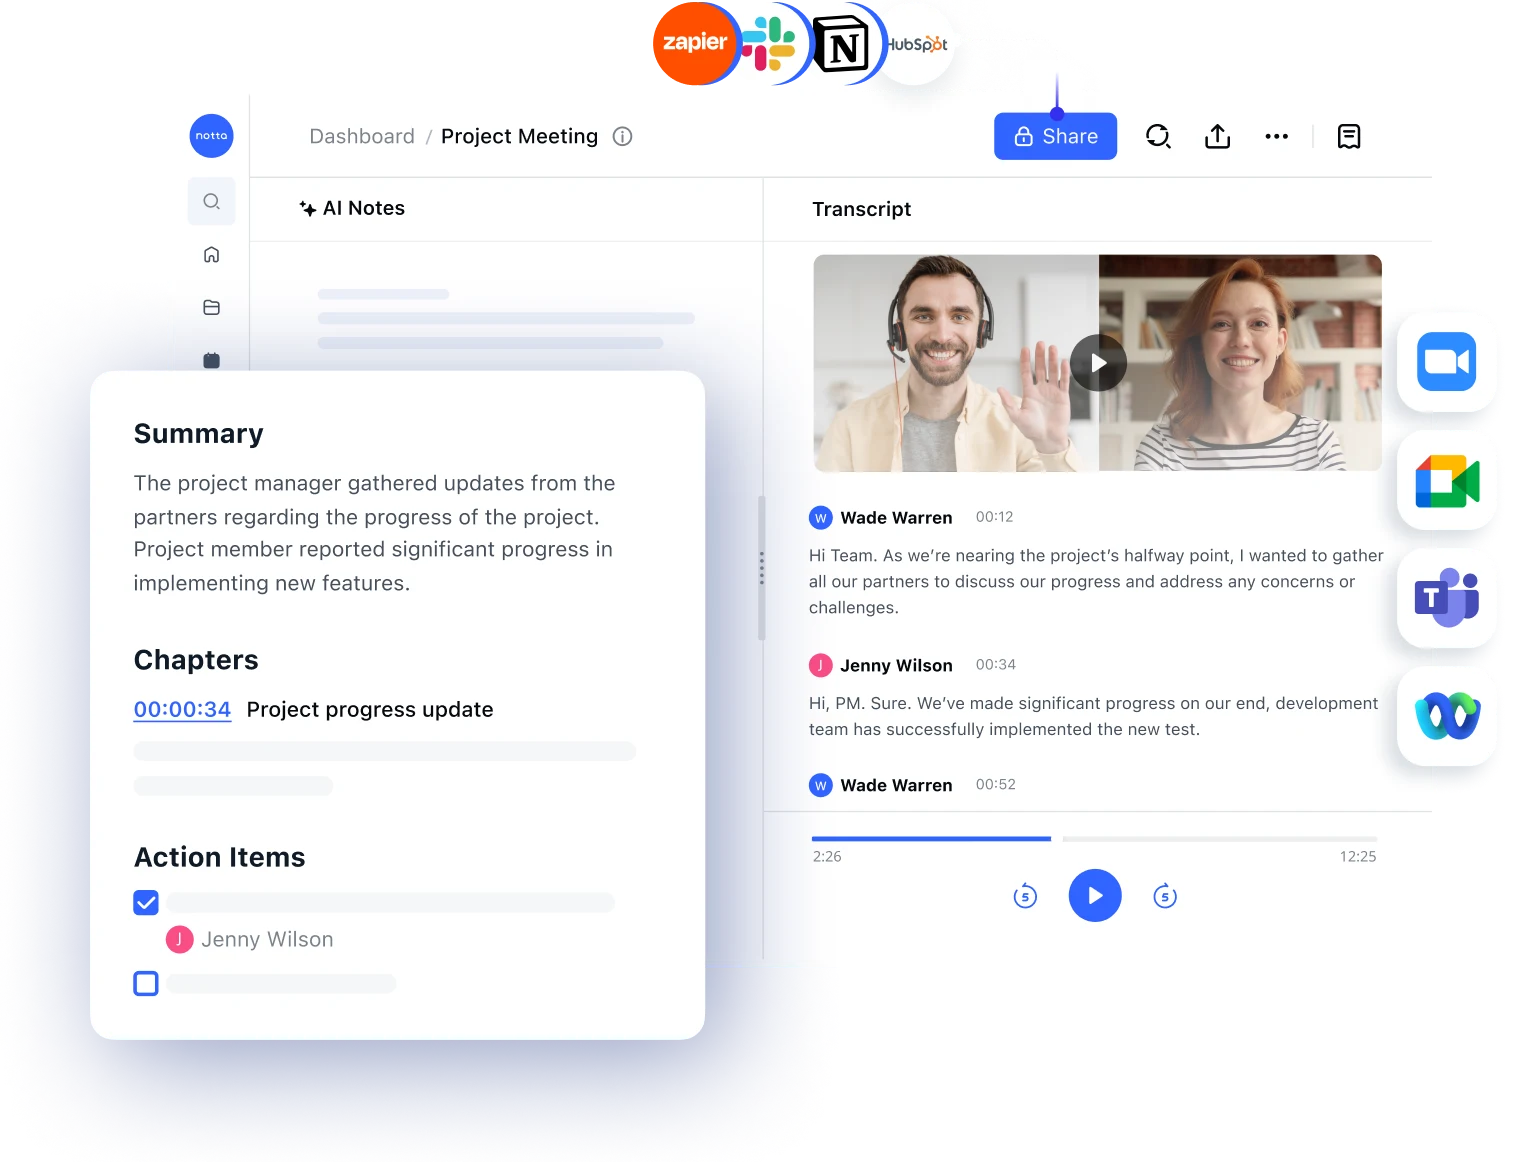
Mastering transcription is crucial for converting audio or video content into written text. It demands precision, expertise, and dedication to excellence. Manual transcription can be time-consuming. Notta streamlines the process with AI-powered features and multi-language support.
You can get real-time conversations and pre-recorded audio transcriptions. Embrace Notta to excel in deciphering accents, recognizing speakers, and handling technical challenges. This ensures flawless transcripts that impress clients and colleagues. Notta helps you to set new standards in professional transcription. This helps to deliver high-quality and dependable written records with ease.
Searching for a automatic note-taking tool? Gald youo find out! With Notta, it allows you to transcribe your favourite audio or Youtube video conten into editable text which you can take some notes.
FAQs
What are the benefits of writing a transcript?
Writing a transcript yields various advantages, particularly for video or audio content. Let's delve into each benefit:
Transcripts are valuable references: A written record of spoken content in video or audio lets viewers easily revisit specific information. Also quotes, or discussions without re-watching the whole video or audio.
Easily shareable: You can share transcripts via email, social media, or blogs. It reaches a broader audience and aiding those with hearing impairments.
Boost viewership: Offering a transcript makes your content inclusive and appealing to a wider audience. Including those who prefer reading over watching or listening.
Boost SEO (Search Engine Optimization): Transcripts offer searchable text for search engines. This increases the likelihood of your content appearing in relevant searches. Driving more organic traffic to your site.
What is the purpose of the transcript?
Transcripts serve diverse purposes in different contexts:
Legal transcriptions: Accurate records of legal proceedings, aiding reference, analysis, and legal arguments.
Business Transcriptions: Transform business-related audio/video content into written form for record-keeping, analysis, and knowledge sharing among teams.
Academic Transcriptions: Convert academic content into written form. Supporting students, researchers, and educators in studying and preserving discussions.
Medical Transcriptions: Transform medical dictations and patient records into written documents. It’s crucial for accurate records and communication among healthcare professionals.
Interview Transcriptions: Convert recorded interviews into a written format for referencing and accurate quoting. It’s valuable for journalists, researchers, and content creators.
Market Research Transcriptions: Convert market research interviews, focus groups, and surveys into written form. This provides insights into consumer opinions and preferences.
In all, transcripts facilitate reviewing, referencing, analyzing, and sharing spoken content. Serves as valuable documentation and aids across various domains.
How to write an interview transcript?
Transcribing an interview requires patience, focus, and attention to detail. A poorly transcribed interview can lead to confusion and lost opportunities. Here's how to avoid this:
Step 1: Listen to the full recording to understand the context and speakers' voices.
Step 2: Estimate the time needed for accurate transcription.
Step 3: Use reliable transcription software like Notta for efficiency.
Step 4: Write a draft first to identify difficult sections and create structure.
Step 5: Use shortcuts like keyboard shortcuts and auto-correct.
Step 6: Proofread carefully for accuracy.
Step 7: Format the transcript with headings, timestamps, and speaker labels for clarity.
How to write a transcript for a video?
Here's a step-by-step guide on writing a video transcript:
Step 1: Watch the video to understand its content and speakers.
Step 2: Transcribe the spoken words verbatim, including pauses and non-verbal sounds.
Step 3: Identify speakers and use labels for clarity.
Step 4: Include timestamps for easy reference within the video.
Step 5: Note relevant visual elements in the transcript.
Step 6: Consider using transcription software for efficiency.
Step 7: Proofread the transcript for accuracy.
Step 8: Format the transcript for readability with paragraph breaks and indents.
Step 9: Ensure timestamps align correctly with the video.
Step 10: Review the transcript to capture the video's essence.
Step 11: Perform a final check for completeness and correctness.
How to transcribe an audio or video recording?
Transcribing an audio or video recording involves these steps:
Step 1: Listen to the recording to familiarize yourself with the content and speakers.
Step 2: Transcribe a verbatim first draft. Capturing all spoken words and sounds accurately.
Step 3: Edit for precision, clarity, and completeness.
Step 4: Format the transcript for readability with proper paragraph breaks and speaker labels.
Step 5: Finalize the transcription by conducting a thorough check for errors and quality improvement.