Read next: how to take meeting notes in Teams
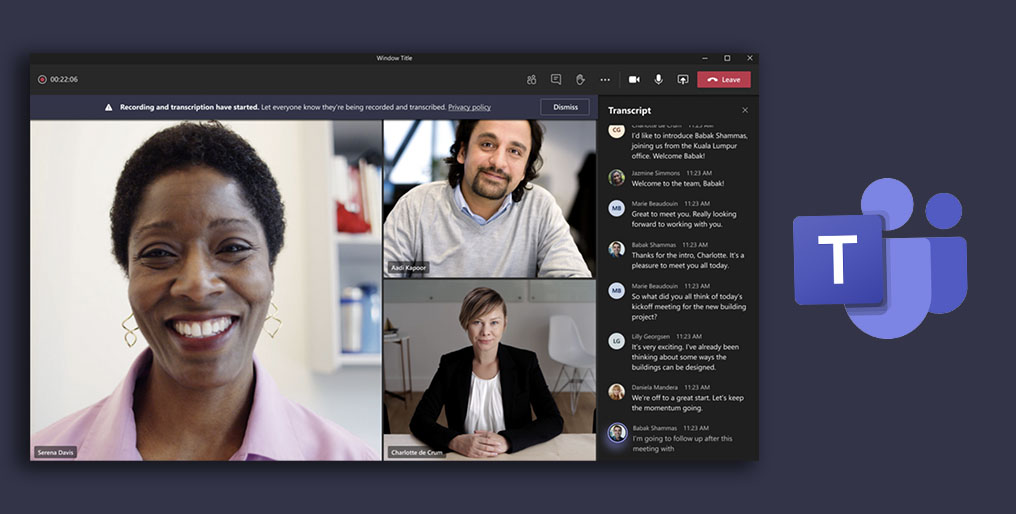
How to Transcribe a Microsoft Teams Meeting and Recording
Unlock the power of AI — Notta's meeting assistant records, transcribes and summarizes meeting minutes with one click.
If you've ever considered transcribing a Microsoft Teams meeting by hand, it can seem like a daunting task. Spending hours reviewing and rewinding your video recording becomes tedious very quickly, and trying to take notes during your meeting is even worse.
A better alternative is having your meetings transcribed in real-time by AI, and Microsoft finally rose to the challenge. Back in 2021, Teams took things to the next level by introducing a live transcription feature built right into the app.
This article will explain effective ways to take live transcription in Microsoft Teams as well as how to transcribe a Teams meeting recording. Let's get into it!
Can Microsoft Teams transcribe meetings?
Yes, Microsoft Teams can transcribe your meetings automatically using its in-app transcription feature. Transcribing a meeting using Teams is simple, but the feature is not available to every Teams user. There are several requirements:
You need to possess any of these approved licenses to transcribe Teams meetings:
Office 365 E1, Office 365 A1, Office 365/Microsoft 365 A3, Office 365/Microsoft 365 A5, Microsoft 365 E3, Microsoft 365 E5, Microsoft 365 F1, Office 365/Microsoft 365 F3, Microsoft 365 Business Basic, Microsoft 365 Business Standard, Microsoft 365 Business Premium SKUs.
You can only use Teams transcription during meetings on the desktop app.
GCC-High and DoD users aren’t qualified to use the feature.
If you're part of an organization, your IT admin needs to enable the feature for you by visiting the Microsoft Teams admin center, going to the Meeting policies, and allowing transcription.
Even if you don't have an eligible Microsoft license, third-party apps like Notta will still transcribe your meetings with ease and precision.
If you are qualified to use the built-in feature, you must enable it in your account settings before you can start using it in your meetings. We'll cover the steps below in the next section.
With Notta, you can easily generate meeting minutes, turning spoken content into written records with 98.86% accuracy.
How to start live transcription on Microsoft Teams
Enable live transcription in Teams
To enable live transcription in Teams, visit your Microsoft Teams admin center on the web.
Click 'Meetings' in the left pane, then click the 'Meeting policies' subcategory. Select your desired policy, then scroll to find the 'Recording and transcription' section.
Click the toggle beside 'Transcription' to enable it, then click 'Save' at the bottom to implement the changes. There may be a delay before the new settings are applied to all members of your organization.
Use live transcription in a Teams meeting
Step 1: While your meeting is in progress, click ‘More’ (‘...’) in the top meeting toolbar.
Step 2: Select the 'Record and transcribe' submenu and click 'Start transcription' to begin the live transcription for your meeting. A popup window will appear to set the spoken language used during the meeting.
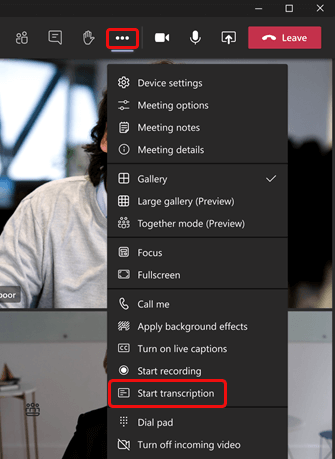
Step 3: To stop the live transcription later, follow the same process and select the 'Stop transcription' option.
Note that if you do not stop the transcription manually, it will stop automatically when no more participants are in the conference.
Change the transcription language
The transcript language must be the same as the language spoken in the meeting. Currently, Microsoft Teams supports 34 transcription languages. The default one is English, but you can change it with a few simple steps:
Step 1: At the top right corner of the live transcription window, select 'Transcript settings'.
Step 2: Hover over Spoken language and select your preferred language from the options displayed.
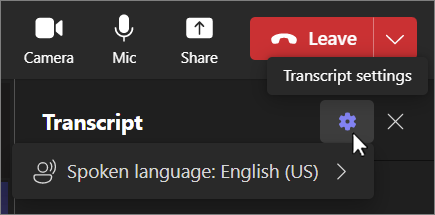
Step 3: Finally, click the Confirm button to save the changes. Any new speech will be processed using the updated language selection.
Download and view the transcripts
Microsoft Teams meeting transcripts are immediately available for download after the meeting from the meeting event entry located in the Calendar section.
Step 1: Select the Calendar option on the left pane.
Step 2: Go to the meeting event you just attended and choose the transcript.
Step 3: Click the Download option above the transcript and choose a file type. The transcript is available in .docx or .vtt.
How to transcribe a Teams meeting with Notta
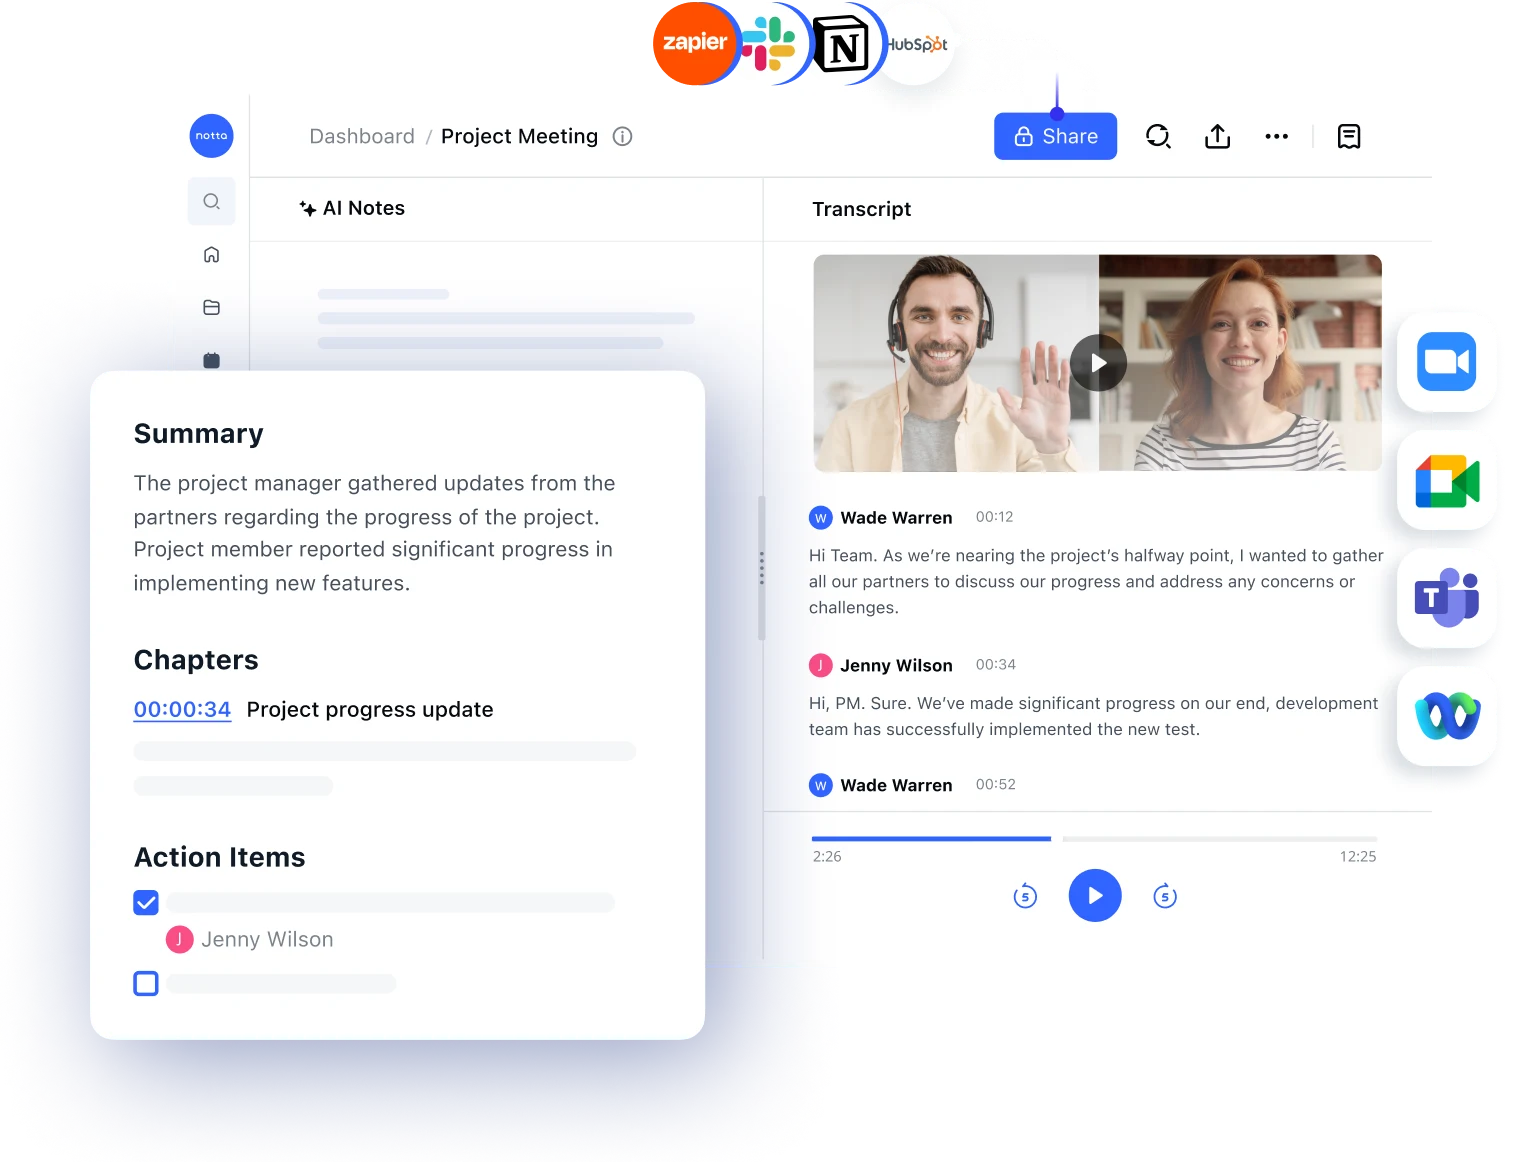
Notta is an AI-powered notetaker for your Teams meetings with up to 98% accuracy and support for 58 languages. It provides real-time transcription with automatic speaker detection, and you can review, edit, and share the transcript with stakeholders, even if they don't have a Notta account.
There are two main ways to transcribe a Teams meeting in Notta:
Join the meeting and transcribe in real-time
Transcribe meeting recordings
Transcribe a live Teams meeting
Follow the steps below to transcribe a live Teams meeting:
Step 1: Sign up for Notta and log in to the dashboard.
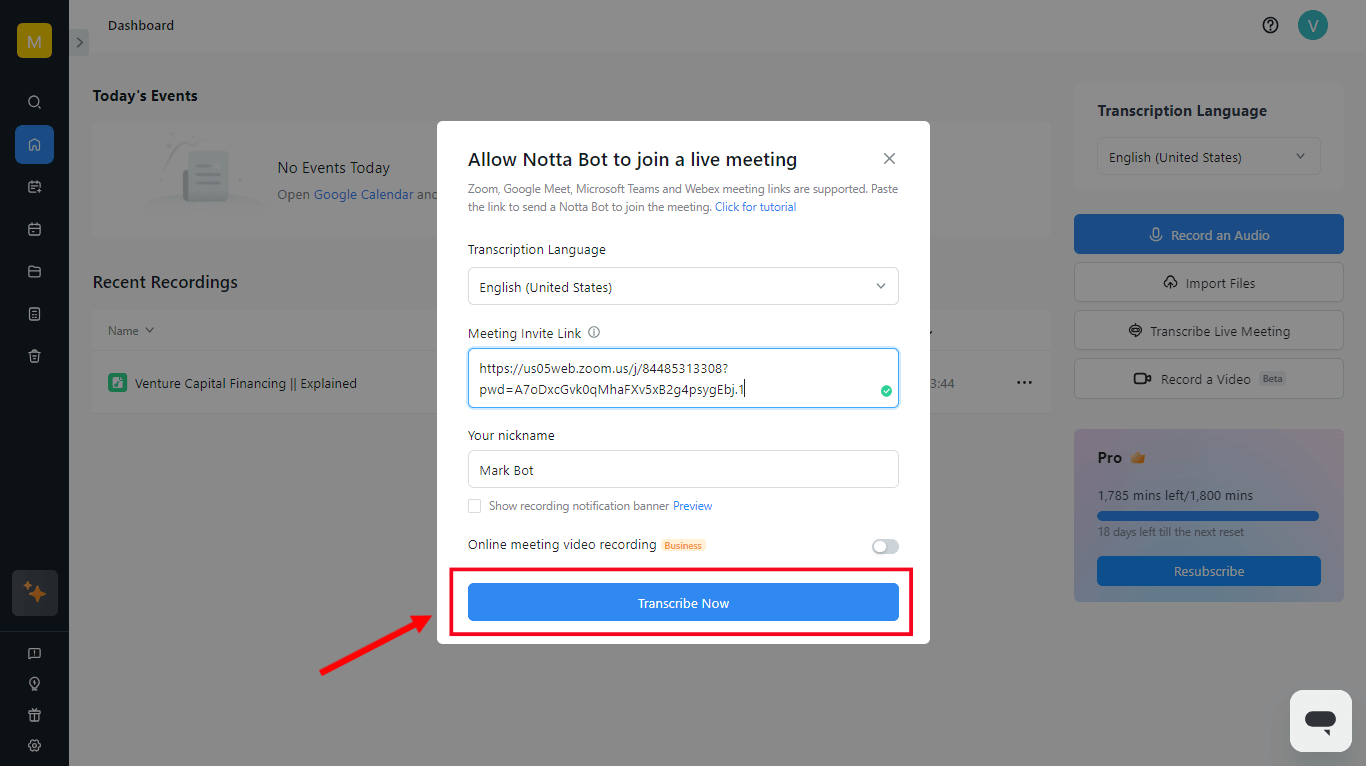
Step 2: Click ‘Record online meeting’ on the right-side toolbar.
Step 3: Select your transcription language, paste the Teams meeting invite link, and click 'Transcribe now'. The Notta Bot will join the meeting and start transcription.
Transcribe a Teams meeting recording
If you have recorded a Teams meeting and want to create a transcript from it, Notta can help by generating a high-accuracy transcript from either imported files or cloud files. Here's how it works:
Step 1: Log in to your Notta Dashboard.
Step 2: On the toolbar to the right, click the ‘Upload & transcribe file' button.
Step 3: Upload your file or directly enter the file link if your recording is stored in Google Drive or Dropbox.
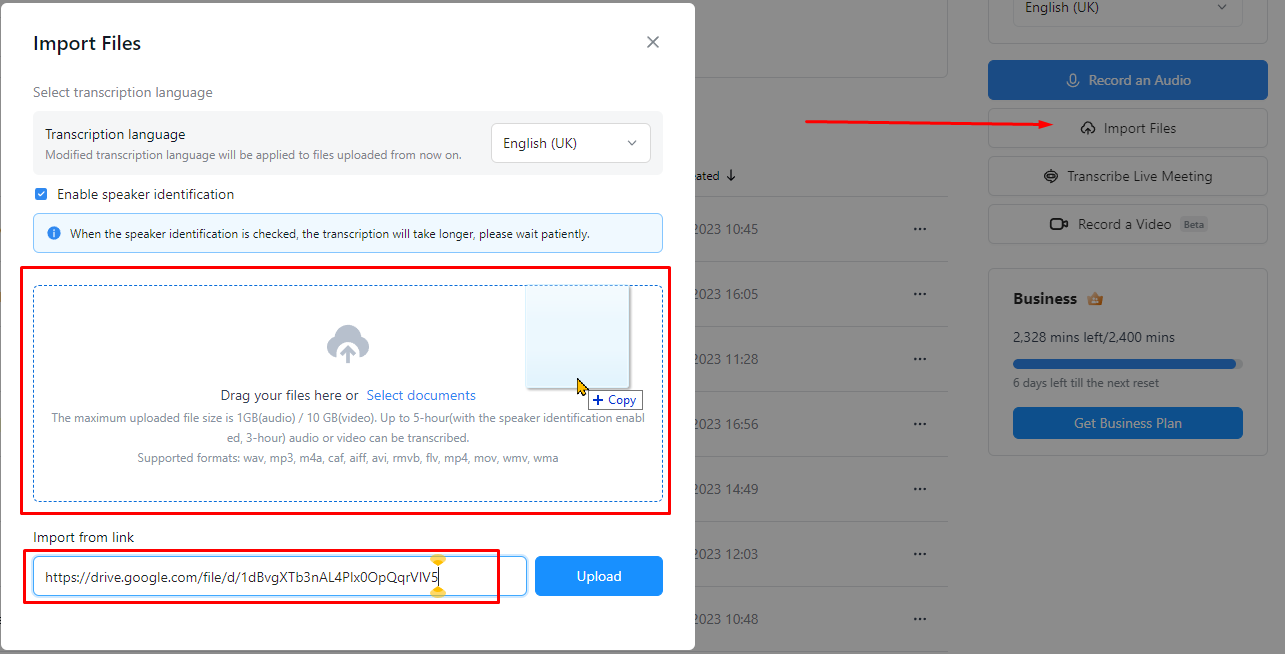
Step 4: Close the upload window after your video is done uploading. Once it’s done transcribing, you can open your transcript and edit it to your liking.
Tip: Transcripts are easily accessible through your Notta dashboard, or you can use the Quick Search feature to locate the correct entry. To download a transcript, click the '...' icon next to your chosen transcript and select 'Download'.
Let our AI do the heavy lifting - record, transcribe, and summarize meetings - so that you can focus on the conversations.
Comparing Notta and Microsoft Teams transcription services
Naturally, you want to know the best way to transcribe Microsoft Teams meetings— using Notta or Microsoft’s built-in transcription service? The answer depends on your needs and budget, but the comparison below will help you make an informed decision.
Price: Teams transcription is only available to users with a Microsoft business account, which starts at $6 USD per user per month. Notta offers a free plan with a generous 120 minutes of transcription per month, and longer transcriptions are available with paid plans starting at $8.17 USD per month.
Accuracy: According to a benchmark report published in 2020, Microsoft Teams has a 78% accuracy rate. While the accuracy depends on several factors, such as input audio quality, accents, and background noise, we found that Notta's transcripts were more accurate (up to 98%).
Transcript export: With Notta, you can export the transcripts in various formats, including TXT, PDF, and DOCX. Microsoft Teams only provides transcripts in DOCX and VTT formats.
Integrations: Both Notta and Microsoft Teams support a large number of app integrations, including Salesforce, Hubspot, and Zapier. Thanks to Microsoft's corporate support, Teams has an advantage here with over 700 integrations with various apps, although most are unrelated to transcription.
Platform support: Notta records and transcribes video meetings from Microsoft Teams, Zoom, Google Meet, and Webex—allowing you to organize all meeting notes together. Microsoft's built-in transcription feature only works within the Teams app.
Devices support: Notta is available as a Web app, Android/iOS mobile app, and Chrome extension, so you can use it anywhere and sync all your data. Teams is also available as a web and mobile app, but the transcription feature is only available during the meeting in the desktop version of the app.
The final verdict
Microsoft Teams and Notta both provide live transcription features at a similar price point, but Notta's advanced features make it the better choice. Teams' built-in transcription feature is fine for creating a simple meeting record but doesn't provide enough features for consistent professional use. Notta's high accuracy, expansive language support, and collaborative editing features are far more helpful for automatically transcribing your crucial meetings in precise detail.
Most importantly, Notta's AI notetaker helps you keep your focus where it belongs: on the people and ideas in your meeting!
FAQs
Where does Microsoft Teams save recordings?
Teams saves the recording in two locations, depending on the type of meeting. If it's a Channel meeting, Teams will save the recording to Sharepoint, but recordings for all other meeting types will be saved to OneDrive.
How accurate is Microsoft Teams transcription?
Microsoft claims its live transcription is highly accurate thanks to cutting-edge technology. While this is true, there is a slight delay in displaying the transcription text after the speaker has spoken.
But it makes up for this with the auto speaker detection, which displays the speaker's name next to the written text. So, in general terms, you can rely on Microsoft Teams transcription, but be sure to compare the text with a recording for crucial details.
Does Teams offer free transcription?
No, Teams does not offer transcription for free. You will need an Enterprise or Business account to record or transcribe a meeting. These accounts come with a monthly fee which is dependent on your company size.
Why is my start transcription greyed out in Teams?
To use the "Start transcription" option on Microsoft Teams, you must either be the account admin or have your organization's IT admin enable the feature for you.
If you are the admin and still experience this issue, make sure you have one of the licenses listed by Microsoft.
If this issue persists despite these licenses, log in to the Microsoft Teams admin center and check if live transcription is allowed. If you just turned on the feature, know there may be a 48-to-72-hour sync period before you can start using it.
Can Teams transcribe a meeting without recording?
Yes, recording and transcription are two separate features in Microsoft Teams; you can record a Teams meeting without generating a transcription, and vice versa.