Can You Transcribe a Teams Meeting without Recording
98% accurate, real-time transcription in just a few clicks. 58 languages and multiple platforms supported.
There are many reasons why transcribing a meeting can be helpful. It keeps everyone on page, ensures that expectations are understood, and it’s a great way to be able to refer back to key points and clear up any confusion.
However, despite the obvious benefits, transcribing every meeting on Microsoft Teams can often require recording an entire meeting. We won’t get into every downside this presents, but it ends up being tedious to record and save each meeting just to get a transcription.
This presents the question; is it possible to transcribe a Teams meeting without recording? Does Microsoft have a feature for live transcription in their meeting platform? We’ll be answering these questions today and giving an in-depth guide on how to transcribe a Teams meeting without recording.
Can you transcribe meetings on Teams without recording?
Yes, it is possible to transcribe meetings on Teams without recording. This is done via Microsoft’s built-in live transcription feature, which can be activated at any time during a call in the meetings control toolbar under ‘More Actions. On top of all the workflow and communication benefits, I’ve also found this feature really useful for taking a meeting in a noisy environment, as the words are displayed on the right side of the screen next to the webcams (this could also be useful for hearing-impaired individuals).
Another option to Microsoft’s built-in function is third-party meeting transcription software, which can be useful if you aren’t currently subscribed to Office 365 and want to transcribe a meeting. We’ll be covering the best third-party software below.
Who can use live transcription on Teams?
Live transcription is only available to those with an Office 365 subscription (See Microsoft’s page for the details). You’ll also only be able to access this tool if you’re using Teams on a desktop, which shouldn’t present too many issues since that’s likely the platform you’ll be conducting meetings on. Learn how to enable transcription in teams.
The free version of Microsoft Teams does allow for live captioning (in English only), which can definitely be helpful for listening to meetings in a noisy area or for those who are hearing-impaired, but it won’t allow you to view or save a transcript afterward.
How to transcribe meetings on Teams without recording
Microsoft makes the live transcription feature extremely easy to access and activate before or during a call, and it can be done in just a few simple steps. For a complete walkthrough, see our guide on how to transcribe teams meetings live.
1. Join the call
Start by joining the call on Teams. You can choose to start transcribing right away or wait until any point in the meeting at which you’d like to begin.
2. Activate the live transcription feature
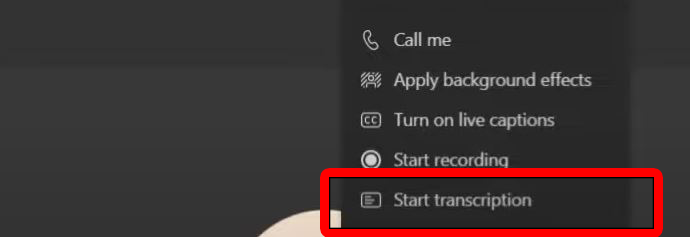
Navigate to the meeting control toolbar at the top of your screen and look for the three dots icon for ‘More Actions. Near the bottom, you’ll see an option called ‘Start Transcription’, which you’ll select when you want to begin transcribing the call.
3. Select transcription language
After you begin transcribing, a window will pop up displaying the conversation in real-time. At the top of this window, select the three dots for ‘Transcript Settings’ and click ‘Change spoken language’. From here you’ll select the language everyone in the call is speaking in. Microsoft Teams allows for 34 different languages for transcription, including English, Chinese, Spanish, and French.
4. Stop live transcription
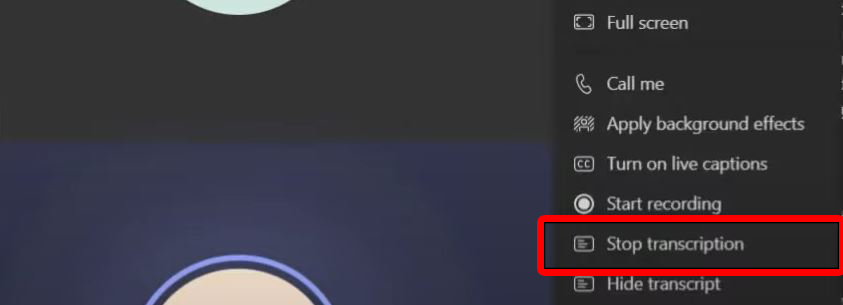
Once your meeting is concluded, or whenever you’d like to stop transcribing, head to the same ‘More Actions’ menu and select ‘Stop transcription’. You can also choose to hide or show the live transcription in this menu by selecting ‘Hide transcript’ or ‘Show transcript’.
Transcription will also stop automatically once everyone leaves the call. Once the meeting is over, you’ll be able to view and download the transcription under the meeting event calendar.
Use Notta's AI transcription tool to quickly and easily transcribe your meetings. We guarantee accuracy and ease of use.
How to view and download your Microsoft Teams transcriptions
All transcripts that are created live on call will be accessible in your Microsoft Teams portal. You’ll need to head over to the calendar where you see meetings and follow a few steps:
1. Select your calendar on the left side of Teams
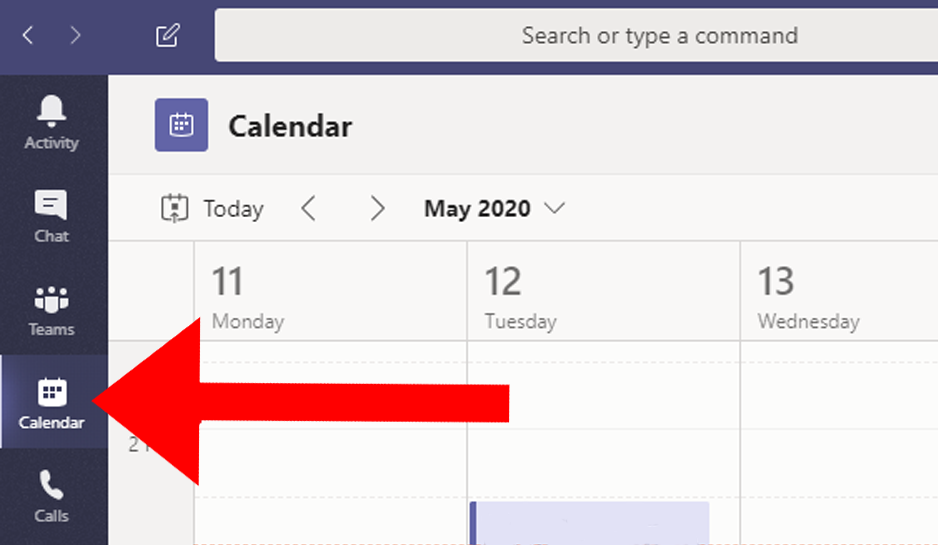
You’ll find all transcriptions in the same calendar where you locate meetings, so to view your transcript, you’ll want to start by opening up the calendar on the left side of the Teams screen.
2. Find the meeting and select the transcript

Find the meeting that you transcribed and select the transcript from the top bar under ‘Recordings & Transcripts’. From here you’ll be able to view, download, and share the recorded text.
3. Download the transcript
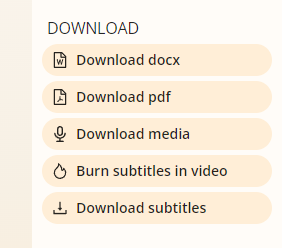
On the selection bar above the transcript, click ‘Download’. You’ll be prompted to choose your desired file type, which can either be DOCX or VTT. Note that you can also view any other meeting-related items in the calendar, such as important meeting notes or attached documents.
Best meeting transcription software: Notta
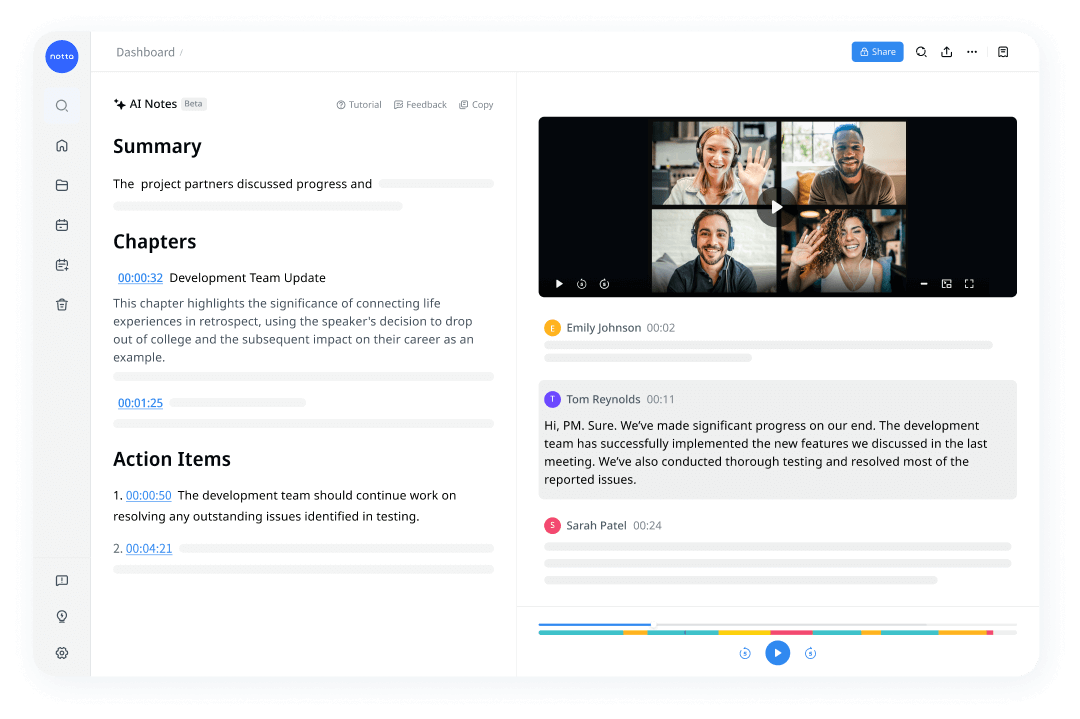
If you aren’t able to access Microsoft’s built-in transcription tool but still want the option for Teams transcription without recording, third-party software will be your best bet.
There are a number of options available for this type of software online, but in my experience the best in both effectiveness and budget is Notta. Notta is an online transcription service that uses an AI assistant to automatically transcribe meetings for editing, downloading, and sharing. Notta also offers free monthly minutes and multiple different plans that can be beneficial for businesses.
Although it’s not as conveniently built-in to the Teams portal as Microsoft’s transcription option, the wide variety of editing and note-making features that come with Notta will make it worth the extra steps.
Notta offers the most integrated AI meeting notes, summaries, and action items so nothing gets missed.
How to transcribe a Microsoft Teams meeting with Notta?
Transcribing Teams meetings with Notta does not require recording the meeting, the same as the Microsoft feature, but there will be a few additional steps to set it up properly.
1. Create a Notta account and join the meeting
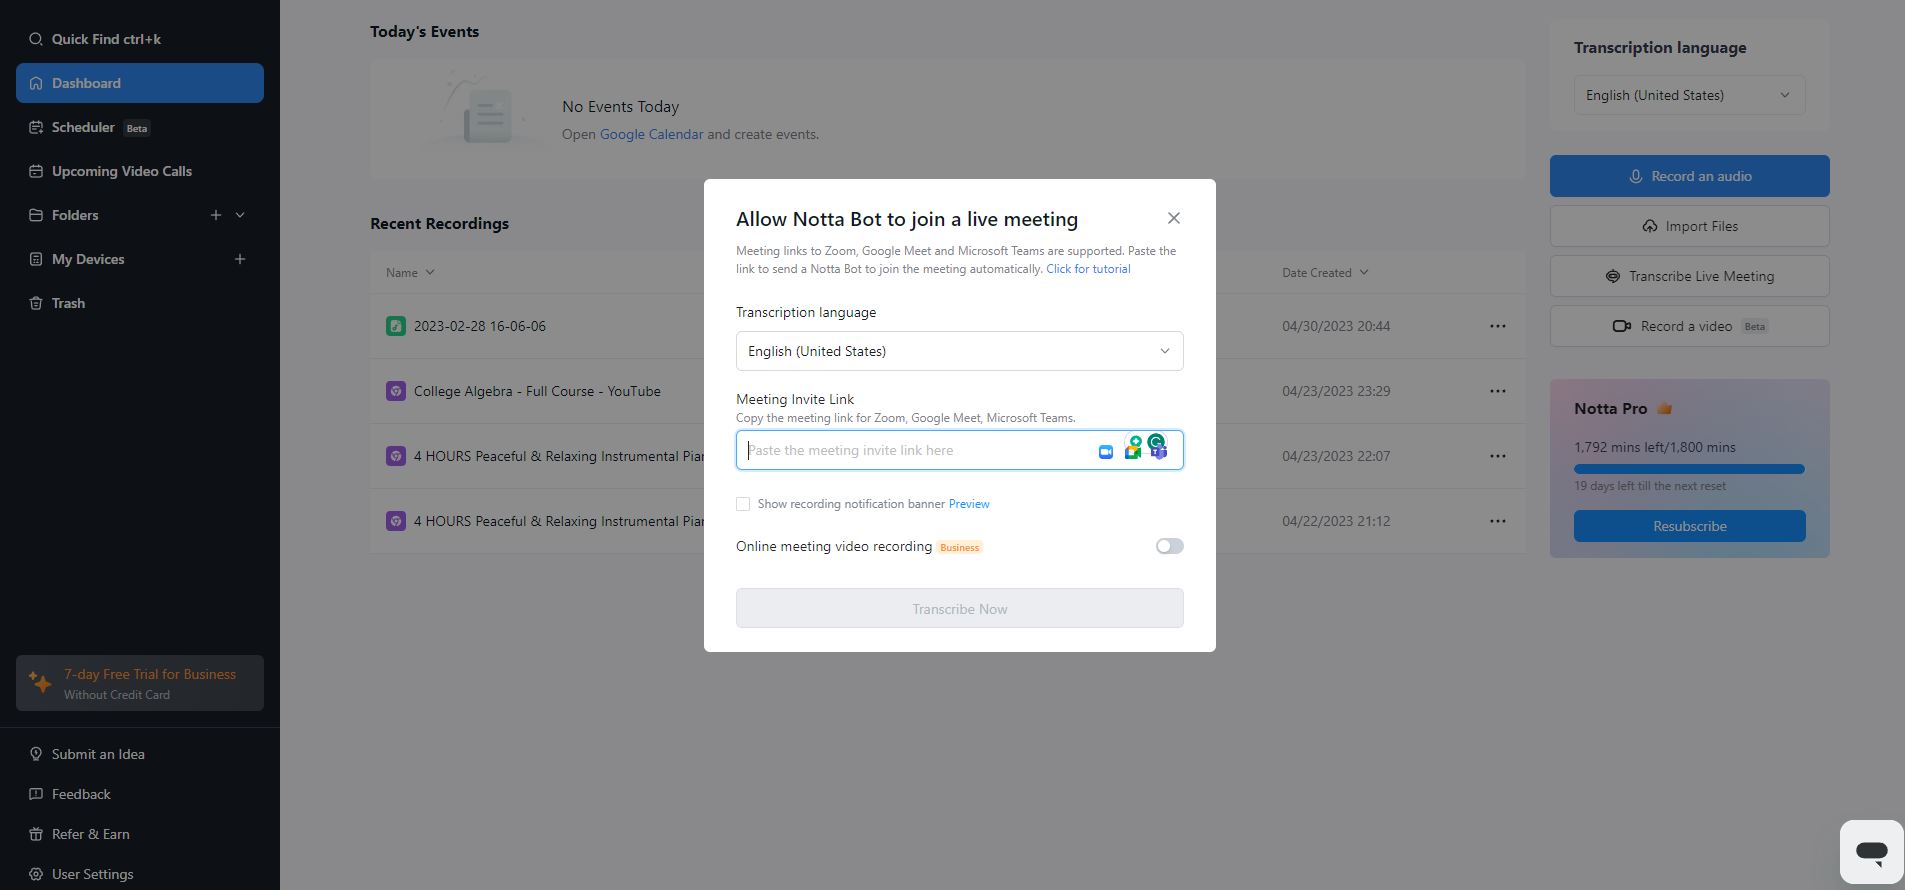
Create a free Notta account and log in to the website. From the dashboard, select ‘Transcribe Live Meeting’ and paste your invitation link for the Microsoft Teams call. Click ‘Transcribe Now’ and Notta Bot will join the meeting. Make sure that the creator of the call allows Notta Bot access, and that your transcription language in Notta is set to the language of the call.
2. Transcribe your Teams meeting
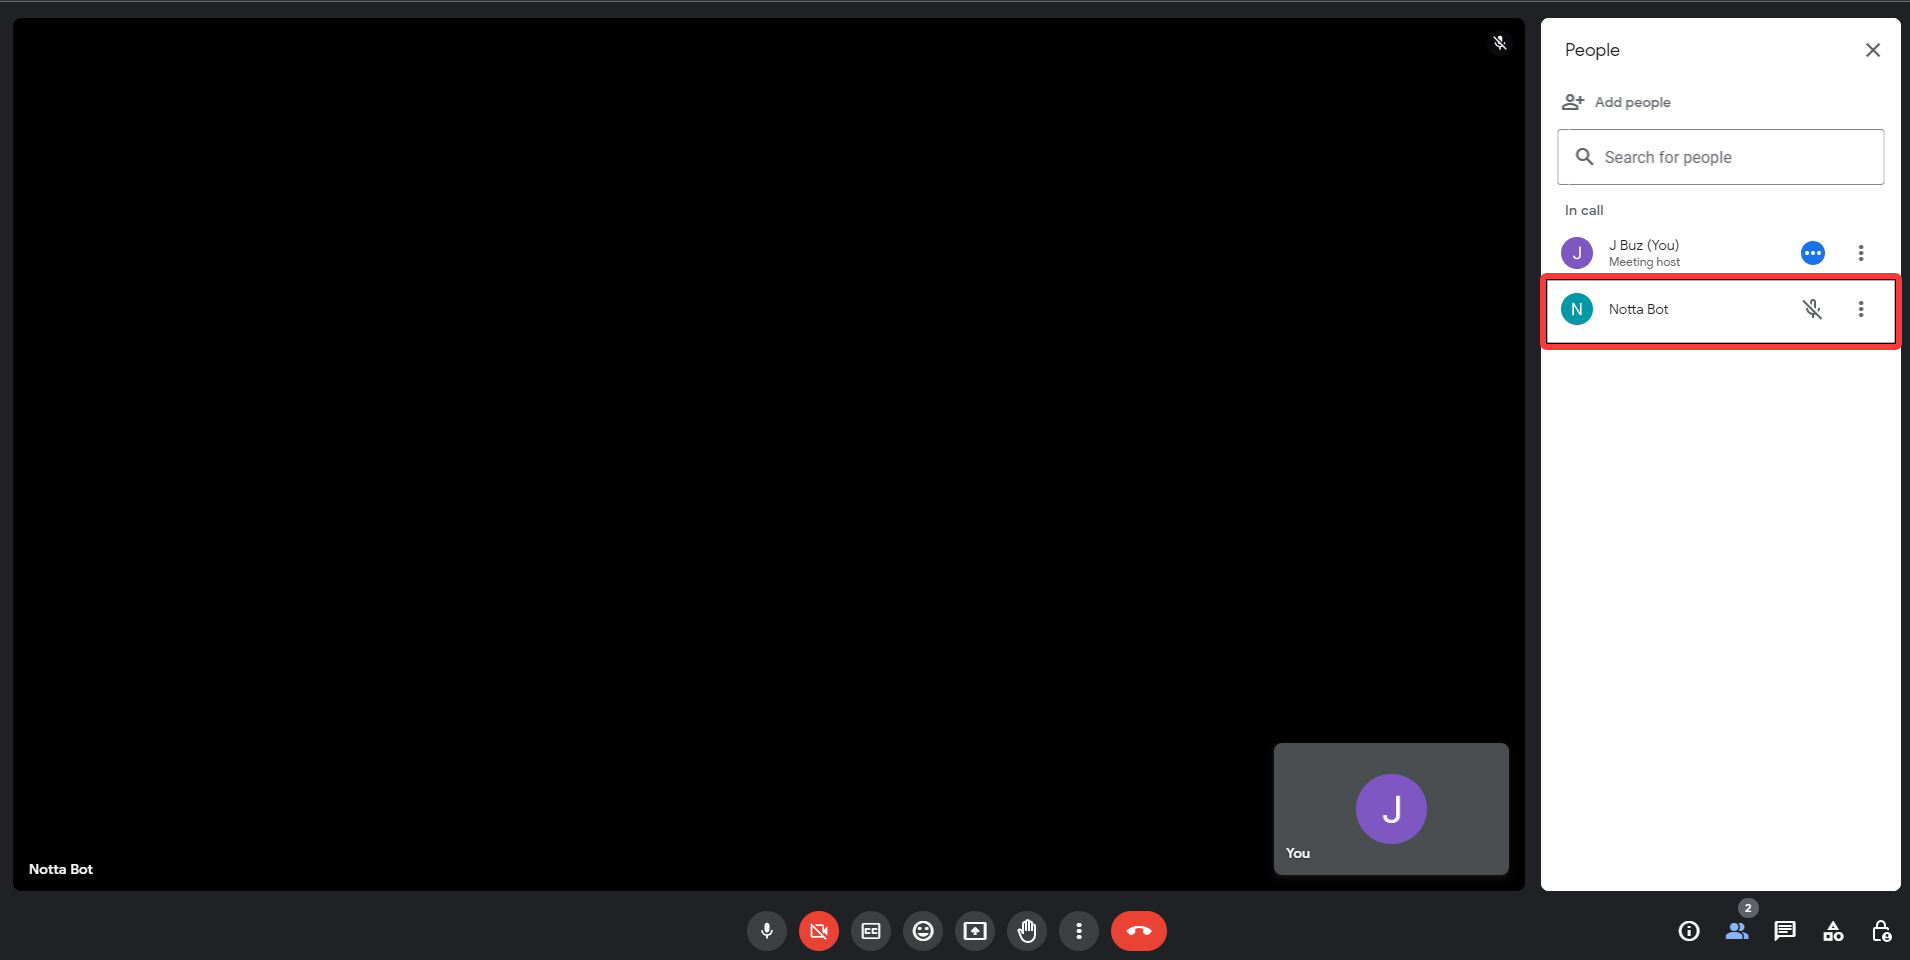
Notta will automatically begin transcribing the meeting in real time once joined. Unlike the Microsoft live transcription feature, you won’t be able to see Notta’s transcription on screen, but after the meeting, you’ll be able to find the transcription in the Notta dashboard.
3. Locate your transcription in the Notta Dashboard
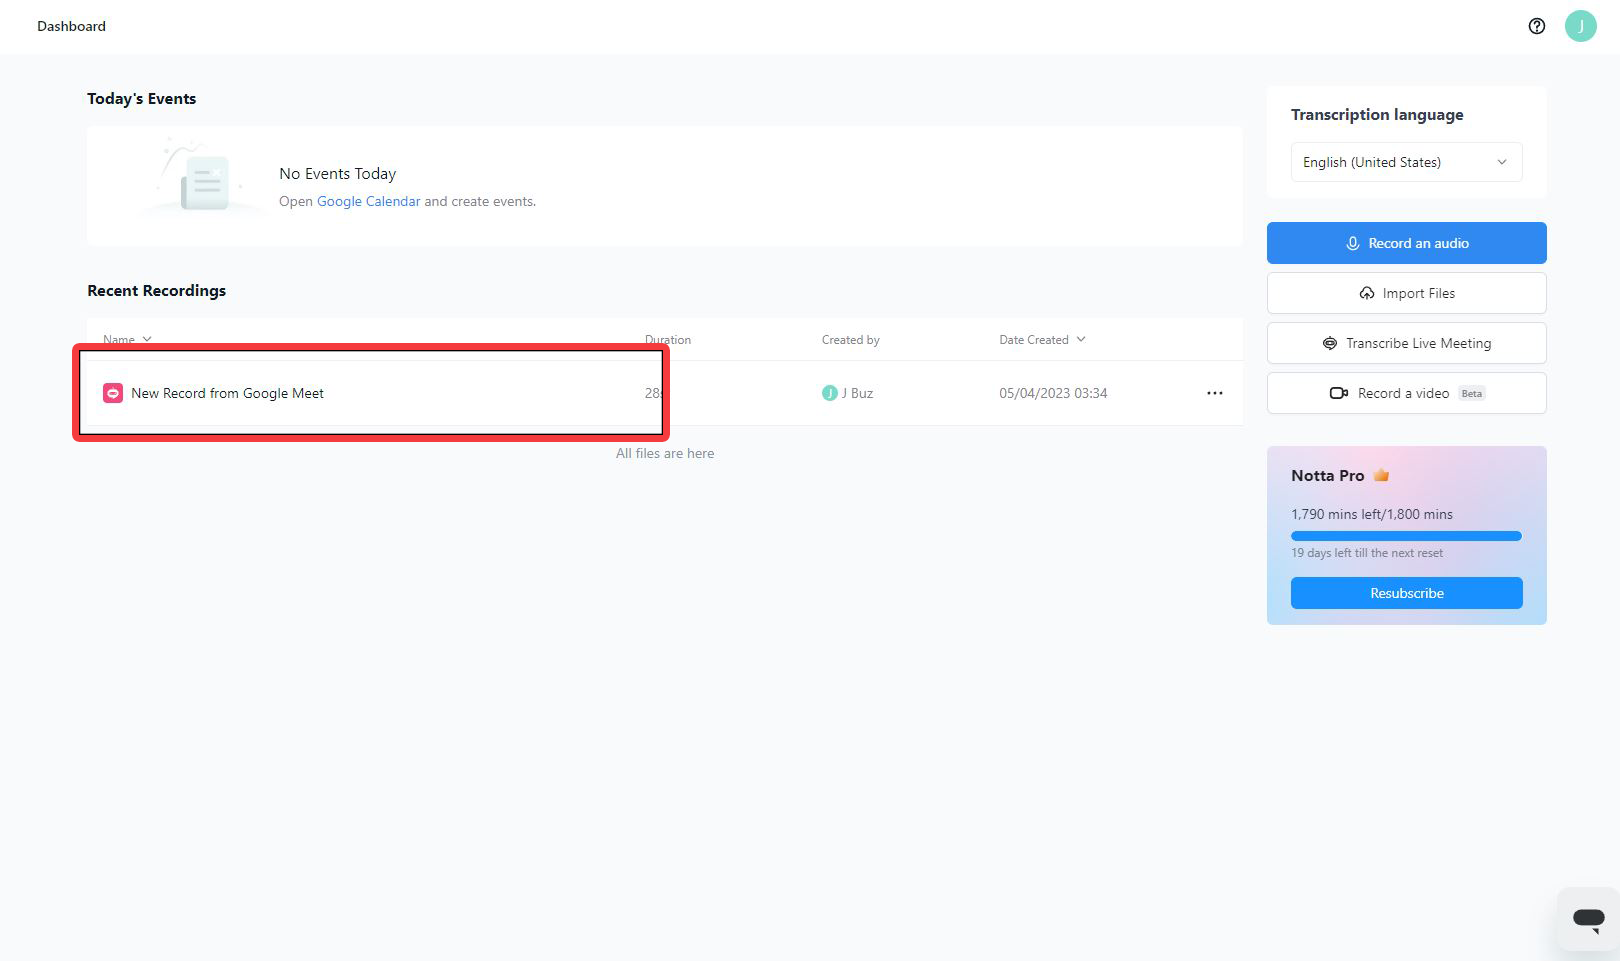
Once the meeting ends, navigate to the Notta dashboard and locate the transcription. Click on the transcription to open and add any notes, edits, or images, or highlight any important points made during the call.
4. Edit, export, and share your transcription

Once your transcription is finalized and ready to download, click the ‘Export’ button to download the text. Notta can export to multiple file types including TXT, DOCX, SRT, or PDF, which I find pretty convenient for keeping records or transferring transcriptions to meeting minute logs or company files.
Although it does require a few extra steps, Notta is a great tool to opt for if you aren’t able to use the live transcription provided by Microsoft. And although it might take some extra setting-up, Notta’s features and toolbar will allow you to highlight key moments and get the most out of the transcription.
Fed up with slow documentation? With Notta, you can record and access error-free transcripts seamlessly synced across all your devices.
FAQs
Who can start, stop, view, and download your Teams transcripts?
Microsoft Teams only allows the meeting organizer to start and stop live transcription, as well as any users accessing the meeting from the same tenant (which Microsoft defines as all people who share common access to Teams, usually set up by the IT admin). All meeting members will be able to view the transcription in real time, but only the organizer and people from the same tenant will be able to download the transcription after the meeting ends.
Is live captioning the same as live transcription?
Live captioning is slightly different than live transcription, in that live captioning does not create a record of the conversation, but rather captions what is spoken in real-time. Live captioning can be useful for hearing-impaired team members or those accessing the meeting from a noisy spot, but the only way you’ll be able to have a record of the meeting afterward is through live transcription.
What is the best third-party app for live transcription?
There are numerous third-party options online for transcribing a meeting without recording it, and some of the best options include Notta, Otter, and Fireflies. These software all have their own individual pros and cons, but no matter the software a third-party app will be able to help you transcribe meetings without recording. These apps can be especially handy if you aren’t able to access the live transcription tool within Teams.
Why should you transcribe meetings?
There are a number of benefits to transcribing meetings, including the summarization of key information and having a source to refer to in order to clarify team goals and notes. Transcripts can serve as official records of decisions, actions, and discussions, which can help keep everyone on board and clear up any confusion. They also allow colleagues who weren’t able to attend the meeting to stay informed and catch up on what was discussed.
Prefer working with recordings? Learn to transcribe teams recordings instead.
Can you use live transcription on Teams for free?
Live transcription on Microsoft Teams is a feature only available to those with an Office 365 subscription. Live captioning is available for those using the free version of Teams, but only in English.
Conclusion
Transcribing meetings can be helpful for many reasons, such as clarifying information and providing a reference for the future. However, transcribing every meeting on Microsoft Teams oftentimes involves recording the meeting, which can be tedious. However, you can use Microsoft's built-in live transcription feature, which can be activated at any time during a call for those with Office 365.
Alternatively, third-party transcription software is available for those not subscribed to Office 365, such as Notta and Otter, and this allows those without a subscription to still be able to transcribe Teams meetings in real time.