How to Transcribe Video to Text on Mac
98% accurate, real-time transcription in just a few clicks. 58 languages and multiple platforms supported.
Have you ever wondered how people type up full transcripts of videos that are dozens of pages long? It seems like a very daunting task.
Luckily, you can transcribe a video in just a few minutes without typing. In this article, we’ll show you how.
We’ll show you exactly how to transcribe video to text on Mac. Whether your video is a couple of minutes long or even a couple of hours long, explore our methods below.
How to transcribe video to text on Mac with Notta
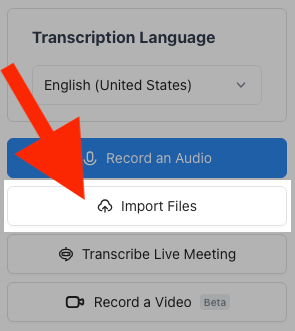
Step 1: Log in to your Notta Dashboard and click on ‘Import Files’ to the right.
Step 2: Choose your transcription language and check the box to enable speaker identification if there are multiple speakers.
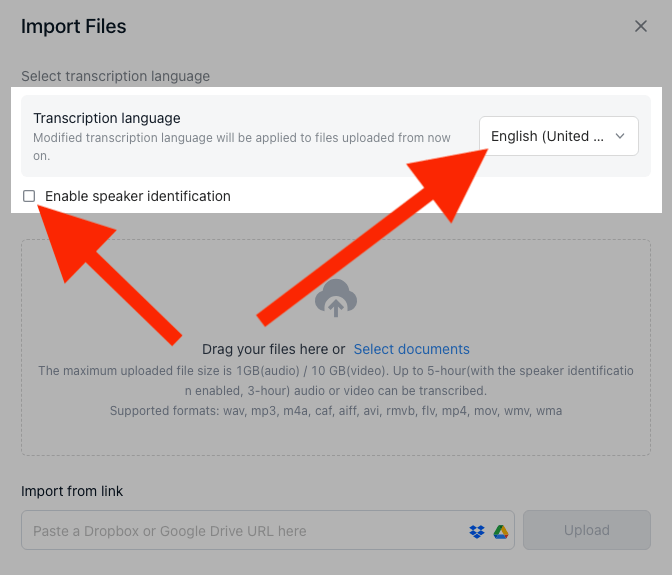
Step 3: Drag your file into Notta or click on ‘Select Documents.’ You can also paste a link from YouTube, Dropbox, or Google Drive.
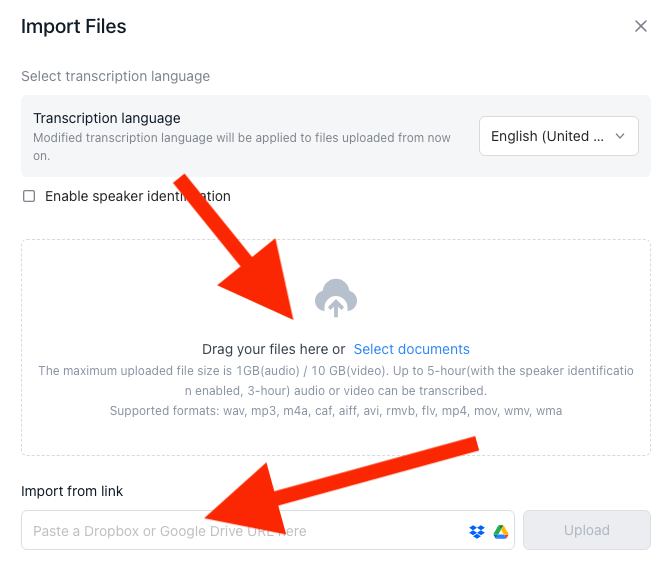
Step 4: Wait for Notta to finish uploading the video.
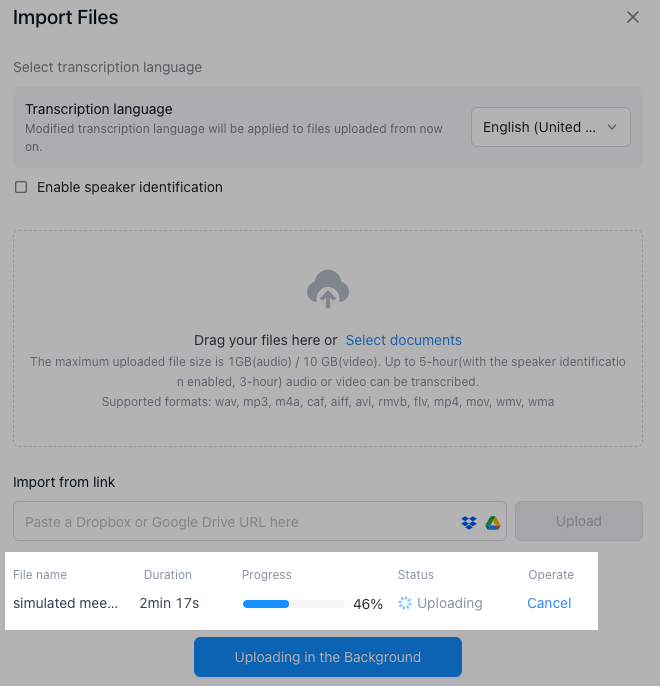
Step 5: Get your transcription. Click on your transcript from your dashboard to view it.
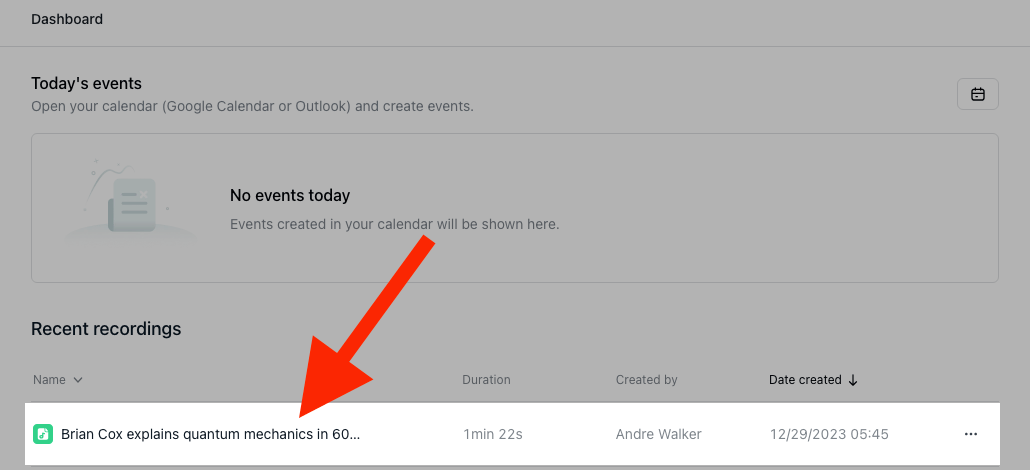
Notta can convert your spoken interviews and conversations into text with 98.86% accuracy in minutes. Focus on conversations, not manual note-taking.
How to transcribe video to text with Mac’s built-in software
For this method, you’ll need an additional device, such as a smartphone, to play the video you want to transcribe. You can use the built-in microphone on your Mac to transcribe the video from your phone. You will play the video on your phone, and you will use the microphone on your Mac to transcribe it.
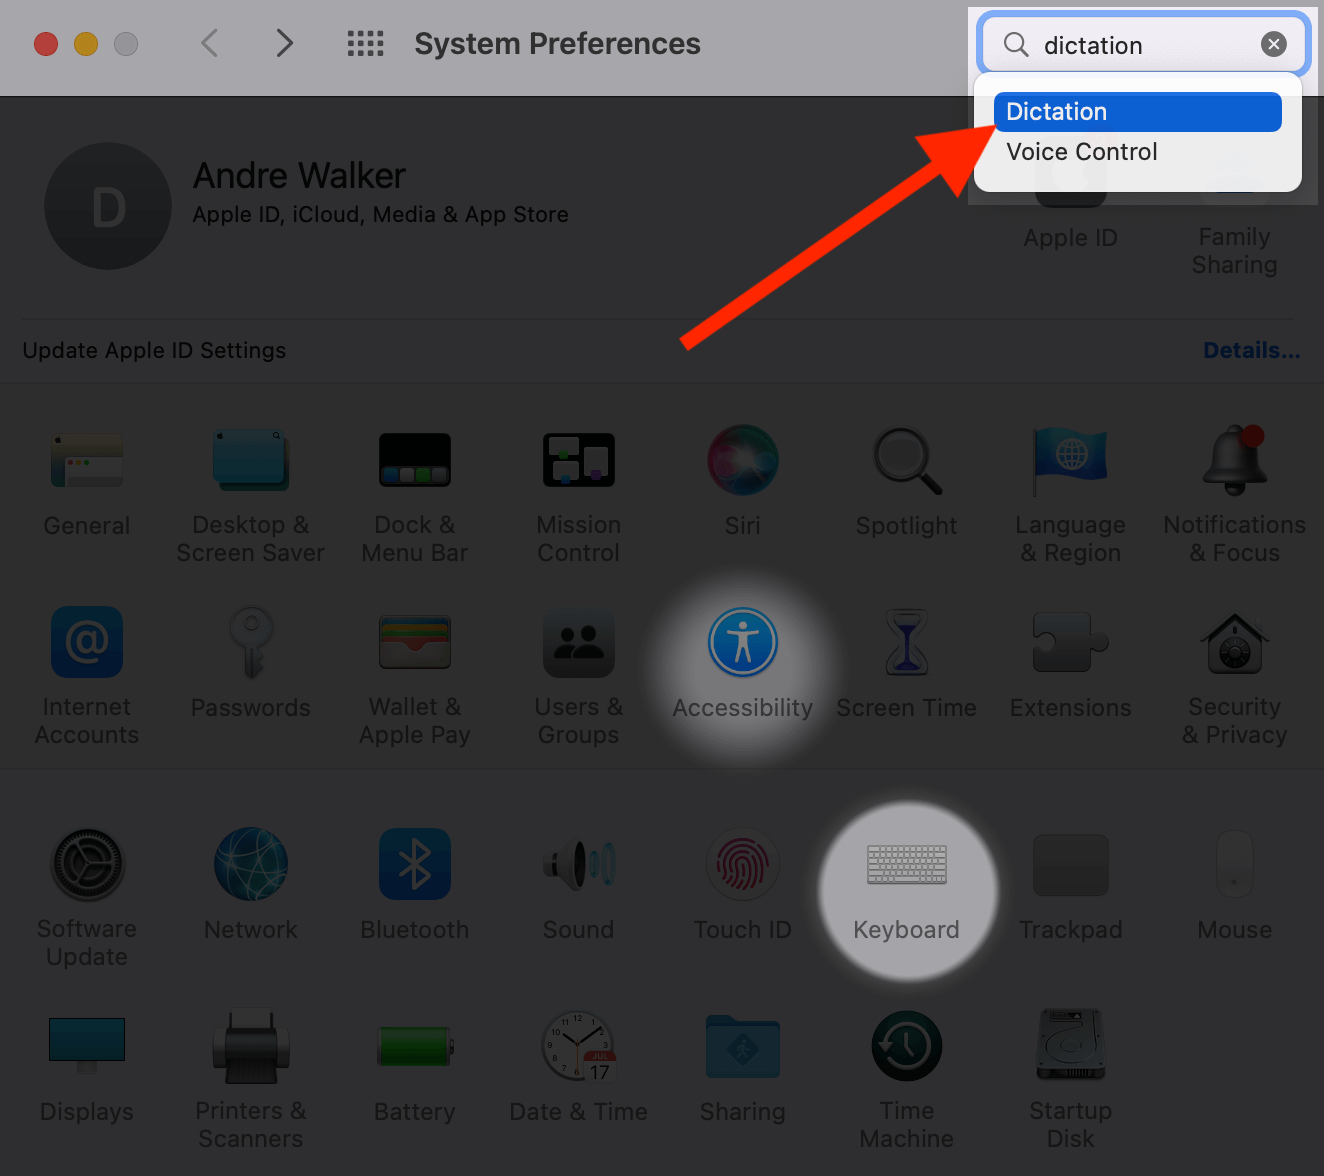
Step 1: Open your System Preferences on Your Mac. In the search bar, type “dictation.” Then click on ‘Dictation.’
Step 2: Tick ‘On’ to start dictation. The shortcut to use the dictation is set to the CTRL key by default. You can change it if you’d like.
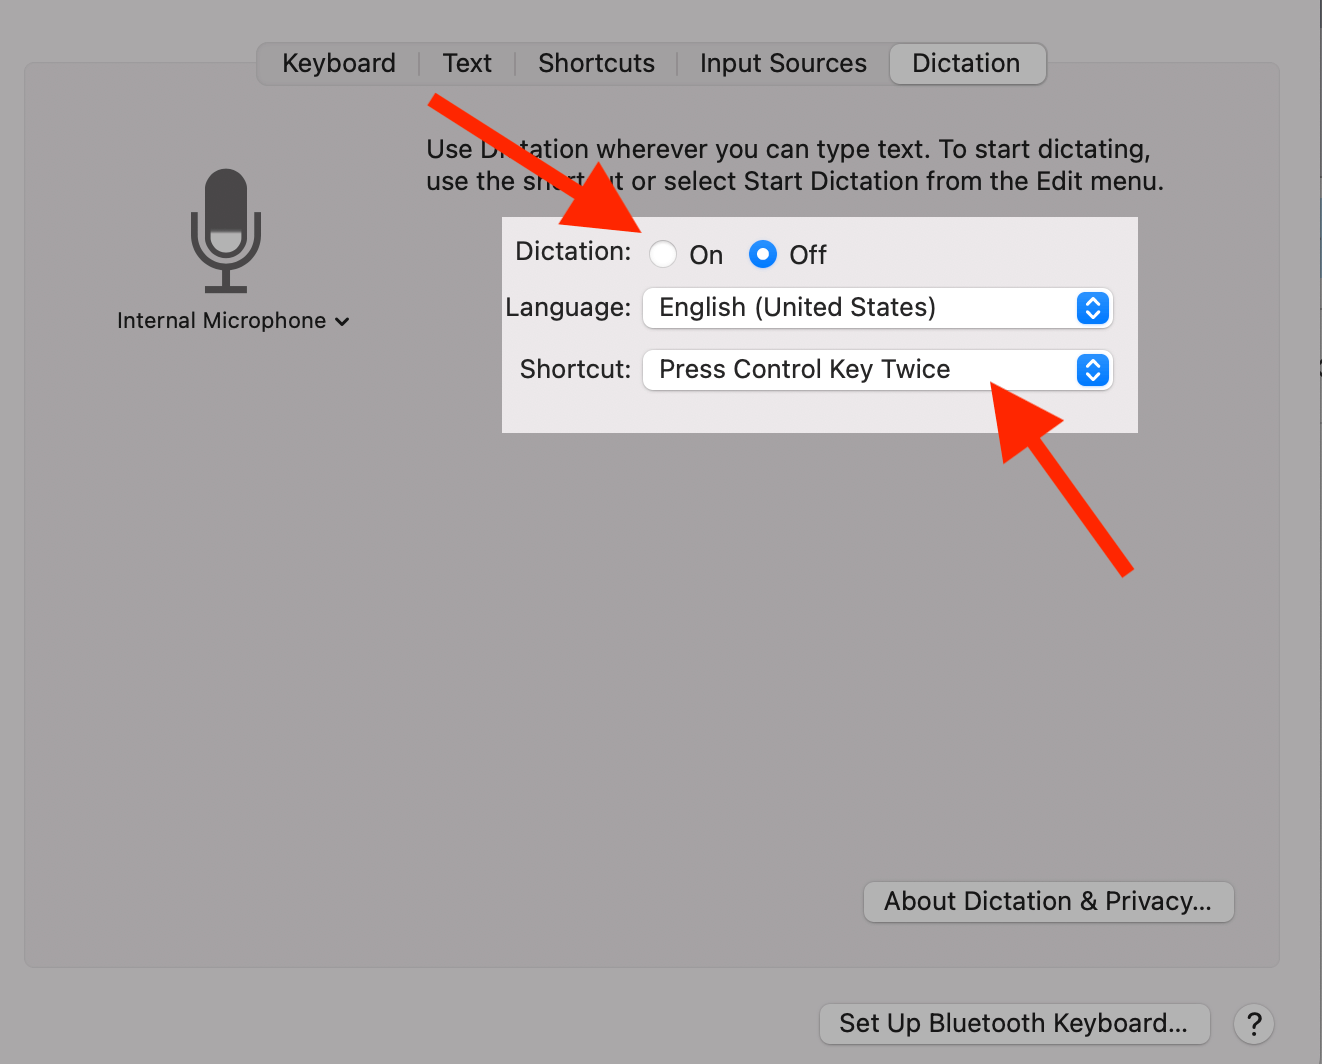
Step 3: Click ‘Enable Dictation’ to turn it on.

Step 4: Pull up the video that you want to transcribe on your phone.
Before you start to play it, open a new note in the Notepad app on your Mac.
Press the CTRL button twice on your Mac to start dictation on your microphone.
You will then see a microphone pop up on the side of the text field. This indicates that the microphone is listening.
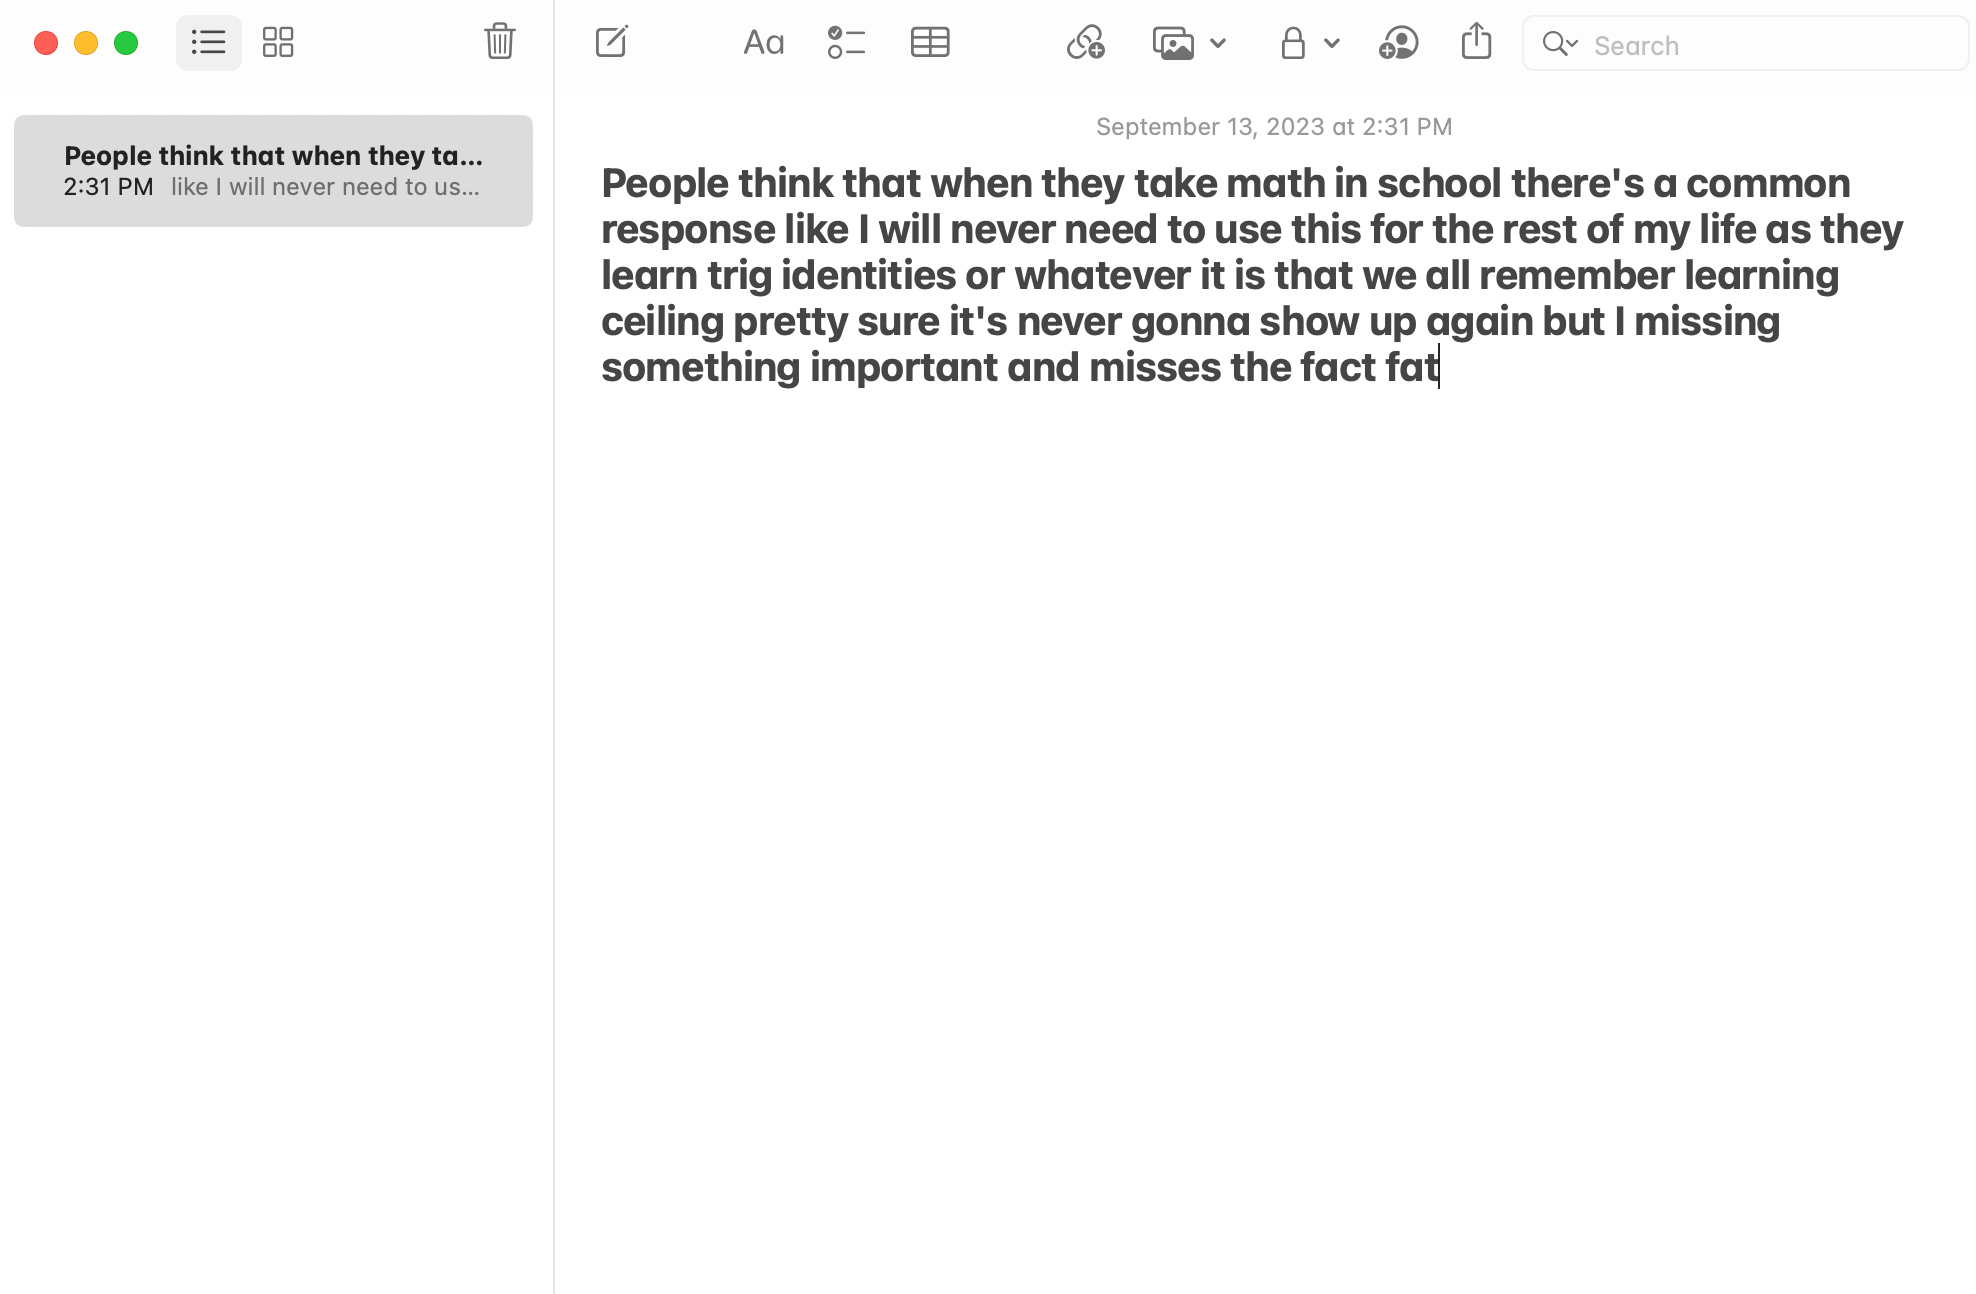
Press play on the video and watch as dictation transcribes the video.
Key takeaways
Now that you’ve explored how to transcribe a video to text on Mac, we’re sure you’ve decided which works best. While Apple dictation can be a decent option if that’s all you have, it’s not very accurate.
Also, it does not have the ability to playback audio or give you an AI summary of the text from the video. When you need more advanced tools and accurate transcription, use Notta.
Notta is a video-to-text converter that will transcribe your video in no time. Sign up for a free account today.
Fed up with slow documentation? With Notta, you can record and access error-free transcripts seamlessly synced across all your devices.
FAQs
Does Mac have a transcribe feature?
MacOS does not come with a built-in transcribe feature. However, there are ways to use the tools that Mac does have to transcribe audio. You can enable dictation on your Mac in System Preferences and then use a smartphone to play the audio. When you hold your phone up to the microphone on the Mac, it will transcribe what it hears.
How do I capture video files on a Mac?
Capturing audio from video files on Mac is very simple with QuickTime. You can use your built-in microphone to record, then play the sound from the video on your speakers :
Step 1: Open the QuickTime app.
Step 2: Click File > New Audio Recording or press Shift + Command + N.
Step 3: QuickTime may ask you to create a new folder for your audio recordings. Give it a name, then press Enter. A window will pop up with a record button. Click the ‘Record’ button on QuickTime.
Step 4: Play the video you want to record. When you are done recording, press ‘Stop’.
Step 5: Click File > Export As > Audio Only to save your audio.
How do I turn speech into text?
Turning speech into text is incredibly simple with Notta:
Step 1: Log into your Notta dashboard and click ‘Record an Audio’.
Step 2: You may get a notification asking for permission to use your computer’s microphone. Click ‘Allow’. Start speaking into your computer’s microphone. Make sure you are close enough to your microphone to hear what you are saying.
Step 3: Watch as Notta transcribes your speech to text. When you are done, click ‘Stop’.
How do I transcribe audio to text using dictation on Mac?
You can transcribe audio to text using your Mac’s internal microphone and another device, such as a smartphone.
Step 1: Open ‘System Preferences’ on your Mac.
Step 2: Search for “dictation”. It will start to suggest the ‘Dictation’ option to you. Click on it.Step 3: Tick ‘On’ to allow dictation. Then click ‘Enable Dictation’. You can also set a shortcut key that you will press to start dictating.
Step 4: Open the ‘Notepad’ app and create a new note. Press your shortcut key twice, and a microphone appears on the screen, indicating that dictation is happening.
Step 5: Play the audio from your smartphone and hold it up to your computer’s microphone. Press your shortcut key twice to stop dictating.
How do I use live captions on Mac?
Live captions are only available on Macs made in 2021 or later. As of this writing, some languages and countries do not yet support it. If you have an eligible Mac, you can enable live captions on Mac in System Preferences:
Step 1: Open ‘System Preferences’ and click ‘Accessibility’.
Step 2: Scroll down to ‘Live Captions’ and click on it.
Step 3: Tick ‘On’ to turn live captions on. Your Mac will display the words to any audio that you play whenever live captions are available.
When live captions are available, a box will appear with a microphone in the top left. A waveform will move when your computer detects audio.
You can scroll up or down in the box to view the most recent captions. If your Mac is having trouble identifying a word, it will underline it. You can press play, pause to start, or stop live captions at any time.